HP IQ527 Getting Started - Page 16
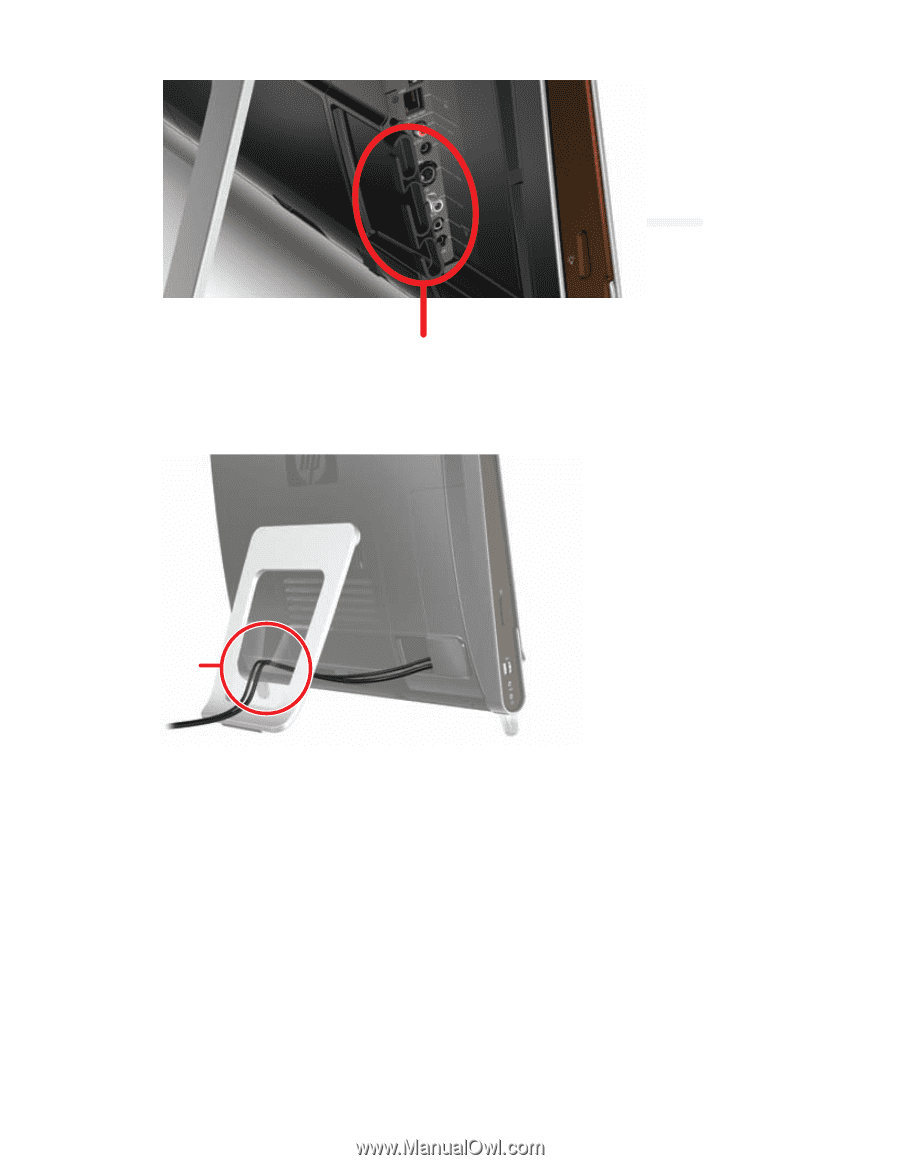
the computer stand., computer, and then pressing it until it snaps into place. Then - features
 |
UPC - 884420938101
View all HP IQ527 manuals
Add to My Manuals
Save this manual to your list of manuals |
Page 16 highlights
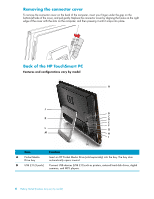
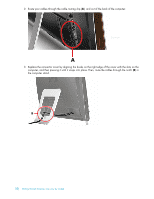
2 Route your cables through the cable routing clip (A), and out of the back of the computer. A 3 Replace the connector cover by aligning the hooks on the right edge of the cover with the slots on the computer, and then pressing it until it snaps into place. Then, route the cables through the notch (B) in the computer stand. B 10 Getting Started (Features may vary by model)
-
 1
1 -
2
-
3
-
4
-
5
-
6
-
7
-
8
-
9
-
10
-
 11
11 -
 12
12 -
 13
13 -
 14
14 -
 15
15 -
 16
16 -
 17
17 -
 18
18 -
 19
19 -
 20
20 -
 21
21 -
22
-
23
-
24
-
25
-
26
-
27
-
28
-
29
-
30
-
31
-
32
-
33
-
34
-
35
-
36
-
37
-
38
-
39
-
40
-
41
-
42
-
43
-
44
-
45
-
46
-
47
-
48
-
49
-
50
-
51
-
52
-
53
-
54
-
55
-
56
-
57
-
58
-
59
-
60
-
61
-
62
-
63
-
64
-
65
-
66
 |
 |
10
Getting Started (Features may vary by model)
2
Route your cables through the cable routing clip (
A
), and out of the back of the computer.
3
Replace the connector cover by aligning the hooks on the right edge of the cover with the slots on the
computer, and then pressing it until it snaps into place. Then, route the cables through the notch (
B
) in
the computer stand.
A
B