HP Indigo 30000 Standard Operating Procedure for Indigo 30000 Digital PressUse - Page 6
Preliminary operating procedure
 |
View all HP Indigo 30000 manuals
Add to My Manuals
Save this manual to your list of manuals |
Page 6 highlights
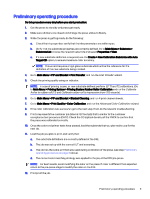
Preliminary operating procedure Do this procedure every day before you start production: 1. Get the press to standby and press get ready. 2. Make sure all doors are closed and change the press status to Ready. 3. While the press is getting ready, do the following: a. Check the ink properties: verify that the inks parameters are within spec. b. Verify that the substrate properties are correctly defined. Go to Main Menu > Substrate > Substrate List, choose the relevant substrate and select Properties > View. c. If a new substrate definition is required, use the Create > New Calibration Substrate with Auto Target OD option, to ensure maximum color accuracy. NOTE: This wizard requires a high-gloss substrate which will be the reference for the definition of the new substrate being created. 4. Go to Main Menu > PIP and Blanket > First Transfer, and run the First Transfer wizard. 5. Check the priming quality using an indicator. NOTE: In case of priming issues, or new substrate defined, perform ILP T1 and T2 calibrations. (Go to Main Menu > Priming System > Priming System Rubber Roller Calibration and run the Calibrate Anilox to rubber roll (T1) and Calibrate rubber roll to impression drum (T2) wizards). 6. Go to Main Menu > PIP and Blanket > Blanket Cleaning, and run 4 print cleaner sheets. 7. Go to Main Menu > Print Quality > Color Calibration, and run the Advanced Color Calibration wizard. 8. If the color calibration was succesfull, go to the next step. If not, do the relevant troubleshooting. 9. Print a representative customer job (internal QC test job) that is similar to the customer acceptance test procedure (CATP). Check the OD (optical density) of the YMCK to confirm that the press was calibrated correctly. 10. Once the color and primer tests have passed, load the substrate that you planned to use for the next job. 11. Load the job you plan to print, and verify that: a. The substrate definitions are correctly defined at the DFE. b. The job was set up with the correct LUT and screening. c. The job has the same LUT that was used during calibration of the press (see step Preliminary operating procedure on page 3 above). d. The correct color matching strategy was applied to the job, at the DFE/pre-press. NOTE: For best results, avoid modifying the color on the press. If color is different than expected return to the pre-press stage to modify the color on the DFE. 12. Print proof the job. Preliminary operating procedure 3
-
 1
1 -
 2
2 -
 3
3 -
 4
4 -
 5
5 -
 6
6 -
 7
7 -
 8
8
 |
 |
