HP Integrity BL890c Installation Guide, Windows Server 2008 SP2 v7.0 - Page 48
Con after the Initial Boot, Reinstall Finished, Abcdef12
 |
View all HP Integrity BL890c manuals
Add to My Manuals
Save this manual to your list of manuals |
Page 48 highlights
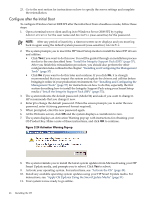
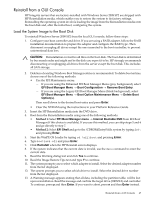
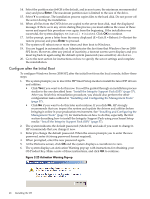
14. Select the partition size (64 GB is the default, and in most cases, the minimum recommended size) and press Enter. The maximum partition size is limited to the size of the drive. 15. Select Y to continue. The installation process copies files to the hard disk. Do not power off the server during the installation. 16. When all files from the DVD drive are copied to the server boot disk, read the displayed message. If there were any errors during this process you must address the cause of those errors and repeat this procedure over again from the beginning. If the installation was successful, the system displays: Reinstall Finished. Click OK to continue. 17. At the prompt, press a letter from the menu displayed (E = Exit; R = Reboot; S = Restart the restore process) and press Enter to proceed. 18. The system will reboot one or more times and then boot to Windows. 19. You are logged in automatically as Administrator the first time that Windows Server 2008 SP2 boots. However, after any period of inactivity, a timeout screen saver displays and you must log back in again using the default system password (case-sensitive): Abcdef12. 20. Go to the next section for instructions on how to specify the server settings and complete the reinstallation. Configure after the Initial Boot To configure Windows Server 2008 SP2 after the initial boot from the local console, follow these steps: 1. The system prompts you to insert the HP Smart Setup media to install the latest HP drivers and utilities. • Click Yes if you want to do this now. You will be guided through an installation process similar to the one described here: "Install the Integrity Support Pack (ISP)" (page 57). After you finish this reinstallation procedure, you should also perform the other configuration tasks outlined in "Installing and Configuring the Management Tools" (page 57) . • Click No if you want to do this later and continue. If you click No, HP strongly recommends that you inspect the system and update the drivers and utilities before bringing it online in your production environment. See "Installing and Configuring the Management Tools" (page 57) for instructions on how to do this, especially the first section describing how to install the Integrity Support Pack using your Smart Setup media: "Install the Integrity Support Pack (ISP)" (page 57). 2. The system indicates the default password (Abcdef12) and asks if you want to change it. HP recommends that you change it now. 3. Enter y to change the default password. When the screen prompts you to enter the new password, enter it (strong password format required). 4. When prompted, enter the new password again. 5. At the Welcome screen, click OK and the system displays a countdown to zero. 6. The system displays an Activation Warning pop-up with instructions for obtaining your OS Product Key. Make a note of these instructions, and click OK to continue. Figure 2-25 Activation Warning Pop-up 48 Installing the OS
-
 1
1 -
2
-
3
-
4
-
5
-
6
-
7
-
8
-
9
-
10
-
11
-
12
-
13
-
14
-
15
-
16
-
17
-
18
-
19
-
20
-
21
-
22
-
23
-
24
-
25
-
26
-
27
-
28
-
29
-
30
-
31
-
32
-
33
-
34
-
35
-
36
-
37
-
38
-
39
-
40
-
41
-
42
-
 43
43 -
 44
44 -
 45
45 -
 46
46 -
 47
47 -
 48
48 -
 49
49 -
 50
50 -
 51
51 -
 52
52 -
 53
53 -
54
-
55
-
56
-
57
-
58
-
59
-
60
-
61
-
62
-
63
-
64
-
65
-
66
-
67
-
68
-
69
-
70
-
71
-
72
-
73
-
74
-
75
-
76
-
77
-
78
-
79
-
80
-
81
-
82
-
83
-
84
-
85
-
86
-
87
-
88
-
89
-
90
-
91
-
92
-
93
-
94
-
95
-
96
-
97
-
98
-
99
-
100
-
101
-
102
-
103
-
104
-
105
-
106
 |
 |
