HP LH4r HP Netserver LXe Pro Installation Road Map - Page 2
Audience Assumptions, LXe Pro Installation Road Map, Table of Contents, Overview of LXe Pro Features
 |
View all HP LH4r manuals
Add to My Manuals
Save this manual to your list of manuals |
Page 2 highlights
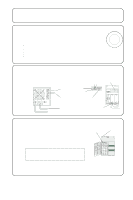
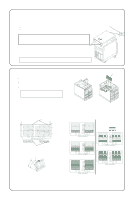
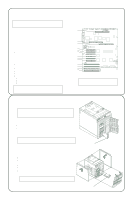
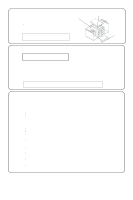
LXe Pro Installation Road Map Table of Contents 1. Verify Contents 2. Obtain HP NetServer Navigator CD-ROM Release History 3. Connect Monitor, Keyboard and Mouse 4. View the Readme File 5. Remove the Cover 6. Install Additional Memory 7. Install Additional PCI Boards and EISA Boards 8. Install Additional Mass Storage Devices 9. Replace all Covers and Connect Cables 10. Configure the HP NetServer and Install Additional ISA Boards 11. Troubleshooting Audience Assumptions This Road Map is for the person who installs, administers, and troubleshoots LAN servers. Hewlett-Packard Company assumes that you are qualified in the servicing of computer equipment and trained in recognizing hazards in products with hazardous energy materials. Overview of LXe Pro Features Mouse Ports Parallel Keyboard Back of NetServer Serial Monitor Reset Switch Power on Switch Disk Access LED Fan LED NetServer Status LCD Keyboard Lock Switch Front Panel Power Supply LED Front Panel Key Lock (4) (2) (3) (1) Front Panel Key Lock (unlocks top cover) NetServer Keylocks (one key is used for all locks) Front Door Key Lock Front Panel Key Lock Hot Swap Drive Keylock Side Cover and Front Bezel Removal (2) (3) Rear Skirts (1) Server Skirts Front Skirts Front Wheel Locking Front Wheel in Unlocked Position Front Wheel in Locked Position
-
 1
1 -
 2
2 -
 3
3 -
 4
4 -
 5
5 -
 6
6
 |
 |
