HP LaserJet 3200 Service Manual - Page 102
Document scanner assembly, To reinstall
 |
View all HP LaserJet 3200 manuals
Add to My Manuals
Save this manual to your list of manuals |
Page 102 highlights
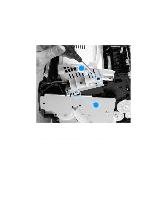
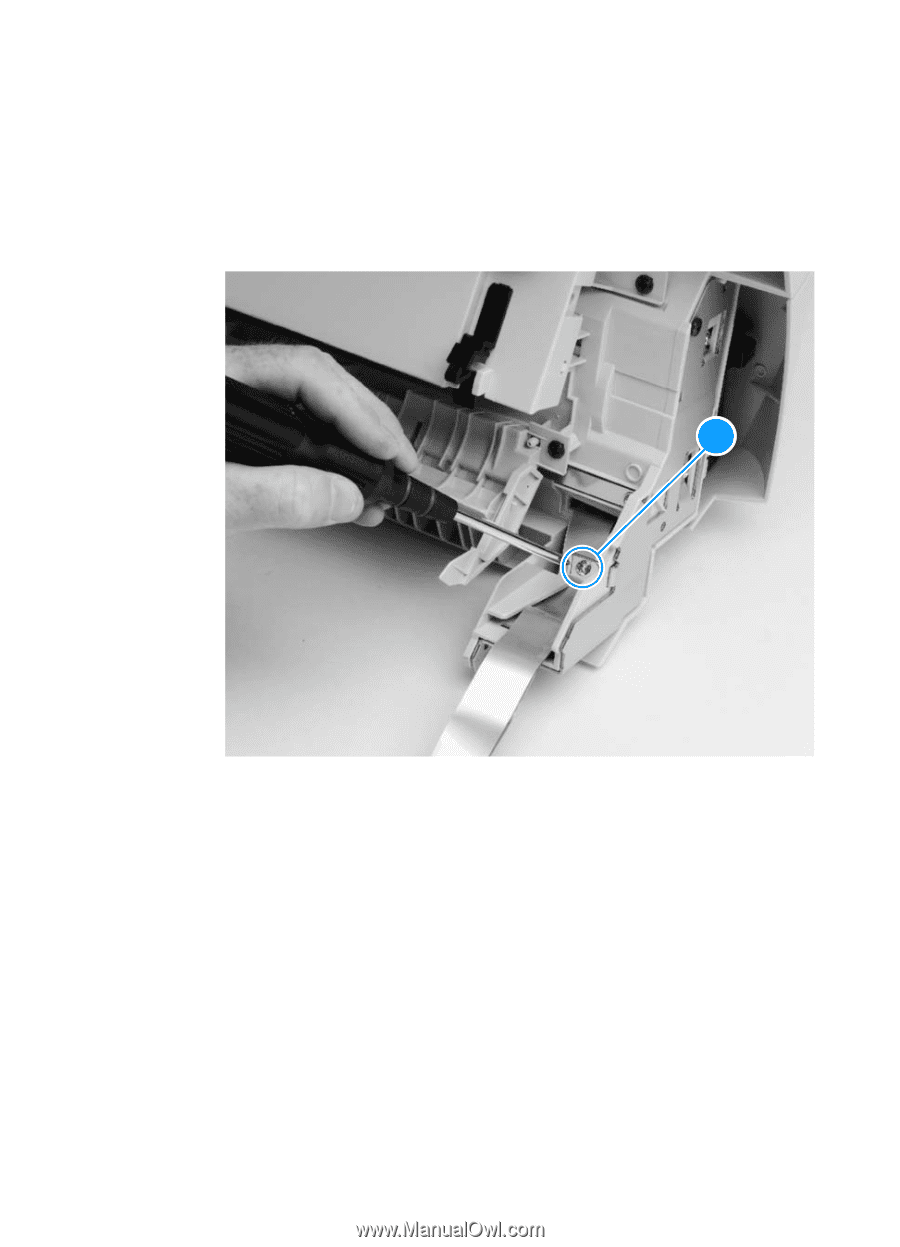
Document scanner assembly 1 Remove the DIMMs, the back, right, and left covers, the internal paper guide, the top cover, and the printer door (see pages 89 through 99). 2 On the back, towards the left side, of the printer door, remove one grounding screw (callout 1) to release the grounding strap. 12 Figure 28. Document scanner assembly removal (1 of 3) 3 Open the document release door. 4 Rotate the plastic strap at the left side of the printer door clockwise to release the strap. To reinstall Make sure you rethread the grounding strap and cable correctly. Failure to do so can damage the cable. 100 Chapter 5 - Removal and replacement EN
-
 1
1 -
2
-
3
-
4
-
5
-
6
-
7
-
8
-
9
-
10
-
11
-
12
-
13
-
14
-
15
-
16
-
17
-
18
-
19
-
20
-
21
-
22
-
23
-
24
-
25
-
26
-
27
-
28
-
29
-
30
-
31
-
32
-
33
-
34
-
35
-
36
-
37
-
38
-
39
-
40
-
41
-
42
-
43
-
44
-
45
-
46
-
47
-
48
-
49
-
50
-
51
-
52
-
53
-
54
-
55
-
56
-
57
-
58
-
59
-
60
-
61
-
62
-
63
-
64
-
65
-
66
-
67
-
68
-
69
-
70
-
71
-
72
-
73
-
74
-
75
-
76
-
77
-
78
-
79
-
80
-
81
-
82
-
83
-
84
-
85
-
86
-
87
-
88
-
89
-
90
-
91
-
92
-
93
-
94
-
95
-
96
-
 97
97 -
 98
98 -
 99
99 -
 100
100 -
 101
101 -
 102
102 -
 103
103 -
 104
104 -
 105
105 -
 106
106 -
 107
107 -
108
-
109
-
110
-
111
-
112
-
113
-
114
-
115
-
116
-
117
-
118
-
119
-
120
-
121
-
122
-
123
-
124
-
125
-
126
-
127
-
128
-
129
-
130
-
131
-
132
-
133
-
134
-
135
-
136
-
137
-
138
-
139
-
140
-
141
-
142
-
143
-
144
-
145
-
146
-
147
-
148
-
149
-
150
-
151
-
152
-
153
-
154
-
155
-
156
-
157
-
158
-
159
-
160
-
161
-
162
-
163
-
164
-
165
-
166
-
167
-
168
-
169
-
170
-
171
-
172
-
173
-
174
-
175
-
176
-
177
-
178
-
179
-
180
-
181
-
182
-
183
-
184
-
185
-
186
-
187
-
188
-
189
-
190
-
191
-
192
-
193
-
194
-
195
-
196
-
197
-
198
-
199
-
200
-
201
-
202
-
203
-
204
-
205
-
206
-
207
-
208
-
209
-
210
-
211
-
212
-
213
-
214
-
215
-
216
-
217
-
218
-
219
-
220
-
221
-
222
-
223
-
224
-
225
-
226
-
227
-
228
-
229
-
230
-
231
-
232
-
233
-
234
-
235
-
236
-
237
-
238
-
239
-
240
-
241
-
242
-
243
-
244
-
245
-
246
-
247
-
248
-
249
-
250
-
251
-
252
-
253
-
254
-
255
-
256
-
257
-
258
-
259
-
260
-
261
-
262
-
263
-
264
-
265
-
266
-
267
-
268
 |
 |
100
Chapter 5 - Removal and replacement
EN
Document scanner assembly
1
Remove the DIMMs, the back, right, and left covers, the internal
paper guide, the top cover, and the printer door (see pages 89
through 99).
2
On the back, towards the left side, of the printer door, remove one
grounding screw (callout 1) to release the grounding strap.
Figure 28.
Document scanner assembly removal (1 of 3)
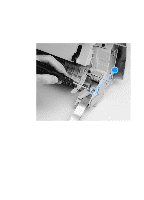
3
Open the document release door.
4
Rotate the plastic strap at the left side of the printer door
clockwise to release the strap.
To reinstall
Make sure you rethread the grounding strap and cable correctly.
Failure to do so can damage the cable.
2
1