HP LaserJet 4000 HP LaserJet 4000 and 4000 N Printers - Getting Started Guide - Page 15
Step 7. Load Trays
 |
View all HP LaserJet 4000 manuals
Add to My Manuals
Save this manual to your list of manuals |
Page 15 highlights
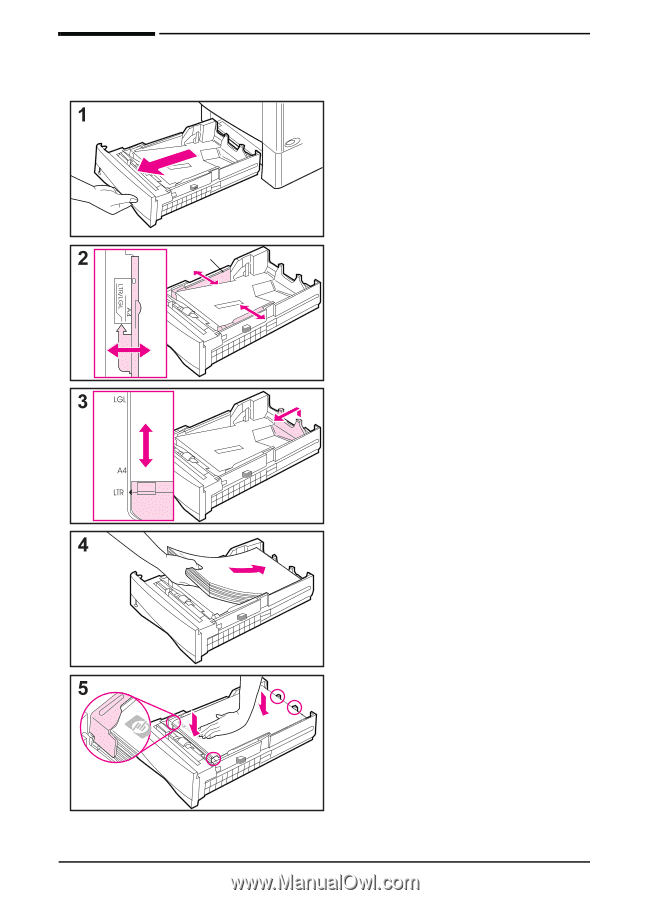
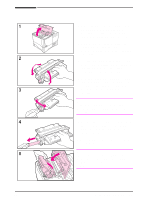
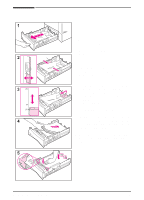
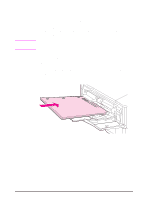
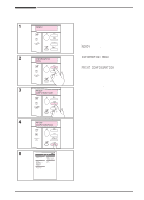
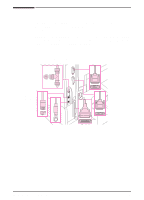
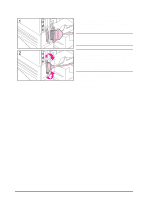
Step 7. Load Trays Lock Tray 2 Tray 2 is a 500-sheet tray. It adjusts for letter, A4, and legal sizes. 1 Pull the tray completely out of the printer. 2 If the tray is not already set to the desired paper size, snap the left and right guides into place to match the width of the paper. For A4 size paper, slide the lock down to secure the guide. 3 Lift the back of the rear paper guide and slide it to the desired paper size until it clicks into place. If the tray is not properly adjusted, the printer might display an error message or paper might jam. 4 Load paper into the tray. 5 Make sure the paper is flat in the tray at all four corners and below the tabs on the guides. Gently slide the tray back into the printer. The printer automatically senses the size of paper if the tray is adjusted correctly. 12 Getting Started Guide EN
-
 1
1 -
2
-
3
-
4
-
5
-
6
-
7
-
8
-
9
-
 10
10 -
 11
11 -
 12
12 -
 13
13 -
 14
14 -
 15
15 -
 16
16 -
 17
17 -
 18
18 -
 19
19 -
 20
20 -
21
-
22
-
23
-
24
-
25
-
26
-
27
-
28
-
29
-
30
 |
 |