HP LaserJet Pro P1100 HP LaserJet Professional P1100 Printer series - User Gui - Page 99
Device settings, Print Density, Apply, button to close the dialog box.
 |
View all HP LaserJet Pro P1100 manuals
Add to My Manuals
Save this manual to your list of manuals |
Page 99 highlights
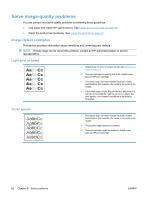
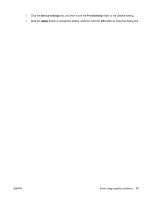
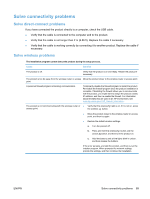
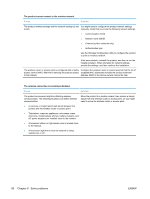
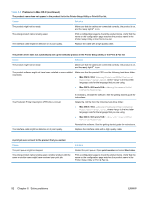
3. Click the Device settings tab, and then move the Print Density slider to the desired setting. 4. Click the Apply button to accept the setting, and then click the OK button to close the dialog box. ENWW Solve image-quality problems 87
-
 1
1 -
2
-
3
-
4
-
5
-
6
-
7
-
8
-
9
-
10
-
11
-
12
-
13
-
14
-
15
-
16
-
17
-
18
-
19
-
20
-
21
-
22
-
23
-
24
-
25
-
26
-
27
-
28
-
29
-
30
-
31
-
32
-
33
-
34
-
35
-
36
-
37
-
38
-
39
-
40
-
41
-
42
-
43
-
44
-
45
-
46
-
47
-
48
-
49
-
50
-
51
-
52
-
53
-
54
-
55
-
56
-
57
-
58
-
59
-
60
-
61
-
62
-
63
-
64
-
65
-
66
-
67
-
68
-
69
-
70
-
71
-
72
-
73
-
74
-
75
-
76
-
77
-
78
-
79
-
80
-
81
-
82
-
83
-
84
-
85
-
86
-
87
-
88
-
89
-
90
-
91
-
92
-
93
-
 94
94 -
 95
95 -
 96
96 -
 97
97 -
 98
98 -
 99
99 -
 100
100 -
 101
101 -
 102
102 -
 103
103 -
 104
104 -
105
-
106
-
107
-
108
-
109
-
110
-
111
-
112
-
113
-
114
-
115
-
116
-
117
-
118
-
119
-
120
-
121
-
122
-
123
-
124
-
125
-
126
-
127
-
128
-
129
-
130
-
131
-
132
-
133
-
134
-
135
-
136
 |
 |

3.
Click the
Device settings
tab, and then move the
Print Density
slider to the desired setting.
4.
Click the
Apply
button to accept the setting, and then click the
OK
button to close the dialog box.
ENWW
Solve image-quality problems
87