HP MP4 Digital Signage Player 4200 Quick Reference Guide - Page 8
Getting started, Write filters, Enhanced Write Filter
 |
View all HP MP4 Digital Signage Player 4200 manuals
Add to My Manuals
Save this manual to your list of manuals |
Page 8 highlights
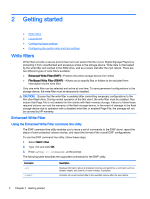
2 Getting started ● Write filters ● Local drives ● Configuring logon settings ● Configuring the system date and time settings Write filters Write filters provide a secure environment and can extend the life of your Digital Signage Players by protecting it from unauthorized and excessive writes to the storage device. Write data is intercepted by the write filter and cached in the RAM drive, and as a result, lost after the next reboot. There are two different types of write filters available: ● Enhanced Write Filter (EWF)-Protects the entire storage device from writes ● File-Based Write Filter (FBWF)-Allows you to specify files or folders to be excluded from interception by the write filter Only one write filter can be selected and active at one time. To save permanent configurations to the storage device, the write filter must be temporarily disabled. CAUTION: Ensure that the write filter is enabled after committing necessary configurations to the thin client flash drive. During normal operation of the thin client, the write filter must be enabled. Also ensure that Page File is not enabled on thin clients with flash memory storage. Failure to follow these required actions can void the warranty of the flash storage device. In the event of damage to the flash storage device due to operation with a disabled write filter or enabled Page File, the damage will not be covered by HP warranty. Enhanced Write Filter Using the Enhanced Write Filter command line utility The EWF command line utility enables you to issue a set of commands to the EWF driver, report the status of each protected volume overlay, and report the format of the overall EWF configurations. To use the EWF command line utility, follow these steps: 1. Select Start > Run. 2. Type CMD and click OK. 3. Enter ewfmgr c: at the prompt. The following table describes the supported commands for the EWF utility. Command -all -commit Description Displays information about all protected volumes and performs a command, such as disable, enable, and commit, on each volume, if specified. Commits all current cached data to the specified volume after the next reboot. 2 Chapter 2 Getting started
-
 1
1 -
2
-
 3
3 -
 4
4 -
 5
5 -
 6
6 -
 7
7 -
 8
8 -
 9
9 -
 10
10 -
 11
11 -
 12
12 -
 13
13 -
14
-
15
-
16
-
17
-
18
-
19
 |
 |