HP Media Center m1100 Getting Started Guide
HP Media Center m1100 - Desktop PC Manual
 |
View all HP Media Center m1100 manuals
Add to My Manuals
Save this manual to your list of manuals |
HP Media Center m1100 manual content summary:
- HP Media Center m1100 | Getting Started Guide - Page 1
HP Media Center PC Getting Started Guide - HP Media Center m1100 | Getting Started Guide - Page 2
Development Company, L.P. All rights reserved. Hewlett-Packard is a registered trademark of Hewlett-Packard Company in the United States of America and other countries/ regions. ii HP Media Center PC Getting Started Guide - HP Media Center m1100 | Getting Started Guide - Page 3
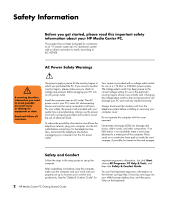
HP Media Center PC 2 AC Power Safety Warnings 2 Safety and Comfort 2 Getting Help 3 Help and Support Center 3 Utility Programs 3 HP Web Site Support 4 Setup Poster 4 Warranty and Support Guide 4 HP Media Center Software Guide 5 Application and System Recovery Programs 5 Instant Support - HP Media Center m1100 | Getting Started Guide - Page 4
iv HP Media Center PC User's Guide - HP Media Center m1100 | Getting Started Guide - Page 5
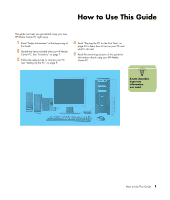
poster to connect your PC. See "Setting Up the PC" on page 9. 4 Read "Starting the PC for the First Time" on page 59 to learn how to turn on your PC and what to do next. 5 Read the remaining sections of this guide for information about using your HP Media Center PC. n A note describes important - HP Media Center m1100 | Getting Started Guide - Page 6
the telephone system before installing or removing your computer cover. Do not operate the computer with the cover removed. Electrostatic discharge (ESD) can damage disk drives, add-in cards, and other components. If an ESD station is not available, wear a wrist strap attached to a metal part of the - HP Media Center m1100 | Getting Started Guide - Page 7
Support, click HP Media Center PC help to read Help topics and run tests. Click Connect to Customer Support (select models only) to get troubleshooting help by using the Internet. To run a test or submit a problem to HP Instant Support, click Start a New Request and follow the onscreen instructions - HP Media Center m1100 | Getting Started Guide - Page 8
9. Warranty and Support Guide You can find the terms of your PC warranty coverage, license information, regulatory information, operating specifications, safety information, and support contact numbers and addresses. You can get help over the telephone from HP. 4 HP Media Center PC Getting Started - HP Media Center m1100 | Getting Started Guide - Page 9
HP Media Center Software Guide This guide can help you get started using the Media Center software program. Media Center allows you to use a remote control to access your recorded television (TV) programs, videos, pictures, music CDs, and DVDs. Application and System Recovery Programs The PC uses - HP Media Center m1100 | Getting Started Guide - Page 10
link to get to the Microsoft Windows XP Media Center Web site. To get the latest news and information about your Media Center program, press the Start button on your remote control, and then select Online Spotlight from the Media Center Start menu. 6 HP Media Center PC Getting Started Guide - HP Media Center m1100 | Getting Started Guide - Page 11
installed Any detailed, specific questions E C + B D Inventory n PC components may F vary by model. G H I A HP Media Center PC B Keyboard/wireless keyboard (wireless receiver not shown) C Wireless mouse D Mouse Speaker system components Your Media Center PC may come with either a set - HP Media Center m1100 | Getting Started Guide - Page 12
9 ENTER hp media center K M N O P Q L J Remote control K Remote control sensor cable (emitter) L FM radio antenna M Two AA batteries for remote control N 10-ft. coaxial cable O S-video to composite video adapter P Composite video cable Q Remote sensor 8 HP Media Center PC Getting Started Guide - HP Media Center m1100 | Getting Started Guide - Page 13
(required). ■ TV. ■ Internet Service Provider (ISP), selected during initial setup (required for Media Center features, such as the Program Guide). ■ Coaxial cable splitter. ■ S-video cable(s), to connect your TV if it requires S-video. ■ Audio Y cable, to connect to a stereo system. (You may need - HP Media Center m1100 | Getting Started Guide - Page 14
Docking Station" on page 78. 10 Turn on the monitor, the PC, and then turn on the speaker system. 11 Follow the onscreen instructions, including selecting an ISP using Easy Internet Sign-up. 12 Set up the Media Center. See the HP Media Center PC Software Guide. 13 After you've completed the initial - HP Media Center m1100 | Getting Started Guide - Page 15
(Audio Out) connector K FireWire (IEEE 1394) connector L Microphone connector M USB 2.0 port N USB 2.0 port (select models only) O On button with power indicator P Drive bay for the HP Personal Media Drive (removable hard disk drive that is sold separately). This bay is designed to connect the - HP Media Center m1100 | Getting Started Guide - Page 16
Audio Line Out M Audio Line In 12 HP Media Center PC Getting Started Guide O LCD TV-OUT PQ R FM TV VID IN S-VID IN L R ST U VW X N Modem (Line In RJ-11) O Digital Audio Out and/or Wireless LAN connector, depending on the PC model P VGA monitor (DB-15) port Q S-video (TV Out) R LCD DVI or (Comp - HP Media Center m1100 | Getting Started Guide - Page 17
Mouse Keyboard SERIAL OUT IN 1 or 2 on front panel, depending on your PC model 4 on the back panel Back panel Universal Serial Bus (USB) for Serial port for digital cameras or other serial devices Audio Line Out (powered speakers, green connector) Back panel Audio Line In (blue connector) Front - HP Media Center m1100 | Getting Started Guide - Page 18
on the back panel Back panel Description and Function FireWire (IEEE 1394) for video cameras and other highspeed devices S-video In/Video In Composite Video In TV In (TV antenna or cable input) Audio In right and left FM In (radio antenna input) Modem 14 HP Media Center PC Getting Started Guide - HP Media Center m1100 | Getting Started Guide - Page 19
Through a Network Port (LAN) The network interface adapter (also called a network interface card, or NIC) connects to an Ethernet (10BaseT) or Fast Ethernet (100BaseT) network hub. Connect this adapter in your PC to your local area network (LAN) hub or any broadband connection. 1 Plug a network - HP Media Center m1100 | Getting Started Guide - Page 20
the Wireless LAN Some Media Center PC models come with an 802.11b wireless LAN module and internal antenna. This device allows you to connect to the Internet from other devices that are compatible with the 802.11 wireless LAN. An additional external antenna is supplied with your system and may be - HP Media Center m1100 | Getting Started Guide - Page 21
to the PC and allows the remote control to work with the Media Center program. 1 If you have a cable TV set-top box, a satellite set-top box, or other set-top box that controls your TV signal, connect the remote control sensor cable (emitter) (A) into the back of the remote sensor. 2 Remove the - HP Media Center m1100 | Getting Started Guide - Page 22
(IEEE 1394) or the USB port. 3 A Found New Hardware message appears. Wait two or three minutes for Windows to make the necessary settings for the new device. When installation is complete, a message appears telling you the camera is ready to use. 18 HP Media Center PC Getting Started Guide - HP Media Center m1100 | Getting Started Guide - Page 23
HP Personal Media Drive that is purchased separately. The HP Media Center PC has a special drive bay that includes an internal USB port and power cable that connects to the HP Personal Media Drive. The drive can be easily inserted and removed from the hard disk drive bay without turning off the PC - HP Media Center m1100 | Getting Started Guide - Page 24
into the bay. 4 Slide the drive all the way into the drive bay until the drive is firmly connected to the internal power and USB cables. When the PC is turned on, the blue power LED on the front of the drive is lit when the drive is inserted correctly. 20 HP Media Center PC Getting Started Guide - HP Media Center m1100 | Getting Started Guide - Page 25
bottom of the desktop. If this icon is hidden, click the arrows on the taskbar to display it. The Safely Remove Hardware window opens. 3 Double-click USB Mass Storage Device to locate your HP Personal Media Drive. USB Mass Storage Device may be listed twice. One may contain a memory card reader or - HP Media Center m1100 | Getting Started Guide - Page 26
USB or FireWire ports. You can connect peripheral devices such as a printer, scanner, video camera, digital camera, memory card reader, and PDA (personal digital assistant) or handheld computer to the PC. See the documentation that came with your device. 22 HP Media Center PC Getting Started Guide - HP Media Center m1100 | Getting Started Guide - Page 27
to connect the TV out on the PC to your TV. An S-video cable provides separate color and black-and-white image signals, and delivers a sharper image than a composite video cable does. C n Select the signal source for TV in the Media Center program settings. Connecting the Television Signal 23 - HP Media Center m1100 | Getting Started Guide - Page 28
provided) from your set-top box into the Audio In right (red) (A) connector and the Audio In left (white) (B) connector on the back of the PC, if you are using a set-top box with S-video or composite video output. FM IN TV IN S-VID IN L R AB C D 24 HP Media Center PC Getting Started Guide - HP Media Center m1100 | Getting Started Guide - Page 29
Connecting the TV Signal Source When You Have an Existing Setup This section describes how to connect the PC to an existing setup for your TV signal source. Wall to VCR to TV using coaxial cable Remove the coaxial cable at the input to the VCR, and connect it to the input of - HP Media Center m1100 | Getting Started Guide - Page 30
coaxial cable Remove the coaxial PC. Be sure to connect the remote control sensor cable (emitter) and position it on your set-top box or satellite box. This allows the PC to change the channel on the box. See "Connecting the Remote Sensor" on page 17. 26 HP Media Center PC Getting Started Guide - HP Media Center m1100 | Getting Started Guide - Page 31
D Set-top box/Satellite In E Set-top box/Satellite Out F VCR In G VCR Out H TV In J Splitter In K Splitter Out L TV In on back of PC M Remote control sensor cable N Remote control sensor Connecting the Television Signal 27 - HP Media Center m1100 | Getting Started Guide - Page 32
Connect an additional composite video cable to a second output on the set-top box or satellite box. Connect the other end of the cable to the S-video to composite video adapter cable; connect the adapter to the S-video In connector on the back of the PC. 28 HP Media Center PC Getting Started Guide - HP Media Center m1100 | Getting Started Guide - Page 33
H B Cable C Set-top box/Satellite In D Set-top box/Satellite Out E S-video or composite cable F VCR In G VCR Out H TV In J Add an S-video or composite cable with adapter K S-video In on back of PC L Remote control sensor cable M Remote control sensor Connecting the Television Signal 29 - HP Media Center m1100 | Getting Started Guide - Page 34
one of the following arrangements, depending on the connection jacks on your TV: 3 If your TV has an S-video jack, connect an S-video cable (A) from the S-video In jack on the TV to the S-video Out jack (B) on the video card on the back of the PC. B A 30 HP Media Center PC Getting Started Guide - HP Media Center m1100 | Getting Started Guide - Page 35
on the back of the PC. Connect a composite video cable, to the S-video to composite video adapter cable. 6 Plug the other end of the composite video cable into the TV In (Video In or Video Input) (A) connector on your TV. 7 Turn on the TV and select the TV IN video source; refer to the documentation - HP Media Center m1100 | Getting Started Guide - Page 36
on the TV: 1 Make sure the video and audio cables are connected before you turn on the TV and the PC. 2 Turn on the TV. Press the Video/TV button on your remote control to select the Video setting, not the TV setting. 3 Turn on the PC. 4 When the Windows desktop appears, right-click an empty area of - HP Media Center m1100 | Getting Started Guide - Page 37
to close the Display Properties window. n Your TV must be connected to the PC to change the display. Disabling video card number.) ■ If you see the Displays tab, continue with the "Displays Tab (Disabling)" procedure. nView tab (disabling) 1 Click the nView tab. 2 If you viewed the PC image on your PC - HP Media Center m1100 | Getting Started Guide - Page 38
the PC. 3 Remove the video cable at the TV and the PC. 2 Click the upper-left corner of the TV icon so it is red, and then click the upper-left corner of the monitor icon so it is green. Click the Apply button. 3 When the PC image appears on the TV 34 HP Media Center PC Getting Started Guide - HP Media Center m1100 | Getting Started Guide - Page 39
Configuring Speaker and Sound Options HP Media Center PCs support many different audio options, sound connections, and speaker configurations. This chapter describes the most typical options. Your system may have different components. Sound Connector Types Your model may include one of three - HP Media Center m1100 | Getting Started Guide - Page 40
in a multichannel audio configuration. Line out (lime green) for front speakers. OUT D E 36 HP Media Center PC Getting Started Guide IN mic (pink) connects to microphone. (3: Also functions as center/subwoofer line out when a multichannel audio configuration is activated.) Line in (light blue - HP Media Center m1100 | Getting Started Guide - Page 41
(select models only). Speaker Configurations You may set up your HP Media Center PC for the following supported configurations: Name Headphone 2 (stereo) 2.1 4.1 6/5.1 8/7.1 Home audio system Digital audio Speaker system None, muted. Left speaker, right speaker. Left speaker, right speaker - HP Media Center m1100 | Getting Started Guide - Page 42
PC (select models only), connect the audio line out connector to the subwoofer. 4 Connect the left and right speakers to the subwoofer. Refer to the speaker documentation. 5 Turn on the PC. 6 Plug in the speaker system power. 7 Turn on the speaker system. 38 HP Media Center PC Getting Started Guide - HP Media Center m1100 | Getting Started Guide - Page 43
that matches the back of your PC. 3 6 S 3 6 S ■ For 3 Connector systems, the blue audio line in connector functions as a rear line out when a multichannel audio configuration is activated. n 3 is Three Connector 6 is Six Connector S is Sound Card Configuring Speaker and Sound Options 39 - HP Media Center m1100 | Getting Started Guide - Page 44
the rear speaker cable to the black connector that matches the back of your PC. IN 3 6 S OUT 3 6 S ■ For 3 Connector systems, the blue audio line in connector functions as a rear line out when a multichannel audio configuration is activated. 40 HP Media Center PC Getting Started Guide - HP Media Center m1100 | Getting Started Guide - Page 45
of your PC. 3 6 S 7 Turn on the PC. 8 Plug in the speaker system power. 9 Turn on the speaker system. 10 After the speakers are connected to the PC, configure the audio software for sound output for your PC model: ■ For 3 Connector systems, the pink mic connector functions as a center/subwoofer - HP Media Center m1100 | Getting Started Guide - Page 46
are connected to the PC, configure the audio software for sound output for your PC model: ■ 6 Connector: See "Configuring Audio Output with Sound Effect Manager" on page 51. ■ Sound Card: See "Configuring Audio Output with a Sound Card" on page 53. 42 HP Media Center PC Getting Started Guide - HP Media Center m1100 | Getting Started Guide - Page 47
The following diagram shows a typical 7.1 audio installation: Connecting the PC to a Home Audio System You can connect your HP Media Center PC to your home stereo or home theater multichannel audio receiver/amplifiers using your existing speakers. For example, see "2.1 home stereo installation" - HP Media Center m1100 | Getting Started Guide - Page 48
. Your system may be different. IN OUT n A A: PC back panel connectors (3, 6, or Sound Card) B B: Y adapter cables C: Receiver/amplifier D: Subwoofer C E: Front speakers (left and right) D E PC to 2.1 multichannel audio system connection 44 HP Media Center PC Getting Started Guide - HP Media Center m1100 | Getting Started Guide - Page 49
This is only a suggested configuration. Your system may be different. IN OUT A B C D E F G PC to 5.1 multichannel audio system connection n A: PC back panel connectors (3, 6, or Sound Card) B: Y adapter cables C: Receiver/amplifier D: Subwoofer E: Center speaker F: Front speakers (left and - HP Media Center m1100 | Getting Started Guide - Page 50
procedure To connect a six-channel (5.1 speaker) home audio system to the PC: 1 Turn off the PC. 2 Turn off the receiver/amplifier. 3 Connect the front stereo mini- " on page 51. ■ Sound Card: See "Configuring Audio Output with a Sound Card" on page 53. 46 HP Media Center PC Getting Started Guide - HP Media Center m1100 | Getting Started Guide - Page 51
power. 5 Turn on the speaker system. 6 After the speakers are connected to the PC, configure the audio software for sound output for your PC model: ■ Audio card with digital output and 3 Connector: See "Configuring Audio Output with Multi-channel Sound Manager" on page 48. Follow the instructions - HP Media Center m1100 | Getting Started Guide - Page 52
PCs with Multi-channel Sound Manager: 1 Click Start on the taskbar. 2 Choose All Programs. 3 Click Music. Click Multi-channel Sound Manager. The Multi-channel Audio Configuration window configuration. ■ General - View Driver and audio information. 48 HP Media Center PC Getting Started Guide - HP Media Center m1100 | Getting Started Guide - Page 53
system's digital audio input. 5 Click OK. 6 Test the speakers, by playing a CD, for example. (If you test using a DVD, you need to configure WinDVD first. See "Configuring Audio for the WinDVD Player" on page 54.) 7 Configure audio output for the Media Center. See "Configuring Audio for Media - HP Media Center m1100 | Getting Started Guide - Page 54
equalizer, click the power button in the center of the circular equalizer control to turn on the equalizer. You can click a pre-set button, such as Pop or Live, or manually adjust the settings and connections. See "Using the Audio Wizard" on page 51. 50 HP Media Center PC Getting Started Guide - HP Media Center m1100 | Getting Started Guide - Page 55
describing the number of speakers in your system, for example, 7.1 Speaker. 7 Test the speakers. Click the Speaker Test button. Follow the instructions. 8 Close the window. 9 Configure audio output for the Media Center. See "Configuring Audio for Media Center" on page 54. 10 Configure audio output - HP Media Center m1100 | Getting Started Guide - Page 56
through mode). 3 Close the window. If you select Enable digital audio output, the microphone volume setting becomes not muted, the recording source is fixed in Stereo Mix, and if you place the microphone too close to the speakers, feedback can occur. 52 HP Media Center PC Getting Started Guide - HP Media Center m1100 | Getting Started Guide - Page 57
with a sound card (optional)" on page 53. 6 Click the Channel button to test the speakers. 7 Adjust the speaker volume settings on the PC. Click the Calibrate button. The wizard starts. Follow the wizard basic instructions. 8 Close the window. 9 Configure audio output for the Media Center. See - HP Media Center m1100 | Getting Started Guide - Page 58
. 5 Select Audio Speaker Configuration. Click the option for the number of speakers to match your multichannel speaker system. 6 You can click the Test button to test the speakers. You should be able to hear the speakers. Click Stop, and then click OK. 54 HP Media Center PC Getting Started Guide - HP Media Center m1100 | Getting Started Guide - Page 59
window opens. ■ Volume controls within a program, such as the volume buttons on the Media Center navigation bar or on the remote control turned to the maximum position. If this is the case, double-click the Volume icon on the taskbar and increase volume. OUT Using Headphones Your PC comes - HP Media Center m1100 | Getting Started Guide - Page 60
taskbar. The Volume Control settings window opens. 3 Select Options, and then click Properties. 4 In Adjust volume for, click Recording. 5 In Show the following volume controls, place a check in the Microphone check box. 6 Click OK. 7 Close the window. 56 HP Media Center PC Getting Started Guide - HP Media Center m1100 | Getting Started Guide - Page 61
. ■ Verify sound cable connections. ■ Reinstall the sound card drivers by using HP Application Recovery. See "Application Recovery" in the Warranty and Support Guide. ■ Reconfigure the sound software for surround sound. ■ Use active, powered speakers, or speakers with an amplifier. ■ Some programs - HP Media Center m1100 | Getting Started Guide - Page 62
58 HP Media Center PC Getting Started Guide - HP Media Center m1100 | Getting Started Guide - Page 63
the initial Microsoft Windows setup. 4 Register with HP to receive changes, updates, and support. You can register with HP any of these ways: Turn on the PC and follow the onscreen instructions, double-click the registration icon A on your desktop and follow onscreen instructions, or register online - HP Media Center m1100 | Getting Started Guide - Page 64
Support Center. ■ Start a search. ■ Run a program. ■ View or change settings by opening the Control Panel. ■ End your current PC session and switch between users by clicking the Log Off button. ■ Turn off the PC or restart it by clicking the Turn Off Computer button. 60 HP Media Center PC Getting - HP Media Center m1100 | Getting Started Guide - Page 65
(Select models only) Icon Opens Windows XP Start menu Help and Support Use it to Find all your software programs, turn off the PC, open Help and Support, and access all the PC utilities and features. View onscreen help information about your PC. Media Center Easy Internet Sign-up wizard Access - HP Media Center m1100 | Getting Started Guide - Page 66
Or as an alternative, double-click the PC Tune Up & Repair icon (select models only) on your desktop and review the products and services offered under Backup Data. Important Information About Recorded TV Programs When you replace the hard disk drive, you lose any files or software that you created - HP Media Center m1100 | Getting Started Guide - Page 67
and System Recovery" in the HP Media Center PC Software Guide for more information. When your PC has software problems, it is possible that a voltage spike, power outage, or brownout has occurred. Symptoms of voltage spikes include a flickering video display, unexpected PC startups, and the PC not - HP Media Center m1100 | Getting Started Guide - Page 68
guides included with your PC. To see the items in the PC Help & Tools folder: 1 Click Start on the taskbar. 2 Choose All Programs. 3 Choose PC Help & Tools. 4 To view an item or to use it, click it. w Before turning off the PC, remove media from all drives: CD, DVD, and the memory card - HP Media Center m1100 | Getting Started Guide - Page 69
on the remote control. Standby mode tips If the PC does not work properly when you wake it from standby, reset the PC by pressing and holding the On button on the front of the PC for approximately 5 seconds until the PC turns off. Then turn the PC back on. If you are using Media Center to record - HP Media Center m1100 | Getting Started Guide - Page 70
it copies programs that are currently running to the hard disk drive and then turns itself off. When the PC comes out of hibernation, the programs are restored to the state they were in before hibernation. 1 Click Start on the taskbar. 2 Click Turn Off Computer at the bottom of the menu. 3 Press - HP Media Center m1100 | Getting Started Guide - Page 71
To turn on auto-standby for the PC, click a time (such as After 20 mins) in the System standby list. ■ To turn on auto-hibernate, click a time (such as After 1 hour) in the System hibernates list. 7 Click OK. w Do not use auto-hibernate if you have scheduled TV recordings in Media Center; instead - HP Media Center m1100 | Getting Started Guide - Page 72
, memory, and other requirements listed for the new software for compatibility with your PC. Install the new software according to the directions provided by the software manufacturer. Check the manufacturer's documentation or customer service information for help if you need it. 68 HP Media Center - HP Media Center m1100 | Getting Started Guide - Page 73
main keys. F1 opens a help window for the software program being used. F3 opens a search window. Other function key operations may depend keyboard. These buttons operate the CD or DVD player, connect you to the Internet, or provide quick access to specific functions. See "Special Keyboard Buttons - HP Media Center m1100 | Getting Started Guide - Page 74
Log off or switch between PC users. Links to an HP Web site. Opens the Help and Support Center. Opens the HP Image Zone Plus software program. Can be reconfigured. Starts iTunes or Windows Media Player. Can be reconfigured. Opens a video software program. Can be reconfigured. Internet buttons Icon - HP Media Center m1100 | Getting Started Guide - Page 75
volume Description or Function Opens or closes upper and lower optical drive tray. Starts recording to selected media. Stops media. Plays or pauses media. Rewinds media. Fast-forwards media. Volume knob controls speaker volume. Mute Turns speaker sound on and off. n The Volume knob can continue - HP Media Center m1100 | Getting Started Guide - Page 76
PC. specific wireless keyboard documentation included in the PC box. A Wireless receiver B Wireless keyboard C Wireless mouse Wireless receiver A light on the receiver indicates receiver activity. A Number lock B Caps lock C Scroll lock D Receiver activity 72 HP Media Center PC Getting Started Guide - HP Media Center m1100 | Getting Started Guide - Page 77
TV programs, and play music, movies, or video. See "Using the Remote Control" in the HP Media Center PC Software Guide for detailed instructions on using the features of the remote control. To use the remote control, simply point it at the remote sensor and press the Start button. DVD MENU - HP Media Center m1100 | Getting Started Guide - Page 78
n Use alkaline batteries in the remote control. Installing the remote control batteries 1 Slide the battery cover off the back of the remote control. 2 Insert the two AA batteries (provided). 3 Replace the battery cover. 74 HP Media Center PC Getting Started Guide - HP Media Center m1100 | Getting Started Guide - Page 79
of types of memory cards and the IBM Microdrive disk drive. The card reader is accessible directly on the front of the PC or located inside a cover. It has four horizontal card slots, which accept the memory cards and the Microdrive disk drive. A B C w Do not try to remove media when the inuse - HP Media Center m1100 | Getting Started Guide - Page 80
in-use light The memory card reader in-use light is off when there are no media cards plugged into the four slots. The light turns on when a media card is inserted into a slot. The light blinks when data is being transferred between the card and the PC. 76 HP Media Center PC Getting Started Guide - HP Media Center m1100 | Getting Started Guide - Page 81
, Secure Digital, SmartMedia, or xD media. ■ Make sure the memory card is fully inserted into the correct slot. ■ Remove the memory card and shine a flashlight into the empty slot to see if any pins are bent. Replace the memory card reader or have the PC serviced if a pin is bent to the point of - HP Media Center m1100 | Getting Started Guide - Page 82
camera and bracket are sold separately. Installing an HP Camera Docking Station HP Media Center PCs come with a camera docking bay and two camera docking bay lids. This bay is designed to hold an HP camera docking station and several HP digital cameras (which are purchased separately). To install - HP Media Center m1100 | Getting Started Guide - Page 83
2 Place the camera docking station (A) on the top of the PC. 3 Place the camera bracket (B) that came with your digital camera on the camera docking station. B n A The camera bracket clips onto the camera dock base. This bracket comes with the digital camera. . Using the PC Hardware 79 - HP Media Center m1100 | Getting Started Guide - Page 84
) into a TV if you want to view the camera images on a TV (optional). ■ Plug the power cord into a power outlet. Refer to the instructions that came with the HP camera docking station. IN OUT SERIAL ETHERNET TV-OUT VID IN LCD R S-VID IN L TV . 80 HP Media Center PC Getting Started Guide - HP Media Center m1100 | Getting Started Guide - Page 85
6 Place the correct camera docking station lid (D) on top of the PC. Gently guide the edge of the lid into the top of the PC. E 7 Place the HP digital camera (E) into the camera docking station. 8 Follow the instructions that came with your camera docking station. D Using the PC Hardware 81 - HP Media Center m1100 | Getting Started Guide - Page 86
82 HP Media Center PC Getting Started Guide - HP Media Center m1100 | Getting Started Guide - Page 87
. ■ Be sure that you installed the device drivers that came with the new device. ■ You may need an updated driver for Windows XP. For non-HP peripherals, contact the vendor directly. For HP peripherals, visit the HP Web site. Refer to the Warranty and Support Guide for details. Troubleshooting 83 - HP Media Center m1100 | Getting Started Guide - Page 88
the software. Refer to "Application and System Recovery" in the Warranty and Support Guide that came with your PC. ■ It's possible that a voltage spike, power outage, or brownout has occurred. Symptoms of voltage spikes include a flickering video display, unexpected computer startups, and the - HP Media Center m1100 | Getting Started Guide - Page 89
Control window opens. Make sure none of the Mute check boxes are selected. Adjust the volume slide bars to increase volume. ■ If your speakers have a power button, check whether it is turned on and whether the power supply is connected to the power source. ■ Check the speaker connections. ■ Remove - HP Media Center m1100 | Getting Started Guide - Page 90
Problem Properties window that opens, click the Buttons Turn Off Computer, and click Restart. If that doesn't work, press and hold the computer On button until the computer turns off (approximately five seconds). Then turn the computer back on. 86 HP Media Center PC Getting Started Guide - HP Media Center m1100 | Getting Started Guide - Page 91
ball housing and remove lint and dust. d Replace the mouse ball and screw on the cover. ■ The computer might have stopped. Reset the computer by pressing and holding the computer On button until the computer turns off (approximately 5 seconds). Then turn the computer back on. Troubleshooting 87 - HP Media Center m1100 | Getting Started Guide - Page 92
to "Application and System Recovery" in the Warranty and Support Guide that came with your PC, to reinstall a software program. If your program came on a CD, follow the instructions that came with the software to reinstall it. ■ Make sure that the batteries for the remote control are charged and - HP Media Center m1100 | Getting Started Guide - Page 93
the remote sensor plugged in, and then restart the PC. Plug in other USB devices after the remote sensor appears in the Device Manager window. You cannot remove a CD or DVD after you have turned off the computer. Turn on the computer and press the Eject button to extend the tray. Troubleshooting 89 - HP Media Center m1100 | Getting Started Guide - Page 94
pen with the computer off. ■ Inspect the ends of the memory cards for dirt or material closing a hole or spoiling a metal contact. Clean the contacts with a lint-free cloth and small amounts of isopropyl alcohol. Replace the memory card if necessary. 90 HP Media Center PC Getting Started Guide - HP Media Center m1100 | Getting Started Guide - Page 95
My PC is experiencing video errors. Solution ■ Your file may be corrupt or in an unsupported format. Open the video file in a video editor such as WinDVD Creator, and then resave the file in a supported format. ■ There may be a problem with the codec. For more information, look in Windows Media - HP Media Center m1100 | Getting Started Guide - Page 96
Sound Options" on page 35. ■ Verify sound cable connections. ■ Reinstall the sound card drivers by using Application Recovery. See "Application Recovery" in the Warranty and Support Guide that came with your PC. ■ Reconfigure the software for surround sound. 92 HP Media Center PC Getting Started - HP Media Center m1100 | Getting Started Guide - Page 97
, opening 60 D desktop 60 organizing tool 64 shortcuts 61 devices connecting 22 digital camera connecting 18, 22 using 75 digital video camera connecting 18 connecting to PC 18, 19, 43 recording videos 18, 19, 43 drives memory card reader 75 DVD can't remove 89 can't remove from drive 89 won't play - HP Media Center m1100 | Getting Started Guide - Page 98
H hard disk drive connecting an HP Personal Media Drive to the PC 19 hardware not provided with PC 9 headphones connector 13 using 55 help Help and Support Center 3, 61 hibernation mode automatic 67 manual 66 home stereo system connecting to the PC 43 home videos 18, 19, 43 HP Application Recovery - HP Media Center m1100 | Getting Started Guide - Page 99
87 using 72 MultiMedia Card (MMC) reader 75 music library 92 mute button 71 N network interface adapter 15 O On button 59 online guides 6 Online Spotlight link to Microsoft Web site 6 P PC back connectors 12 components 7 components for Media Center 8 connecting the remote sensor 17 connecting the - HP Media Center m1100 | Getting Started Guide - Page 100
PC 43 S-video In connector 14 System Recovery 5 System Restore 5 system tray 60 T transfer wizard 62 transferring old PC information to a new PC 62 troubleshooting 83 can't remove CD/DVD from drive 89 corrupted files 83, 84 keyboard buttons not working 86 keyboard not working 86 memory card reader
-
 1
1 -
 2
2 -
 3
3 -
 4
4 -
 5
5 -
 6
6 -
 7
7 -
8
-
9
-
10
-
11
-
12
-
13
-
14
-
15
-
16
-
17
-
18
-
19
-
20
-
21
-
22
-
23
-
24
-
25
-
26
-
27
-
28
-
29
-
30
-
31
-
32
-
33
-
34
-
35
-
36
-
37
-
38
-
39
-
40
-
41
-
42
-
43
-
44
-
45
-
46
-
47
-
48
-
49
-
50
-
51
-
52
-
53
-
54
-
55
-
56
-
57
-
58
-
59
-
60
-
61
-
62
-
63
-
64
-
65
-
66
-
67
-
68
-
69
-
70
-
71
-
72
-
73
-
74
-
75
-
76
-
77
-
78
-
79
-
80
-
81
-
82
-
83
-
84
-
85
-
86
-
87
-
88
-
89
-
90
-
91
-
92
-
93
-
94
-
95
-
96
-
97
-
98
-
99
-
100
 |
 |

HP Media Center PC
Getting Started Guide