HP Media Center m390n HP Media Center Desktop PCs - Creating DVDs and CDs With - Page 11
Pause, Record
 |
View all HP Media Center m390n manuals
Add to My Manuals
Save this manual to your list of manuals |
Page 11 highlights
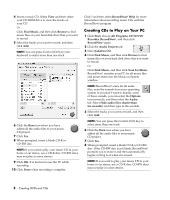
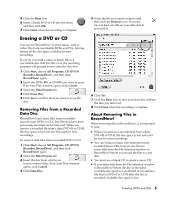
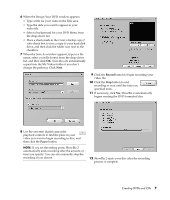
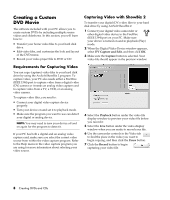
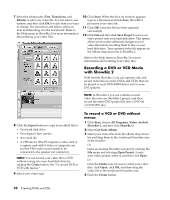
6 When the Design Your DVD window appears: • Type a title for your video in the Title area. • Type the date you want to appear in your video file. • Select a background for your DVD Menu from the drop-down list. • Place a check mark in the Create a backup copy of video check box to save a copy to your hard disk drive, and then click the folder icon next to the checkbox. 7 When the Save As window appears, type in a file name, select your file format from the drop-down list, and then click OK. Your files are automatically copied into the My Videos folder if you don't change the pathway. Click Next. 9 Click the Record button to begin recording your video file. 10 Click the Stop button to end recording or wait until the time you specified ends. 11 If necessary, click Yes. ShowBiz 2 automatically begins creating the DVD-formatted disc. 8 Use the onscreen digital camcorder playback controls to find the place in your video you want to begin recording to disc, and then click the Pause button. NOTE: If you set the ending point, ShowBiz 2 automatically ends recording after the amount of time you specify. You can also manually stop the recording if you choose. 12 ShowBiz 2 ejects your disc after the recording process is complete. Creating DVDs and CDs 7
-
 1
1 -
2
-
3
-
4
-
5
-
 6
6 -
 7
7 -
 8
8 -
 9
9 -
 10
10 -
 11
11 -
 12
12 -
 13
13 -
 14
14 -
 15
15 -
 16
16 -
17
-
18
-
19
-
20
-
21
-
22
-
23
-
24
 |
 |
