HP Mini 110-1122TU Service Guide - Page 129
Creating a set of recovery discs, Edit> Paste
 |
View all HP Mini 110-1122TU manuals
Add to My Manuals
Save this manual to your list of manuals |
Page 129 highlights
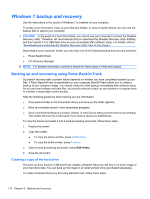
● You can back up your information to an optional external hard drive, a network drive, or discs. ● When backing up to discs, use any of the following types of discs (purchased separately): CD-R, CD-RW, DVD+R, DVD-R, or DVD±RW. The discs you use depend on the type of optical drive you are using. NOTE: DVDs store more information than CDs, so using them for backup reduces the number of recovery discs required. ● When backing up to discs, number each disc before inserting it into an optical drive. ● Save the customized settings in a window, toolbar, or menu bar by taking a screen shot of the settings. The screen shot can be a time-saver if you have to reset your preferences. To copy the screen and paste the image into a word-processing document: 1. Display the screen. 2. Copy the screen: To copy only the active window, press alt+prt sc. To copy the entire screen, press prt sc. 3. Open a word-processing document, selcet Edit> Paste. 4. Save the document. Creating a set of recovery discs HP recommends that you create recovery discs to be sure that you can restore your system to its original factory state if you experience serious system failure or instability. Create these discs after setting up the computer for the first time. NOTE: This task will require an optional external or shared optical drive. Handle these discs carefully and keep them in a safe place. The software allows the creation of only one set of recovery discs. Note the following guidelines before creating recovery discs: ● You will need high-quality DVD-R, DVD+R, BD-R (writable Blu-ray), or CD-R discs. All these discs are purchased separately. DVDs have a larger storage capacity than CDs. If you use CDs, up to 20 discs may be required, whereas only a few DVDs are required. NOTE: Double-layer discs and read-write discs-such as CD-RW, DVD±RW, and BD-RE (rewritable Blu-ray) discs-are not compatible with the Recovery Manager software. ● The computer must be connected to AC power during this process. ● Only one set of recovery discs can be created per computer. ● Number each disc before inserting it into an optical drive. ● If necessary, you can exit the program before you have finished creating the recovery discs. The next time you open Recovery Manager, you will be prompted to continue the disc creation process. Windows 7 backup and recovery 119
-
 1
1 -
2
-
3
-
4
-
5
-
6
-
7
-
8
-
9
-
10
-
11
-
12
-
13
-
14
-
15
-
16
-
17
-
18
-
19
-
20
-
21
-
22
-
23
-
24
-
25
-
26
-
27
-
28
-
29
-
30
-
31
-
32
-
33
-
34
-
35
-
36
-
37
-
38
-
39
-
40
-
41
-
42
-
43
-
44
-
45
-
46
-
47
-
48
-
49
-
50
-
51
-
52
-
53
-
54
-
55
-
56
-
57
-
58
-
59
-
60
-
61
-
62
-
63
-
64
-
65
-
66
-
67
-
68
-
69
-
70
-
71
-
72
-
73
-
74
-
75
-
76
-
77
-
78
-
79
-
80
-
81
-
82
-
83
-
84
-
85
-
86
-
87
-
88
-
89
-
90
-
91
-
92
-
93
-
94
-
95
-
96
-
97
-
98
-
99
-
100
-
101
-
102
-
103
-
104
-
105
-
106
-
107
-
108
-
109
-
110
-
111
-
112
-
113
-
114
-
115
-
116
-
117
-
118
-
119
-
120
-
121
-
122
-
123
-
 124
124 -
 125
125 -
 126
126 -
 127
127 -
 128
128 -
 129
129 -
 130
130 -
 131
131 -
 132
132 -
 133
133 -
 134
134 -
135
-
136
-
137
-
138
-
139
-
140
-
141
-
142
-
143
-
144
-
145
-
146
-
147
-
148
-
149
-
150
-
151
-
152
-
153
-
154
-
155
 |
 |
