HP Mini 210-1150NR Mini User Guide - Windows 7 - Page 19
Replacing the vanity cover, the computer.
 |
View all HP Mini 210-1150NR manuals
Add to My Manuals
Save this manual to your list of manuals |
Page 19 highlights
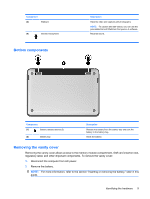
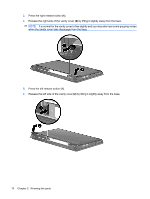
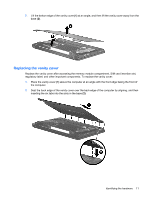
7. Lift the bottom edge of the vanity cover (1) at an angle, and then lift the vanity cover away from the base (2). Replacing the vanity cover Replace the vanity cover after accessing the memory module compartment, SIM card insertion slot, regulatory label, and other important components. To replace the vanity cover: 1. Place the vanity cover (1) above the computer at an angle with the front edge facing the front of the computer. 2. Seat the back edge of the vanity cover over the back edge of the computer by aligning, and then inserting the six tabs into the slots in the base (2). Identifying the hardware 11
-
 1
1 -
2
-
3
-
4
-
5
-
6
-
7
-
8
-
9
-
10
-
11
-
12
-
13
-
 14
14 -
 15
15 -
 16
16 -
 17
17 -
 18
18 -
 19
19 -
 20
20 -
 21
21 -
 22
22 -
 23
23 -
 24
24 -
25
-
26
-
27
-
28
-
29
-
30
-
31
-
32
-
33
-
34
-
35
-
36
-
37
-
38
-
39
-
40
-
41
-
42
-
43
-
44
-
45
-
46
-
47
-
48
-
49
-
50
-
51
-
52
-
53
-
54
-
55
-
56
-
57
-
58
-
59
-
60
-
61
-
62
-
63
-
64
-
65
-
66
-
67
-
68
-
69
-
70
-
71
-
72
-
73
-
74
-
75
-
76
-
77
-
78
-
79
-
80
-
81
-
82
-
83
-
84
-
85
-
86
-
87
-
88
-
89
-
90
-
91
-
92
 |
 |
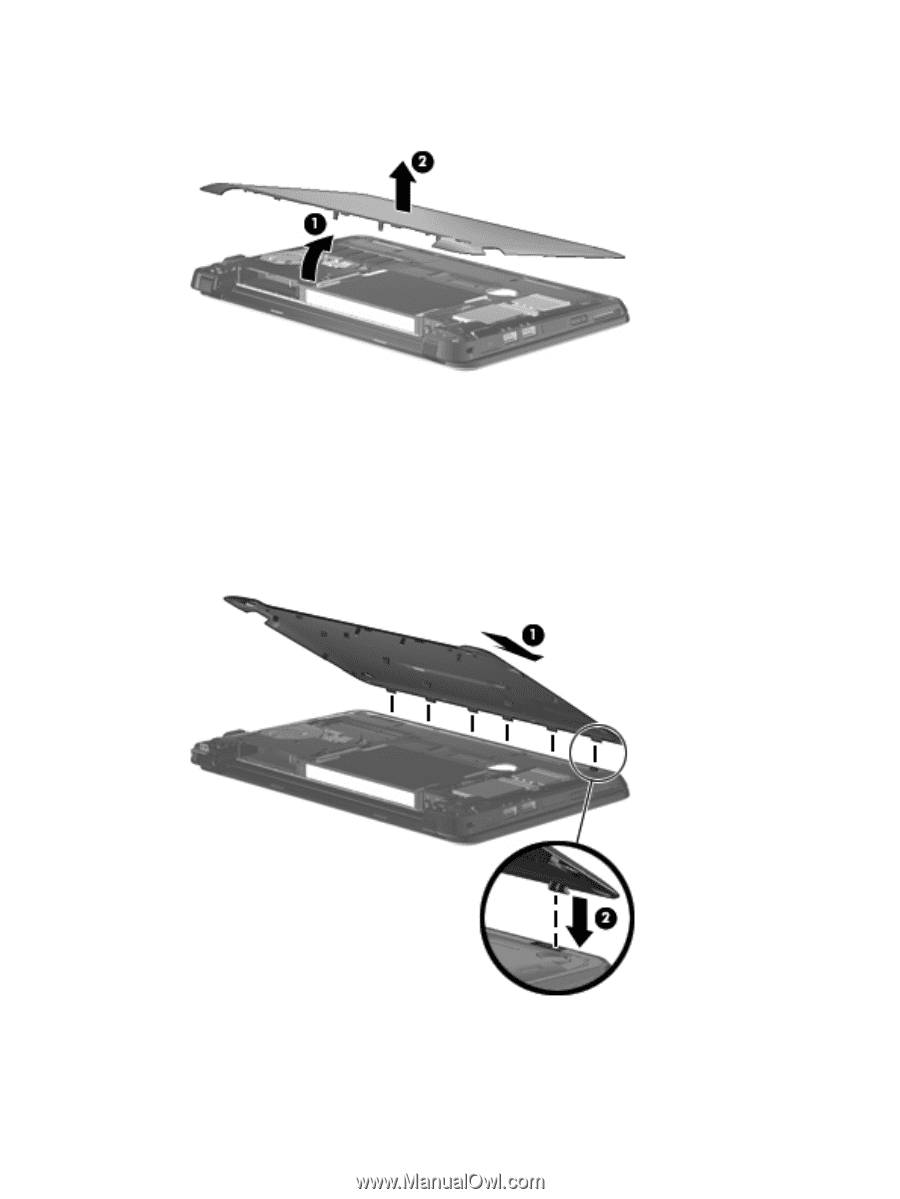
7.
Lift the bottom edge of the vanity cover
(1)
at an angle, and then lift the vanity cover away from the
base
(2)
.
Replacing the vanity cover
Replace the vanity cover after accessing the memory module compartment, SIM card insertion slot,
regulatory label, and other important components. To replace the vanity cover:
1.
Place the vanity cover
(1)
above the computer at an angle with the front edge facing the front of
the computer.
2.
Seat the back edge of the vanity cover over the back edge of the computer by aligning, and then
inserting the six tabs into the slots in the base
(2)
.
Identifying the hardware
11