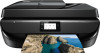
HP Officejet 5000 User Guide
HP Officejet 5000 Manual
 |
View all HP Officejet 5000 manuals
Add to My Manuals
Save this manual to your list of manuals |
HP Officejet 5000 manual content summary:
- HP Officejet 5000 | User Guide - Page 1
HP OfficeJet 5200 All-in-One series - HP Officejet 5000 | User Guide - Page 2
- HP Officejet 5000 | User Guide - Page 3
Printer parts ...5 Control panel and status lights ...7 Paper basics ...9 Load media ...11 Load original ...16 Update the printer ...18 Open the HP printer software (Windows) ...19 Use the HP Smart app to print, scan, and troubleshoot from an iOS, Android, or Windows 10 device 19 Turn the printer - HP Officejet 5000 | User Guide - Page 4
87 Use Wi-Fi Direct ...88 9 Printer management tools ...92 The HP Smart app ...92 Toolbox (Windows) ...92 HP Utility (OS X and macOS) ...92 Embedded web server ...93 10 Solve a problem ...96 Jams and paper-feed issues ...96 Ink cartridge issues ...102 Printing issues ...103 Copy issues ...111 Scan - HP Officejet 5000 | User Guide - Page 5
Get help from the HP Smart app ...122 Understand printer reports ...122 Solve problems using Web Services ...123 Maintain the printer ...124 Restore original factory defaults and settings 126 HP support ...126 Appendix A Technical information ...128 HP Company notices ...128 Specifications ...128 - HP Officejet 5000 | User Guide - Page 6
vi ENWW - HP Officejet 5000 | User Guide - Page 7
1 How do I? Learn how to use your HP OfficeJet 5200 series ● Get started on page 2 ● Print on page 21 ● Copy and scan on page 30 ● Fax on page 37 ● Web Services on page 76 ● Work with cartridges on page 79 ● Network setup on page 84 ● Solve a problem on page 96 ENWW 1 - HP Officejet 5000 | User Guide - Page 8
following topics: ● Accessibility ● HP EcoSolutions (HP and the Environment) ● Printer parts ● Control panel and status lights ● Paper basics ● Load media ● Load original ● Update the printer ● Open the HP printer software (Windows) ● Use the HP Smart app to print, scan, and troubleshoot from an iOS - HP Officejet 5000 | User Guide - Page 9
when a printer's wireless or Wi-Fi Direct capability is turned on or when a printer with fax, instructions to schedule the day and time for On and Off. 1. On the printer control panel display, from the Home screen, swipe left to see touch ( Setup ). ( Setup ), and then ENWW HP EcoSolutions (HP - HP Officejet 5000 | User Guide - Page 10
Quiet Mode on or off from the printer control panel 1. From the Home screen, touch ( Setup ). 2. Touch Quiet Mode. 3. Touch the toggle button to turn it on or off. To turn Quiet Mode on or off from the printer software (Windows) 1. Open the HP printer software. For more information, see Open the - HP Officejet 5000 | User Guide - Page 11
supplies such as ink and paper, try the following: ● Recycle used original HP ink cartridges through HP Planet Partners. For more information, visit www.hp.com/recycle. ● Optimize paper usage by printing on both sides of the paper. ● Change the print quality in the printer driver to a draft setting - HP Officejet 5000 | User Guide - Page 12
top views of HP OfficeJet 5200 All-in-One series Feature 1 2 3 4 5 6 7 8 9 10 11 12 13 14 15 16 Description Lid Lid-backing Scanner glass Document feeder Cartridge access door Paper path cover Ink cartridges On button (also referred to as the Power button) Front panel Printer display Output tray - HP Officejet 5000 | User Guide - Page 13
Back view Figure 2-2 Rear view of HP OfficeJet 5200 All-in-One series Feature 1 2 3 4 Description Fax port (2-EXT) Fax port (1-LINE) Power connection. Use only the power cord supplied by HP. Rear USB port Control panel and status lights Overview of buttons and lights The following diagram and - HP Officejet 5000 | User Guide - Page 14
the Web Services Summary menu, where you can check HP ePrint status details, change HP ePrint settings, or print an Info page. Wi-Fi Direct icon: Opens the Wi-Fi Direct menu where you can turn on Wi-Fi Direct, turn off Wi-Fi Direct, and display the Wi-Fi Direct name and password. Wireless icon - HP Officejet 5000 | User Guide - Page 15
Setup ), and then touch TIP: Touch (Home) to return to the Home screen. Paper basics The printer is designed to work well with most types of office paper. It is best to test a variety of print paper types before buying large quantities. Use HP paper for optimum print quality. Visit the HP website - HP Officejet 5000 | User Guide - Page 16
. Photo printing ● HP Premium Plus Photo Paper HP Premium Plus Photo Paper is HP's highest-quality photo paper for your best photos. With HP Premium Plus Photo Paper, you can print beautiful photos that are instant-dry so you can share them right off the printer. The printer supports several sizes - HP Officejet 5000 | User Guide - Page 17
. ● Load only one type of paper at a time into a tray or document feeder. ● When loading the tray and document feeder, make sure the paper is loaded correctly. ● Do not overload the tray or document feeder. ● To prevent jams, poor print quality, and other printing problems, avoid loading the - HP Officejet 5000 | User Guide - Page 18
Load paper. ● Remove all paper from the paper tray, and then load the photo paper print side facing down and HP logos facing up. ● Slide the photo paper forward until it stops. ● Slide the paper-width guides firmly against the edge of the photo paper. 4. Push the paper tray back into the printer and - HP Officejet 5000 | User Guide - Page 19
manually. 6. Change or retain the paper settings on the printer display. To load full-size paper 1. Open the paper tray door. 2. Pull the paper tray out and slide the paper-width guides outward. 3. Load paper. ● Insert a stack of paper into the paper tray with the short edge forward and the print - HP Officejet 5000 | User Guide - Page 20
tray back in and close the paper tray door. 5. Pull out the tray extender manually. 6. Change or retain the paper settings on the printer display. To load legal paper 1. Open the paper tray door. 2. Pull out the paper tray, slide the paper-width guides outward, and then remove any previously loaded - HP Officejet 5000 | User Guide - Page 21
● Slide the paper-width guides inward until they stop at the edges of the paper. 4. Push the paper tray back in. The paper tray door should stay open, with the paper sticking out. 5. Pull out the tray extender manually. 6. Change or retain the paper settings on the printer display. To load envelopes - HP Officejet 5000 | User Guide - Page 22
it stops. ● Slide the paper-width guides inward against the stack of envelopes until they stop. 4. Push the paper tray back in and close the paper tray door. 5. Pull out the tray extender manually. 6. Select the loaded envelope type in the Paper Size menu on the printer display. Load original To - HP Officejet 5000 | User Guide - Page 23
2. Load the original print side down on the right front corner of the glass. 3. Close the scanner lid. To load an original in the document feeder 1. Open the document feeder cover. 2. Slide paper-width guides outwards. ENWW Load original 17 - HP Officejet 5000 | User Guide - Page 24
width guides inward until they stop at the edge of paper. Update the printer By default, if the printer is connected to a network and Web Services has been enabled, the printer automatically checks for updates. To update the printer using the printer control panel 1. On the printer control panel - HP Officejet 5000 | User Guide - Page 25
throughout this guide. After installing the HP printer software, depending on your operating system, do one of the following: NOTE: If you are using the HP Smart app instead of the printer software, see Use the HP Smart app to print, scan, and troubleshoot from an iOS, Android, or Windows 10 device - HP Officejet 5000 | User Guide - Page 26
will automatically detect the printer. Get more information about the HP Smart app For basic instructions on how to print, scan, and troubleshoot using HP Smart, see Print using the HP Smart app on page 21, Scan using the HP Smart app on page 31 and Get help from the HP Smart app on page 122. For - HP Officejet 5000 | User Guide - Page 27
Load paper in the input tray. For more information, see Load media on page 11. 2. Open HP Smart. For more information, see Use the HP Smart app to print, scan, and troubleshoot from an iOS, Android, or Windows 10 device on page 19. 3. On the HP Smart Home screen, make sure your printer is selected - HP Officejet 5000 | User Guide - Page 28
from your device, cloud storage, or social media sites. 4. Select the photo or document you want to print. 5. Tap Print. Print documents using HP printer software To print documents (Windows) 1. Load paper in the input tray. For more information, see Load media on page 11. 2. From your software - HP Officejet 5000 | User Guide - Page 29
( www.hp.com/go/mobileprinting ). (At this time, this website might not be available in all languages.) To print a photo from the computer (Windows) 1. Load paper in the input tray. For more information, see Load media on page 11. 2. From your software, select Print. 3. Make sure your printer is - HP Officejet 5000 | User Guide - Page 30
on page 27. NOTE: If you change the paper size, be sure to load the correct paper in the input tray and set the paper size on the printer control panel. 6. Click OK to close the Properties dialog box. 7. Click Print or OK to begin printing. To print envelopes (OS X and macOS) 1. From the File menu - HP Officejet 5000 | User Guide - Page 31
, on iOS, Android, Windows Mobile, Chromebook and Amazon Kindle. To print from apps on your mobile devices 1. Make sure your printer is connected to the same network as your mobile device. 2. Enable printing on your mobile device: ● iOS: Use the Print option from the Share menu. No setup is required - HP Officejet 5000 | User Guide - Page 32
or later are supported by the HP Print Service Plugin. Devices running Android 4.3 or earlier can print using the HP ePrint app, available in the Google Play Store. ● Windows Mobile: Tap Print from the Device menu. No setup is required since the software is preinstalled. NOTE: If your printer is not - HP Officejet 5000 | User Guide - Page 33
on both sides (duplexing) on page 25. Ink tips ● ● If the print quality is not acceptable, see Printing issues on page 103 for more information. Use Original HP cartridges. Original HP cartridges are designed and tested with HP printers and papers to help you easily produce great results, time - HP Officejet 5000 | User Guide - Page 34
paper (not just one page). All the paper in the stack should be of the same size and type to avoid a paper jam. ● Load paper with the print-side down. ● Ensure that paper loaded in the input tray lays flat and the edges are not bent or torn. Printer settings tips (Windows) ● To change default print - HP Officejet 5000 | User Guide - Page 35
page and layout settings: - Orientation: Select Portrait for vertical prints or Landscape for horizontal prints. - Print on Both Sides Manually: Manually flip the pages after one side of the paper prints out so that you can print on both sides of the paper. ○ Flip on Long Edge: Select it if you want - HP Officejet 5000 | User Guide - Page 36
changing the paper type and size, adjusting the darkness of the copy, and resizing the copy. To make a copy 1. Load the original print side up into the document feeder, or load the original print side down on the right front corner of the scanner glass. 2. On the printer control panel display, from - HP Officejet 5000 | User Guide - Page 37
the printer scanner 1. Load the original print-side up in the document feeder, or load the original print-side down on the right front corner of the scanner glass. 2. Open HP Smart. For more information, see Use the HP Smart app to print, scan, and troubleshoot from an iOS, Android, or Windows 10 - HP Officejet 5000 | User Guide - Page 38
, so that you can use to adjust a previously scanned document or photo on your device. 1. Open HP Smart. For more information, see Use the HP Smart app to print, scan, and troubleshoot from an iOS, Android, or Windows 10 device on page 19. 2. Select Scan, and then select Import Local. 3. Select the - HP Officejet 5000 | User Guide - Page 39
the document feeder, or load the original print side down on the right front corner of the scanner glass. 2. Open the HP printer software. For more information, see Open the HP printer software (Windows) on page 19. 3. In the printer software, under Print, Scan & Fax , click Scan , and then click - HP Officejet 5000 | User Guide - Page 40
to email from HP printer software (Windows) 1. Load the original print side up into the document feeder, or load the original print side down on the right front corner of the scanner glass. 2. Open the HP printer software. For more information, see Open the HP printer software (Windows) on page 19 - HP Officejet 5000 | User Guide - Page 41
finished changing settings, do one of the following. ● Click more about using the HP Scan software. Click here printer control panel To scan an original from the printer control panel 1. Load the original print side up into the document feeder, or load the original print side down on the right front - HP Officejet 5000 | User Guide - Page 42
offers basic scan options. For additional scan options or functionality, scan from the HP printer software. 1. Load the original print-side up in the document feeder, or load the original print-side down on the right front corner of the scanner glass. 2. Open the embedded web server. For more - HP Officejet 5000 | User Guide - Page 43
used numbers. From the printer control panel, you can also set setup test from the printer control panel. ● Send a fax ● Receive a fax ● Set up phone book contacts ● Change fax settings ● Fax and digital phone services or color fax by using the printer control panel. NOTE: Send single-page faxes - HP Officejet 5000 | User Guide - Page 44
To send a standard fax from the printer control panel 1. Load the original print side up into the document feeder, or load the original print side down on the right front corner of the scanner glass. 2. From the printer control panel display, touch Fax . 3. Touch Send Now. 4. Touch Enter Fax Number - HP Officejet 5000 | User Guide - Page 45
recognized by the calling card service. If this is the case, create a phone book contact to store the PIN for your calling card. NOTE: Make sure the volume is turned on to hear a dial tone. To send a fax using monitor dialing from the printer control panel 1. Load the original print side up into the - HP Officejet 5000 | User Guide - Page 46
Method is turned on. a. From the printer control panel display, touch Fax . b. Touch Setup , and then touch Preferences . c. Set Scan and Fax Method to on. 2. Load the original print side up into the document feeder, or load the original print side down on the right front corner of the scanner glass - HP Officejet 5000 | User Guide - Page 47
that it fits on the paper that is loaded. If you have disabled the Auto Reduction feature, the printer prints the fax on two pages. NOTE: If you are copying a document when a fax arrives, the fax is stored in the printer memory until the copying finishes. ● Receive a fax manually ● Set up backup fax - HP Officejet 5000 | User Guide - Page 48
To set backup fax from the printer control panel 1. From the printer control panel display, touch Fax . 2. Touch Setup . 3. Touch Preferences . 4. exists that prevents the printer from printing the faxes (for example, if the printer runs out of paper). The printer continues to store incoming faxes - HP Officejet 5000 | User Guide - Page 49
prevents the printer from printing (for example, the printer runs out of paper), the printer stops answering printer control panel 1. From the printer control panel display, touch Fax . 2. Touch Setup . 3. Touch Preferences . 4. Touch Fax Forwarding. 5. Touch On (Print and Forward) to print - HP Officejet 5000 | User Guide - Page 50
first page is printed on a second page. Auto Reduction is useful when you receive a Legal-size fax and Letter-size paper is loaded in the main tray. To set automatic reduction from the printer control panel 1. From the printer control panel display, touch Fax . 2. Touch Setup . 3. Touch Preferences - HP Officejet 5000 | User Guide - Page 51
up or modify HP Digital Fax (Windows) 1. Open the HP printer software. For more information, see Open the HP printer software (Windows) on page 19. 2. In the printer software, under Print, Scan & Fax , click Fax , and then click Digital Fax Setup Wizard . 3. Follow the onscreen instructions. ENWW - HP Officejet 5000 | User Guide - Page 52
. 3. Click Digital Fax Archive in the Fax Settings section. To turn off HP Digital Fax 1. From the printer control panel display, touch Fax . 2. Touch Setup . 3. Touch Preferences and then touch HP Digital Fax. 4. Touch Turn Off HP Digital Fax. 5. Touch Yes. Set up phone book contacts You can set - HP Officejet 5000 | User Guide - Page 53
phone book contacts NOTE: Before you can create a group phone book contact, you must have already created at least one phone book contact. 1. From the printer control panel display, touch Fax . 2. Touch Phone Book. 3. Touch Group Contacts. 4. Touch (Plus Sign) to add a group. 5. Touch Name and - HP Officejet 5000 | User Guide - Page 54
the getting started guide that came with the printer, use the following prints your name and fax number on the top of every fax you send. HP recommends that you set up the fax header by using the HP software provided with the printer. You can also set up the fax header from the printer control panel - HP Officejet 5000 | User Guide - Page 55
setting if you want to receive faxes manually. You must be available to respond in person to the incoming fax call or else the printer does not receive faxes. To set the answer mode 1. From the printer control panel display, touch Fax . 2. Touch Setup , and then touch Preferences . 3. Touch Auto - HP Officejet 5000 | User Guide - Page 56
and then follow the onscreen instructions. NOTE: If the From the printer control panel display, touch Fax . 2. Touch Setup , and problem redial: If this option is turned on, the printer redials automatically if there has been a problem connecting with the receiving fax machine. Connection problem - HP Officejet 5000 | User Guide - Page 57
To set the redial options 1. From the printer control panel display, touch Fax . 2. Touch Setup , and then touch Preferences . 3. Touch Auto Redial . 4. Touch Busy Redial , or No Answer Redial , or Connection Problem Redial . Set the fax speed You can set the fax speed used to communicate between - HP Officejet 5000 | User Guide - Page 58
your Internet faxing services support department or your local service provider for further assistance. Use reports You can set up the printer to print error reports and confirmation reports automatically for each fax you send and receive. You can also manually print system reports as required - HP Officejet 5000 | User Guide - Page 59
fax confirmation 1. From the printer control panel display, touch Fax . 2. Touch Setup . 3. Touch Reports and touch Fax Confirmation . 4. Touch to select one of the following options. Off On (Fax Send) On (Fax Receive) On (Fax Send and Fax Receive) Does not print a fax confirmation report when - HP Officejet 5000 | User Guide - Page 60
is an error during transmission or reception. To set the printer to print fax error reports automatically 1. From the printer control panel display, touch Fax . 2. Touch Setup . 3. Touch Reports and touch Fax Error Report. 4. Touch to select one of the following. On (Fax Send and Fax Receive) Off - HP Officejet 5000 | User Guide - Page 61
NOTE: You cannot print the call history. To view the call history 1. From the printer control panel display, touch Fax . 2. Touch Send Now. 3. Touch ( Phone Book ). 4. Touch Call History . Additional fax setup After completing all the steps in the Getting Started Guide, use the instructions in this - HP Officejet 5000 | User Guide - Page 62
printer. NOTE: If you have a parallel-type phone system, HP setup for your home or office ● Case A: Separate fax line (no voice calls received) ● Case B: Set up the printer with DSL ● Case C: Set up the printer with a PBX phone system or an ISDN line ● Case D: Fax with a distinctive ring service - HP Officejet 5000 | User Guide - Page 63
at the same number you use for fax calls on the printer. 3. From the following table, select the combination of equipment and services applicable to your home or office setting. Then look up the recommended fax setup. Step-by-step instructions are included for each case in the sections that follow - HP Officejet 5000 | User Guide - Page 64
Answering ring service calls up modem machine Voice mail service Recommended fax setup Case D: Fax with a distinctive ring service on the connected on this phone line, set up the printer as described in this section. Figure 5-1 Back view of the printer 1 2 58 Chapter 5 Fax Telephone wall - HP Officejet 5000 | User Guide - Page 65
tones to the sending fax machine and receives the fax. Case B: Set up the printer with DSL If you have a DSL service through your telephone company, and do not connect any equipment to the printer, use the instructions in this section to connect a DSL filter between the telephone wall jack and the - HP Officejet 5000 | User Guide - Page 66
setup. 3. Connect an additional phone cord from the DSL filter to the telephone wall jack. 4. Run a fax test. If you encounter problems setting up the printer with optional equipment, contact your local service printer. Refer to the documentation that came with your PBX phone system for instructions - HP Officejet 5000 | User Guide - Page 67
the Ring Pattern Detection feature in the printer control panel to set distinctive ring. With this feature, the printer recognizes and records the ring pattern the fax. If you encounter problems setting up the printer with optional equipment, contact your local service provider or vendor for further - HP Officejet 5000 | User Guide - Page 68
. If you pick up the phone before the printer answers the call and hear fax tones from a sending fax machine, you need to answer the fax call manually. If you encounter problems setting up the printer with optional equipment, contact your local service provider or vendor for further assistance. 62 - HP Officejet 5000 | User Guide - Page 69
in person to incoming fax calls, or the printer cannot receive faxes. You must initiate the manual fax before voicemail picks up the line. If you encounter problems setting up the printer with optional equipment, contact your local service provider or vendor for further assistance. Case G: Fax - HP Officejet 5000 | User Guide - Page 70
port labeled 2-EXT on the back of the printer. 3. Connect one end of the phone cord to your telephone wall printer begins emitting fax reception tones to the sending fax machine and receives the fax. If you encounter problems setting up the printer with optional equipment, contact your local service - HP Officejet 5000 | User Guide - Page 71
line and use that phone line to send faxes, follow these instructions to set up your fax. 1 Telephone wall jack. 2 Parallel splitter. 3 DSL/ADSL filter. Connect one end of the phone cord to the 1-LINE port on the back of the printer. Connect the other end of the cord to the DSL/ADSL - HP Officejet 5000 | User Guide - Page 72
the fax. If you encounter problems setting up the printer with optional equipment, contact your local service provider or vendor for further also called a coupler), as shown in the illustration. (A parallel splitter has one RJ-11 port on the front and two RJ-11 ports on the back. Do not use a two- - HP Officejet 5000 | User Guide - Page 73
the back of the printer. 3. Connect a phone to the "OUT" port on the back of your computer dial-up modem. 4. Connect one end of the phone to answer the fax call manually. If you encounter problems setting up the printer with optional equipment, contact your local service provider or vendor for - HP Officejet 5000 | User Guide - Page 74
parts of the home/office sharing the same phone number with DSL service need to be connected to additional DSL filters to avoid noise when making voice calls. 2. Using the phone cord supplied in the box with the printers, connect one end to the DSL filter, then connect the other end to the - HP Officejet 5000 | User Guide - Page 75
the fax. If you encounter problems setting up the printer with optional equipment, contact your local service provider or vendor for further printer, fax tones from a sending fax machine might be recorded on your answering machine, and you might not receive faxes with the printer. 3. Connect one end - HP Officejet 5000 | User Guide - Page 76
Answer setting on the printer to the maximum number of rings supported by your printer. (The maximum number problems setting up the printer with optional equipment, contact your local service in the illustration. (A parallel splitter has one RJ-11 port on the front and two RJ-11 ports on the back - HP Officejet 5000 | User Guide - Page 77
the back of the printer. You might need to ) To set up the printer on the same phone line on the back of the printer. 2. Find the phone the back of the printer. 3. Unplug your answering modem). 4. Connect one end of the phone the back of the printer. NOTE: You might telephone to the printer. You can - HP Officejet 5000 | User Guide - Page 78
If you encounter problems setting up the printer with optional equipment, contact your local service provider or printer. You might need to connect the phone cord to your country/region adapter. NOTE: You need to purchase a parallel splitter. A parallel splitter has one RJ-11 port on the front - HP Officejet 5000 | User Guide - Page 79
same phone line for telephone, fax, and have a computer DSL modem, follow these instructions to set up your fax. If you encounter problems setting up the printer with optional equipment, contact your local service provider or vendor for further assistance. Case K: Shared voice/fax line with computer - HP Officejet 5000 | User Guide - Page 80
called a coupler), as shown in the illustration. (A parallel splitter has one RJ-11 port on the front and two RJ-11 ports on the back. Do not use a two Remove the white plug from the port labeled 2-EXT on the back of the printer. 2. Find the phone cord that connects from the back of your computer ( - HP Officejet 5000 | User Guide - Page 81
information on how to fix the problem and rerun the test. To test fax setup via the printer control panel 1. Set up the printer for faxing according to your particular home or office setup instructions. 2. Make sure the cartridges are installed, and that full-size paper is loaded in the input tray - HP Officejet 5000 | User Guide - Page 82
to print, and get help for HP ePrint . Set up Web Services Before you set up Web Services, make sure your printer is connected to the Internet. To set up Web Services, use one of the following methods. To set up Web Services using the printer control panel 1. On the printer control panel display - HP Officejet 5000 | User Guide - Page 83
to the server, the printer prints an information page. Follow the instructions on the information page to finish the setup. To set up Web Services using the HP printer software (Windows) 1. Open the HP printer software. For more information, see Open the HP printer software (Windows) on page 19 - HP Officejet 5000 | User Guide - Page 84
Home screen, touch ( Setup ). 2. Touch Web Services. 3. Touch Display Email Address. NOTE: Touch Print Info to print an information page that contains the printer code and instructions on how to customize the email address. To turn off HP ePrint 1. On the printer control panel display, from the - HP Officejet 5000 | User Guide - Page 85
its side, back, front, or top. Related topics ● Check the estimated ink levels on page 79 Check the estimated ink levels You can check the estimated ink levels from the printer software, printer control panel or HP Smart. To check the estimated ink levels from the printer control panel ▲ From Home - HP Officejet 5000 | User Guide - Page 86
(Windows) 1. Open the HP printer software. 2. In the printer software, click Estimated Levels. To check the ink levels from the HP printer software (OS X and macOS) 1. Open HP Utility. NOTE: HP Utility is located in the HP folder in the Applications folder. 2. Select the HP OfficeJet 5200 series - HP Officejet 5000 | User Guide - Page 87
b. Open the latch on the cartridge slot. And then remove the cartridge from the slot. 3. Insert a new cartridge. a. Remove the cartridge from packaging. b. Remove plastic tape using the pull tab. ENWW Replace the cartridges 81 - HP Officejet 5000 | User Guide - Page 88
information, see www.support.hp.com, and search for HP Smart. NOTE: The Setup cartridge that comes with the printer is not available for separate purchase. Use single-cartridge mode Use the single-cartridge mode to operate the HP OfficeJet 5200 series with only one ink cartridge. The singlecartridge - HP Officejet 5000 | User Guide - Page 89
cartridge. When plastic tape covers the ink cartridge contacts, the printer cannot detect that the ink cartridge is installed. Exit single-cartridge mode ● Install two ink cartridges in the HP OfficeJet 5200 series to exit single-cartridge mode. Store printing supplies Cartridges can be left in the - HP Officejet 5000 | User Guide - Page 90
printer wirelessly, visit the HP Wireless Printing Center ( www.hp.com/go/wirelessprinting ). TIP: You can use HP Smart to set up printers on your wireless network. For more information about getting the app, see Use the HP Smart app to print, scan, and troubleshoot from an iOS, Android, or Windows - HP Officejet 5000 | User Guide - Page 91
and Android mobile devices.) NOTE: HP Smart uses Bluetooth for printer setup only. Printing using Bluetooth is not supported. 2. Open the HP Smart app. 3. Windows: On the home screen, click or tap Setup a new printer and follow the onscreen instructions to add a printer to your network. iOS/Android - HP Officejet 5000 | User Guide - Page 92
is currently connected to a wireless network. 2. Open the HP Smart app. For information about how to open the app on a Windows 10 computer, see Use the HP Smart app to print, scan, and troubleshoot from an iOS, Android, or Windows 10 device on page 19. 3. Make sure your printer is selected. TIP: If - HP Officejet 5000 | User Guide - Page 93
firewall settings). To print network settings Do one of the following: ● On the printer control panel display, from the Home screen, touch (Wireless) to display the network status screen. Touch Print Info to print the network configuration page. ● On the printer control panel display, from the - HP Officejet 5000 | User Guide - Page 94
first and then install the printer software. Select Wireless when prompted by the printer software for a connection type. - If you are using a mobile device, make sure you have installed a compatible printing app. For more information about mobile printing, visit www.hp.com/global/us/en/eprint - HP Officejet 5000 | User Guide - Page 95
name from the list of wireless networks shown such as DIRECT-**- HP OfficeJet 5200 series (where ** are the unique characters to identify your printer). Enter the Wi-Fi Direct password when prompted. NOTE: To obtain Wi-Fi Direct password, on the printer control panel display, from the Home screen - HP Officejet 5000 | User Guide - Page 96
name from the list of wireless networks shown such as DIRECT-**- HP OfficeJet 5200 series (where ** are the unique characters to identify your printer). Enter the Wi-Fi Direct password when prompted. NOTE: To obtain Wi-Fi Direct password, on the printer control panel display, from the Home screen - HP Officejet 5000 | User Guide - Page 97
Click here for online troubleshooting for Wi-Fi Direct, or for more help with setting up Wi-Fi Direct. At this time, this website might not be available in all languages. ENWW Use Wi-Fi Direct 91 - HP Officejet 5000 | User Guide - Page 98
can view ink status, printer and network information. You can also print diagnostic reports, access print quality tools, and view and change printer settings. For more information about the HP Smart app, see Use the HP Smart app to print, scan, and troubleshoot from an iOS, Android, or Windows 10 - HP Officejet 5000 | User Guide - Page 99
clear them manually. You can printer, if you disable cookies, you also disable one or more of the following features: ● Using some setup printer by touching configuration page. (Wireless) or by printing a network NOTE: The printer must be on a network and must have an IP address. 2. In a supported - HP Officejet 5000 | User Guide - Page 100
wireless on, search for and connect to the Wi-Fi Direct name, for example: DIRECT-**- HP OfficeJet 5200 series (where ** are the unique characters to identify your printer). Enter the Wi-Fi Direct password when prompted. NOTE: To obtain Wi-Fi Direct password, on the printer control panel display - HP Officejet 5000 | User Guide - Page 101
is correct. To find out the printer IP address, on the printer control panel display, from the Home screen, touch (Wireless). To obtain the printer IP address by printing a network configuration page, on the printer control panel display, from the Home screen, touch ( Setup ), touch Tools, and then - HP Officejet 5000 | User Guide - Page 102
problems using Web Services ● Maintain the printer ● Restore original factory defaults and settings ● HP support Jams and paper-feed issues What do you want to do? Clear a paper jam Solve paper jam issues Use an HP online troubleshooting wizard. Instructions for clearing the jam in the printer - HP Officejet 5000 | User Guide - Page 103
To clear an internal paper jam CAUTION: Avoid pulling jammed paper from the front of the printer. Instead follow the steps below to clear the jam. Pulling out jammed paper from the front of the printer might cause the paper to tear and leave torn pieces inside the printer; this could result in more - HP Officejet 5000 | User Guide - Page 104
on the control panel to continue the current job. 2. If the problem is not resolved, check the print carriage area inside the printer. CAUTION: During the process, avoid touching the cable attached to the print carriage. a. Open the cartridge access door. b. If there is any jammed paper, move the - HP Officejet 5000 | User Guide - Page 105
control panel to continue the current job. To get help from the print display, touch Help from the Home screen, touch How to Videos, and then touch Clear Carriage Jam. 3. If the problem is still not resolved, check the tray area. a. Pull out the paper tray to extend it. b. Carefully turn the printer - HP Officejet 5000 | User Guide - Page 106
remove all the pieces of paper from the printer, more paper jams are likely to occur. 3. Close the document feeder cover, pressing down firmly until it snaps into place. Clear a print carriage jam Resolve a print carriage jam. Use an HP online troubleshooting wizard If something is blocking the - HP Officejet 5000 | User Guide - Page 107
load paper when the printer is printing. Solve paper-feed problems What kind of problem are you having? ● Paper is not picked up from a tray ● Make sure paper is loaded in the tray. For more information, see Load media on page 11. Fan the paper before loading. ● Make sure the paper-width guides are - HP Officejet 5000 | User Guide - Page 108
problem, try removing the ink cartridges, verifying the protective piece of plastic tape has been removed from each ink cartridge, and then reinserting the ink any of the ink or other debris elsewhere on the cartridge. 6. On the inside of the printer, locate the contacts in the print carriage. The - HP Officejet 5000 | User Guide - Page 109
one ink cartridge is causing problems, you can remove it and use the single-cartridge mode to operate the HP OfficeJet 5200 series with only one cartridge. Printing issues What do you want to do? Fix problems with page not printing (unable to print) HP Print and Scan Doctor Troubleshoot problems - HP Officejet 5000 | User Guide - Page 110
. d. Try using your printer again. 5. Restart the print spooler. To restart the print spooler a. Depending on your operating system, do one of the following: Windows 10 i. From the Windows Start menu, select Windows Administrative Tools from the app list, and then select Services. ii. Right-click - HP Officejet 5000 | User Guide - Page 111
the computer. 7. Clear the print queue. To clear the print queue a. Depending on your operating system, do one of the following: ● Windows 10: From the Windows Start menu, select Windows System from the app list, select Control Panel, and then click View devices and printers under Hardware and Sound - HP Officejet 5000 | User Guide - Page 112
and Printers. ● Windows Vista: From the Windows Start menu, click Control Panel, and then click Printers. ● Windows XP: From the Windows Start menu, click Control Panel, and then click Printers and Faxes. b. Double-click the icon for your printer to open the print queue. c. On the Printer menu - HP Officejet 5000 | User Guide - Page 113
the computer. Fix print quality issues Step-by-step instructions for resolving most print quality issues Troubleshoot print quality issues online Read general instructions in the Help for resolving print quality issues NOTE: To avoid print quality problems, always turn the printer off using the - HP Officejet 5000 | User Guide - Page 114
, under Print, Scan & Fax , in the Print section, click Maintain Your Printer to access the printer toolbox. d. Click Clean Printheads on the Device Services tab. Follow the onscreen instructions. 8. If cleaning the printhead does not solve the problem, contact HP support. Go to www.support.hp.com - HP Officejet 5000 | User Guide - Page 115
Select your printer from the list of devices at the left of the window. d. Click Align. e. Click Align and follow the onscreen instructions. f. Click All Settings to return to the Information and Support pane. 6. Print a test page. To print a test page a. Load Letter or A4 plain, white paper in the - HP Officejet 5000 | User Guide - Page 116
instructions. 5. Print a diagnostics page if the cartridges are not low on ink. To print a diagnostics page from the printer display a. Load letter or A4 unused plain white paper into the input tray. b. On the printer control panel display, from the Home screen, swipe left to see touch ( Setup - HP Officejet 5000 | User Guide - Page 117
b. On the printer control panel display, from the Home screen, swipe left to see touch ( Setup ). ( Setup ) and c. Touch Tools , touch Clean Cartridges, and then follow the onscreen instructions. 7. If cleaning the printhead does not solve the problem, contact HP support. Go to www.support.hp.com - HP Officejet 5000 | User Guide - Page 118
● Checks for an active phone line To test fax setup via the printer control panel 1. Set up the printer for faxing according to your particular home or office setup instructions. 2. Make sure the ink cartridges are installed and that full-size paper is loaded in the input tray before starting the - HP Officejet 5000 | User Guide - Page 119
printer problems. If prompted, select your country/region, and then click All HP Contacts for information on calling for technical support. the splitter and connecting the printer directly to the telephone wall jack. Plug the phone cord into the correct port 1. Connect one end of the phone cord - HP Officejet 5000 | User Guide - Page 120
● Connect one end of the phone cord to your telephone wall jack, then connect the other end to the port labeled 1-LINE on the back of the printer. 1 wall jack and the printer to make sure the phone cord is secure. ● If you are using a phone splitter, this can cause faxing problems. (A splitter is a - HP Officejet 5000 | User Guide - Page 121
them back one at a time and rerunning the test each time, until you identify which piece of equipment is causing the problem. - If the Fax Line Condition Test fails without the other equipment, connect the printer to a working phone line and continue reviewing the troubleshooting information in - HP Officejet 5000 | User Guide - Page 122
phone line. Troubleshoot fax problems. Troubleshoot fax problems. Use an HP online troubleshooting wizard. Resolve problems sending or receiving a fax or faxing to your computer. NOTE: The HP online troubleshooting wizards may not be available in all languages. Read general instructions in the - HP Officejet 5000 | User Guide - Page 123
Error Correction Mode on page 41. If the problem persists, contact your telephone company. ● If you are using a digital subscriber line (DSL) service, make sure that you have a DSL filter connected or you cannot fax successfully. ● Make sure the printer is not connected to a telephone wall jack that - HP Officejet 5000 | User Guide - Page 124
contact your DSL provider for support. ● If you are using a phone splitter, this can cause faxing problems. (A splitter is a manually; otherwise, the printer cannot receive the fax. For information on receiving faxes manually, see Receive a fax manually on page 42. ● If you have a voice mail service - HP Officejet 5000 | User Guide - Page 125
rings before answering on page 49. Network and connection issues What do you want to do? Fix wireless connection Choose one of the following troubleshooting options. HP Print and Scan Doctor The HP Print and Scan Doctor is a utility that will try to diagnose and fix the issue automatically. ENWW - HP Officejet 5000 | User Guide - Page 126
HP online troubleshooting wizards may not be available in all languages. Read general instructions in the Help for wireless troubleshooting Check the network configuration or print the wireless test report to assist in diagnosing network connection issues. 1. From the printer control panel display - HP Officejet 5000 | User Guide - Page 127
not resolve the problem, contact HP. For more information about contacting HP support, see HP support on page 126. Get help from the printer control panel You can use the printer's help topics to learn more about the printer, and some help topics include animations that guide you through procedures - HP Officejet 5000 | User Guide - Page 128
panel. on the printer Get help from the HP Smart app The HP Smart app provides alerts for printer issues (jams and other problems), links to help content, and options to contact support for additional assistance. Understand printer reports You can print the following reports to help troubleshoot - HP Officejet 5000 | User Guide - Page 129
Print the web access report to help identify internet connectivity issues which can affect Web Services. Solve problems using Web Services If you are having problems using Web Services, such as HP ePrint , check the following: ● Make sure the printer is connected to the Internet using an wireless - HP Officejet 5000 | User Guide - Page 130
TIP: For additional help on setting up and using Web Services, visit HP Connected . This site might not be available in all countries/regions. Maintain the printer What do you want to do? Clean the scanner . 3. Close the scanner lid, and turn on the printer. 124 Chapter 10 Solve a problem ENWW - HP Officejet 5000 | User Guide - Page 131
from the printer control panel. Clean the document feeder If the document feeder picks up multiple pages or if it does not pick up plain paper, you can clean the rollers and separator pad. To clean the rollers or separator pad WARNING! Before cleaning the printer, turn the printer off by pressing - HP Officejet 5000 | User Guide - Page 132
mode. TIP: You can visit the HP online support website at www.support.hp.com for information and utilities that can help you correct many common printer problems. (Windows) Run the HP Print and Scan Doctor to diagnose and automatically fix printing, scanning, and copying issues. The application - HP Officejet 5000 | User Guide - Page 133
. If you did not register your printer while installing the software, you can register now at http://www.register.hp.com. Additional warranty options Extended service plans are available for the HP OfficeJet 5200 series at additional costs. Go to www.support.hp.com , select your country/region and - HP Officejet 5000 | User Guide - Page 134
/or other countries. Bluetooth is a trademark owned by its proprietor and used by HP Inc. under license. Specifications Technical specifications for the HP OfficeJet 5200 series are provided in this section. For more product specifications, see the Product Data Sheet at www.support.hp.com . ● System - HP Officejet 5000 | User Guide - Page 135
HP OfficeJet 5200 series may be slightly distorted. ● HP recommends using a USB cable less than or equal to 3 m (10 feet) in length to minimize injected noise due to potential high electromagnetic fields. Print specifications ● Print cm (8.5 x 11.7 inches) ● Supported File Types: BMP, JPEG, PNG, - HP Officejet 5000 | User Guide - Page 136
printing using maximum dpi, see Print using the maximum dpi on page 26. Acoustic information If you have Internet access, you can access acoustic information from the HP website. Regulatory notices The HP OfficeJet 5200 series name (HP OfficeJet 5200 All-in-One series, etc.) the instructions, may - HP Officejet 5000 | User Guide - Page 137
on, the user is encouraged to try to correct the interference by one or more of the following measures: ● Reorient or relocate the any changes or modifications made to this device that are not expressly approved by HP may void the user's authority to operate the equipment. This device complies with - HP Officejet 5000 | User Guide - Page 138
one Wireless functionality in Europe ● For products with 802.11 b/g/n or Bluetooth issues with existing radio services. - This product operates less. European telephone network declaration (Modem/Fax) HP products with FAX capability comply with the requirements of problems, you should contact - HP Officejet 5000 | User Guide - Page 139
HP recommends a compliant plug, jack and 2-wire telephone cord to connect this product to the premises wiring and telephone network. See installation instructions uninterrupted service. If trouble is experienced with this equipment, please contact the manufacturer, or look elsewhere in this manual, - HP Officejet 5000 | User Guide - Page 140
Switched Telephone Network (PSTN) gedacht. Schließen Sie den TAE N-Telefonstecker, der im Lieferumfang des HP All-in-One enthalten ist, an die Wandsteckdose (TAE 6) Code N an. Dieses HP-Fax kann als einzelnes Gerät und/oder in Verbindung (mit seriellem Anschluss) mit anderen zugelassenen Endger - HP Officejet 5000 | User Guide - Page 141
Declaration of conformity Declaration of conformity can be found at www.hp.eu/certificates. ENWW Regulatory notices 135 - HP Officejet 5000 | User Guide - Page 142
Declaration of conformity 136 Appendix A Technical information ENWW - HP Officejet 5000 | User Guide - Page 143
ENWW Regulatory notices 137 - HP Officejet 5000 | User Guide - Page 144
operation is minimized. This product and any attached external antenna, if supported, shall be placed in such a manner to minimize the potential . Notice to users in Canada (5 GHz) CAUTION: When using IEEE 802.11a wireless LAN, this product is restricted to indoor use, due to its operation in the - HP Officejet 5000 | User Guide - Page 145
Notice to users in Canada Under Industry Canada regulations, this radio transmitter may only operate using an antenna of a type and maximum (or lesser) gain approved for the transmitter by Industry Canada. To reduce potential radio interference to other users, the antenna type and its gain should be - HP Officejet 5000 | User Guide - Page 146
the National Telecommunications Commission. Environmental product stewardship program HP is committed to providing quality products in an environmentally Union Commission Regulation 1275/2008 ● Paper ● Plastics ● Safety data sheets ● Recycling program ● HP inkjet supplies recycling program ● Power - HP Officejet 5000 | User Guide - Page 147
(China) ● China Energy Label for Printer, Fax and Copier ● Battery disposal in wireless network ports are activated, please refer to section P14 'Additional Information' of the product IT ECO Declaration at www.hp.com/hpinfo/globalcitizenship/ environment/productdata/itecodesktop-pc.html. Paper - HP Officejet 5000 | User Guide - Page 148
print cartridges and ink cartridges free of charge. For more information, go to the following website: www.hp.com/hpinfo/globalcitizenship/environment/recycle/ Power consumption HP printing household waste disposal service, or go to http://www.hp.com/recycle. Chemical substances HP is committed to - HP Officejet 5000 | User Guide - Page 149
that the restricted substance corresponds to the exemption. www.support.hp.com To access the latest user guides or manuals for your product, go to www.support.hp.com. Select Find your product, and then follow the onscreen instructions. ENWW Environmental product stewardship program 143 - HP Officejet 5000 | User Guide - Page 150
The Table of Hazardous Substances/Elements and their Content (China) 有害物质 部件名称 铅 汞 镉 六价铬 多溴联苯 (Pb) (Hg) (Cd) (Cr(VI)) (PBB) 0 0 0 0 0 电线 0 0 0 0 0 X 0 0 0 0 打印系统 X 0 0 0 0 显示器 X 0 0 0 0 0 0 0 0 0 驱动光盘 X 0 0 0 0 扫描仪 X 0 0 0 0 - HP Officejet 5000 | User Guide - Page 151
registered products go to www.hp.com/hpinfo/globalcitizenship/environment/pdf/ epeat_printers.pdf. SEPA Ecolabel User Information (China) 63.0 dB(A China Energy Label for Printer, Fax and Copier GB 21521 1 3 1 2 GB 21521 W W W ENWW Environmental product - HP Officejet 5000 | User Guide - Page 152
the product. Any attempt to service or replace this battery should be performed by a qualified service technician. Battery notice for Brazil . Ao final da vida útil deste produto, o usuário deverá entregá-lo à HP. A não observância dessa orientação sujeitará o infrator às sanções previstas em lei - HP Officejet 5000 | User Guide - Page 153
jam or tray problem ● Out of paper ● Printer failure ● Door open ● Counterfeit Cartridge Advisory ● Incompatible cartridges ● Paper too short ● Please Connect to HP Instant Ink ● Paper Jam in Automatic Document Feeder ● HP Protected Cartridge Installed ● Used HP Instant Ink Cartridge ● Use SETUP - HP Officejet 5000 | User Guide - Page 154
, including in the initialization process, which prepares the printer and cartridges for printing. In addition, some residual ink is left in the cartridge after it is used. For more information see www.hp.com/go/inkusage . Cartridge problem The cartridge identified in the message is missing, damaged - HP Officejet 5000 | User Guide - Page 155
support on page 126. To order a genuine HP replacement cartridge online, see Order cartridges on page 82. For problems with cartridges obtained from HP Instant Ink, please visit the HP Instant Ink program website for more information. Paper jam or tray problem Paper has become jammed in the printer - HP Officejet 5000 | User Guide - Page 156
Power button) to turn on the printer. If this problem persists, write down the error code provided in the message, and then contact HP support. For more information about contacting HP support, see HP support on page 126. Door open Before the printer can print documents, all doors and covers must - HP Officejet 5000 | User Guide - Page 157
Please Connect to HP Instant Ink The printer must be connected to HP Instant Ink, otherwise you will be unable to print soon without further warning. See the printer control panel for instructions on connecting, or visit the HP Instant Ink program website for more information. Paper Jam in Automatic - HP Officejet 5000 | User Guide - Page 158
too long to auto-duplex The paper loaded is longer than supported by the printer automatic duplexing. You can manually duplex it by selecting "manual duplex" or "print odd pages" and "print even pages" in your printer software (if supported). For more information, see Paper basics on page 9 and Load - HP Officejet 5000 | User Guide - Page 159
up 44 both sides, print on 25 broadcast faxing send 40 buttons, control panel 7 C carriage clear carriage jams 100 cartridges 82 check ink levels 79 tips 79 clean 60 document feeder clean 125 feeding problems, troubleshoot 125 double-sided printing 25 DSL, fax setup with parallel phone systems 59 E - HP Officejet 5000 | User Guide - Page 160
, change 87 view and print settings 87 wireless communication setup 84 wireless settings 122 O OS X and macOS HP Utility 92 output tray locating 6 P paper clear jams 96 HP, order 11 selecting 11 skewed pages 101 troubleshoot feeding 101 paper-feed problems, troubleshoot 101 parallel phone systems - HP Officejet 5000 | User Guide - Page 161
reports 52 faxes 43 last fax details 54 specifications 129 troubleshoot 121 print quality report 123 printer control panel locating 6 network settings 87 send faxes 38 printer software (Windows) about 92 opening 19, 92 printer status report information on 122 pulse dialing 50 R radio interference - HP Officejet 5000 | User Guide - Page 162
114 hardware, failed 112 port connection, failed 113 setup 75 telephone wall jack 113 tone dialing 50 trays clear paper jams 96 locating 6 paper-width guides illustration 6 troubleshoot feeding 101 troubleshoot answering machines 119 control panel help system 121 embedded web server 94 fax 111
-
 1
1 -
 2
2 -
 3
3 -
 4
4 -
 5
5 -
 6
6 -
 7
7 -
8
-
9
-
10
-
11
-
12
-
13
-
14
-
15
-
16
-
17
-
18
-
19
-
20
-
21
-
22
-
23
-
24
-
25
-
26
-
27
-
28
-
29
-
30
-
31
-
32
-
33
-
34
-
35
-
36
-
37
-
38
-
39
-
40
-
41
-
42
-
43
-
44
-
45
-
46
-
47
-
48
-
49
-
50
-
51
-
52
-
53
-
54
-
55
-
56
-
57
-
58
-
59
-
60
-
61
-
62
-
63
-
64
-
65
-
66
-
67
-
68
-
69
-
70
-
71
-
72
-
73
-
74
-
75
-
76
-
77
-
78
-
79
-
80
-
81
-
82
-
83
-
84
-
85
-
86
-
87
-
88
-
89
-
90
-
91
-
92
-
93
-
94
-
95
-
96
-
97
-
98
-
99
-
100
-
101
-
102
-
103
-
104
-
105
-
106
-
107
-
108
-
109
-
110
-
111
-
112
-
113
-
114
-
115
-
116
-
117
-
118
-
119
-
120
-
121
-
122
-
123
-
124
-
125
-
126
-
127
-
128
-
129
-
130
-
131
-
132
-
133
-
134
-
135
-
136
-
137
-
138
-
139
-
140
-
141
-
142
-
143
-
144
-
145
-
146
-
147
-
148
-
149
-
150
-
151
-
152
-
153
-
154
-
155
-
156
-
157
-
158
-
159
-
160
-
161
-
162
 |
 |

HP
OfficeJet
5200 All-in-One series