HP Officejet J5700 Fax Getting Started Guide - Page 10
Step 3: Manage and con fax settings - install
 |
View all HP Officejet J5700 manuals
Add to My Manuals
Save this manual to your list of manuals |
Page 10 highlights
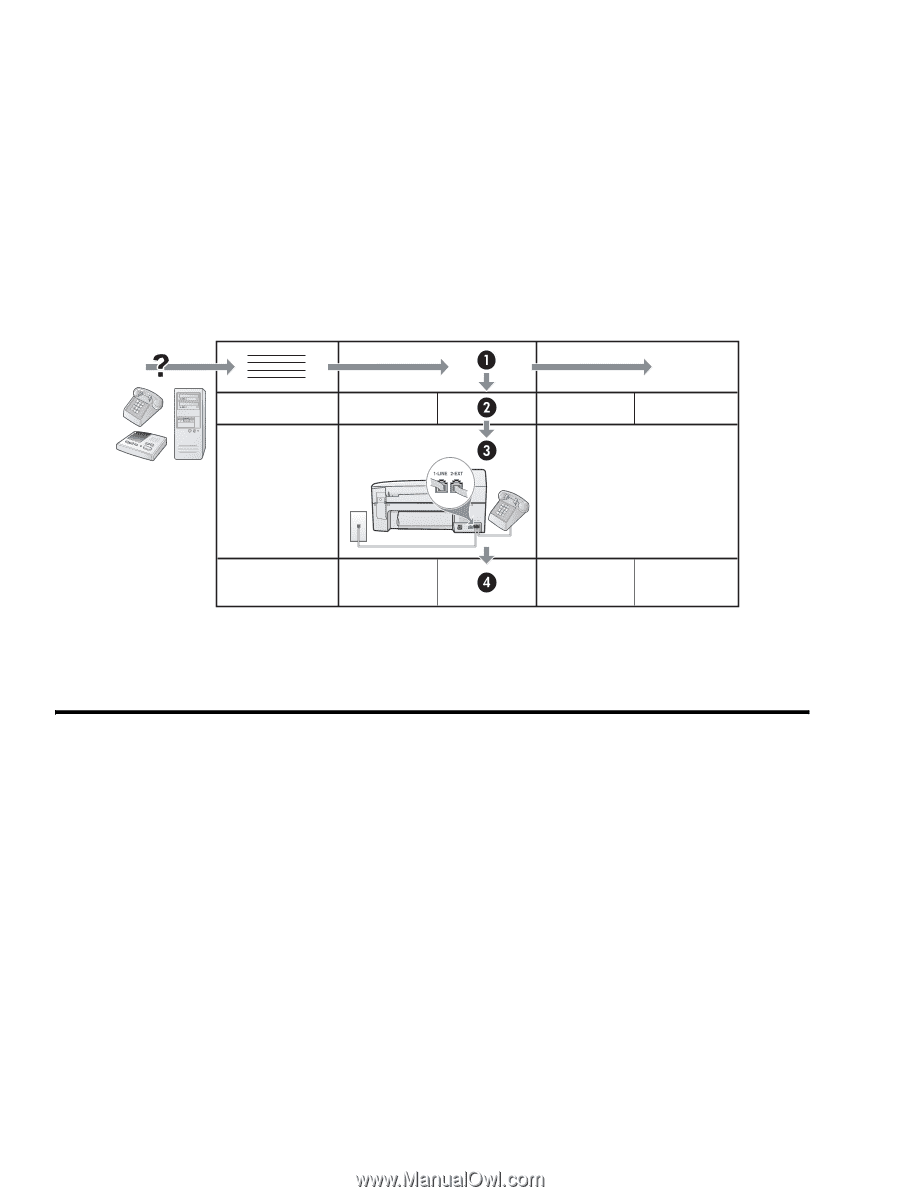
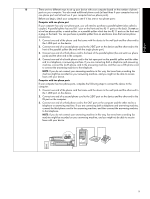
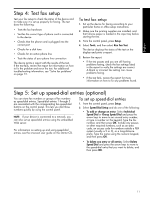
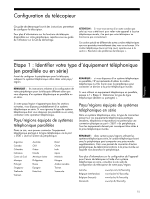
Understand the fax setup tables Once you determine how you use the fax setup tables, follow these steps: ᕡ In the first row, determine what other devices will share the phone line with the all-in-one (phone, computer, answering machine). ᕢ In the next rows, determine if the phone line has any special services (voicemail or distinctive ring), and, if the phone line will be used with a computer, determine if you have a dial-up or DSL modem. ᕣ The next row provides an example of what your fax setup might look like in terms of how to connect various devices to the all-in-one. ᕤ In the last row of the table are numbers that correspond to the "Configuration guideline" table on page 8. Use the "Configuration guideline" table to help you set up your device so that it operates the most effectively based on the way your all-in-one is set up. NOTE: You must follow the numbers as they appear in the last row of each fax setup table. Performing the steps out of sequence may result in fax setup problems. Step 3: Manage and configure fax settings After you have connected the device to a phone line, set the fax header, date and time settings, and country/ region settings. You can also configure these settings from the control panel. For information on the control panel, see the onscreen user guide on the Starter CD. If you are connecting the device directly to a computer, install the device software, and then run the Fax Setup Wizard (Windows) or HP Device Manager (Mac OS). You can also launch these tools from Solution Center (Windows) or HP Device Manager (Mac OS) at a later time. If your device is connected to a network, you can also configure the fax settings from the embedded Web server (EWS). For information on the EWS, see the onscreen user guide on the Starter CD. 10
-
 1
1 -
2
-
3
-
4
-
 5
5 -
 6
6 -
 7
7 -
 8
8 -
 9
9 -
 10
10 -
 11
11 -
 12
12 -
 13
13 -
 14
14 -
 15
15 -
16
-
17
-
18
-
19
-
20
-
21
-
22
-
23
-
24
-
25
-
26
-
27
-
28
-
29
-
30
-
31
-
32
-
33
-
34
-
35
-
36
-
37
-
38
-
39
-
40
-
41
-
42
-
43
-
44
-
45
-
46
-
47
-
48
 |
 |