HP Officejet g55 HP OfficeJet G55 - (English) Quick Setup Poster for Windows - Page 1
HP Officejet g55 - All-in-One Printer Manual
 |
View all HP Officejet g55 manuals
Add to My Manuals
Save this manual to your list of manuals |
Page 1 highlights
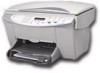
HP OfficeJet G55 Quick Setup Poster 1 Install the software first a Open the carton. b Remove the HP c Turn your OfficeJet computer installation on and insert CD from the tray. the HP OfficeJet installation CD. d Click Install to begin. If the screen to the left does not appear, go to the Windows taskbar, click Start, and then choose Run. In the Run dialog box, type d:\setup.exe (substitute your CD-ROM drive letter for the "d"), and then click OK. Follow the onscreen installation instructions. Note: For more information during installation, click the Help button, if available. e When prompted during installation, take the Product Tour. View the Product Tour to see all the features of your new HP OfficeJet. After the tour, continue to step f to finish setup. f If Windows is using any of your files that need to be updated, Windows will shut down during installation. Leave your computer off until step 10 (Configure your software). Note: On the screen, you may be prompted to enter your cable type. A parallel cable is included in your carton. However, if your PC is equipped with a USB port and you are using Windows 98/2000, we recommend you purchase and use a highspeed (12Mbps) USB cable to increase performance. Check your PC's documentation to determine if you have a USB port. 2 Unpack your HP OfficeJet 3 Load paper a Remove the tray from the carton. b Remove the print c cartridges from the sides of the HP OfficeJet. print cartridges Rest the box on its side and pull out your HP OfficeJet. Remove any packaging or tape from the HP OfficeJet. d Verify that you have these additional key components. a b c power adapter power cord parallel cable print cartridges 4 Connect and secure cables and cords a Connect your cable. Parallel Cable Users: - or - USB Cable Users: b Parallel Cable Users: c Connect the power supply and the adapter. Warning: Do not Connect the parallel Connect the USB cable from your Tighten the screws on the cable connect the USB cable, then go to step b. HP OfficeJet to your PC, then go so that it is securely attached to cable and to step c. your PC. parallel cable at the same time. 1 3 5 Turn on your HP OfficeJet 2 6 Insert black print cartridge a Open the door and raise it up until it clicks into place. The print-cartridge carriage moves to the middle of the access area. b Raise both latches on the print carriage. c Remove the black print cartridge (thinner one) d from its packaging and, being careful to touch only the black plastic, gently remove both the green pull tab and the blue tape covering the nozzles. Push the black print cartridge firmly down into the slot on the right. As you insert the cartridge, make sure the label is facing you. CAUTION: Do not touch or remove the goldcolored contacts. e Lower the right print-cartridge latch down onto the top of the cartridge, and push down until the latch locks firmly into place. http://www.hp.com/go/all-in-one Turn page over for additional setup.
-
 1
1 -
 2
2
 |
 |
