HP OmniBook 800 HP OmniBook 800 - 5/166 Installation and Setup Guides - Page 42
Adding Memory to the OmniBook
 |
View all HP OmniBook 800 manuals
Add to My Manuals
Save this manual to your list of manuals |
Page 42 highlights
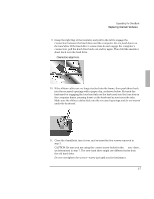
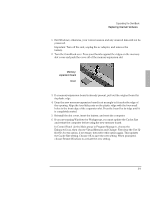
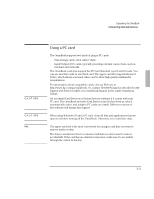
Expanding the OmniBook Replacing Internal Hardware 12. Insert the battery. Connect the ac adapter. 13. Press the reset button. 14. Install Windows and the original software on the new drive C using the Recovery CD-ROM-see "To reinstall Windows and original HP software" under "Reinstalling Windows" inchapter 2. Also check the README file on the Recovery CD for instructions. • There are different procedures for Windows 95 and Windows for Workgroups. • For other operating systems, re-install the operating system from your own source first, then load the OmniBook-specific software. 15. Restore the files you backed up from the old drive C. In Windows 95, use the Backup utility (Start, Programs, Accessories, System Tools, Backup, Restore tab). CAUTION Adding Memory to the OmniBook The OmniBook memory-expansion slot accommodates one memory-expansion board. You can install a memory-expansion board to increase the total amount of memory. (To find out your OmniBook memory size, see HP User Tools in Windows 95 or OmniBook Tools in Windows for Workgroups.) Take precautions against damage from static electricity: Gather all the parts you need so you can complete the installation in one sitting. Don't remove the memory-expansion board from its packaging until you've removed the slot cover from the OmniBook. When you remove the board from its packaging, hold it only by its edges. Don't touch the electronic components or gold traces. Also, close all applications, exit Windows, shut down the computer, unplug the ac adapter, and remove the battery. Otherwise, the OmniBook or memoryexpansion board may be damaged. 3-8
-
 1
1 -
2
-
3
-
4
-
5
-
6
-
7
-
8
-
9
-
10
-
11
-
12
-
13
-
14
-
15
-
16
-
17
-
18
-
19
-
20
-
21
-
22
-
23
-
24
-
25
-
26
-
27
-
28
-
29
-
30
-
31
-
32
-
33
-
34
-
35
-
36
-
 37
37 -
 38
38 -
 39
39 -
 40
40 -
 41
41 -
 42
42 -
 43
43 -
 44
44 -
 45
45 -
 46
46 -
 47
47 -
48
-
49
-
50
-
51
-
52
-
53
-
54
-
55
-
56
-
57
-
58
-
59
-
60
-
61
-
62
-
63
-
64
-
65
-
66
-
67
-
68
-
69
-
70
-
71
-
72
-
73
-
74
-
75
-
76
-
77
-
78
-
79
-
80
-
81
-
82
-
83
-
84
-
85
-
86
-
87
-
88
 |
 |