HP OmniBook 800 HP OmniBook 800 - User Guide Windows for Workgroups - Page 26
To install an HP printer that is not listed under Printers, To view or change printer settings - floppy driver
 |
View all HP OmniBook 800 manuals
Add to My Manuals
Save this manual to your list of manuals |
Page 26 highlights
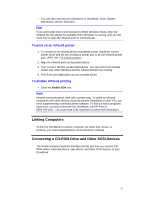
Installing a printer includes specifying the type of printer, specifying the port where the printer will be connected, and possibly defining other printer options. 1. In Program Manager, double-click the OmniBook Tools icon (in the Main group), then click Connections and click Printers (or use Control Panel, Printers). 2. Check the list of Installed Printers for the type of printer you're using. In the list of Installed Printers, select the type of printer you're using. If your printer type isn't listed, see the next topic. Refer also to your printer's documentation for more information. 3. Check the port that's listed next to the printer-such as LPT1. If the port is wrong, choose Connect, then select the correct port and choose OK: • For a parallel printer, select LPT1. • For an IrDA-compatible infrared printer, select the infrared printer port, LPT3. (LPT3 is reserved for infrared printing.) However, you can print to an infrared printer only while Windows is running.Be sure that Fast Printing Direct to Port is checked in the Connect dialog box. • For a serial printer, select the serial port, typically COM1. 4. Choose Set As Default Printer if you want this printer to be one that the computer automatically sends printing commands to. 5. Choose Close. 6. Make a connection between the printer and the OmniBook: • For a parallel printer, see "Making Parallel Connections". • For an infrared printer, see "Making Infrared Connections". • For a serial printer, see "Making Serial Connections". For more information about setting up a printer, see your Windows manual. To install an HP printer that is not listed under Printers • Insert the printer driver floppy disk (that came with the printer) into drive A. In Program Manager, in the File menu, choose Run and type a:setup. Follow the directions on the screen. (Refer to your printer's documentation for more information.) To view or change printer settings 1. Open OmniBook Tools (in Main group in Program Manager). Click the Connections tab, then Printers. 2. Highlight the printer you want. To make it the default printer, choose Set As Default Printer. To change other settings, choose Setup, then select the tab and the settings that you want. 26
-
 1
1 -
2
-
3
-
4
-
5
-
6
-
7
-
8
-
9
-
10
-
11
-
12
-
13
-
14
-
15
-
16
-
17
-
18
-
19
-
20
-
 21
21 -
 22
22 -
 23
23 -
 24
24 -
 25
25 -
 26
26 -
 27
27 -
 28
28 -
 29
29 -
 30
30 -
 31
31 -
32
-
33
-
34
-
35
-
36
-
37
-
38
-
39
-
40
-
41
-
42
-
43
-
44
-
45
-
46
-
47
-
48
-
49
-
50
-
51
-
52
-
53
-
54
-
55
-
56
-
57
-
58
-
59
-
60
-
61
-
62
-
63
-
64
-
65
-
66
-
67
-
68
-
69
-
70
-
71
-
72
-
73
-
74
-
75
-
76
-
77
-
78
-
79
-
80
-
81
-
82
-
83
-
84
-
85
-
86
 |
 |
