HP P4000 HP StorageWorks P4000 G2 10GbE SFP+ Hardware Installation Instruction - Page 3
Upgrading the software - review
 |
View all HP P4000 manuals
Add to My Manuals
Save this manual to your list of manuals |
Page 3 highlights
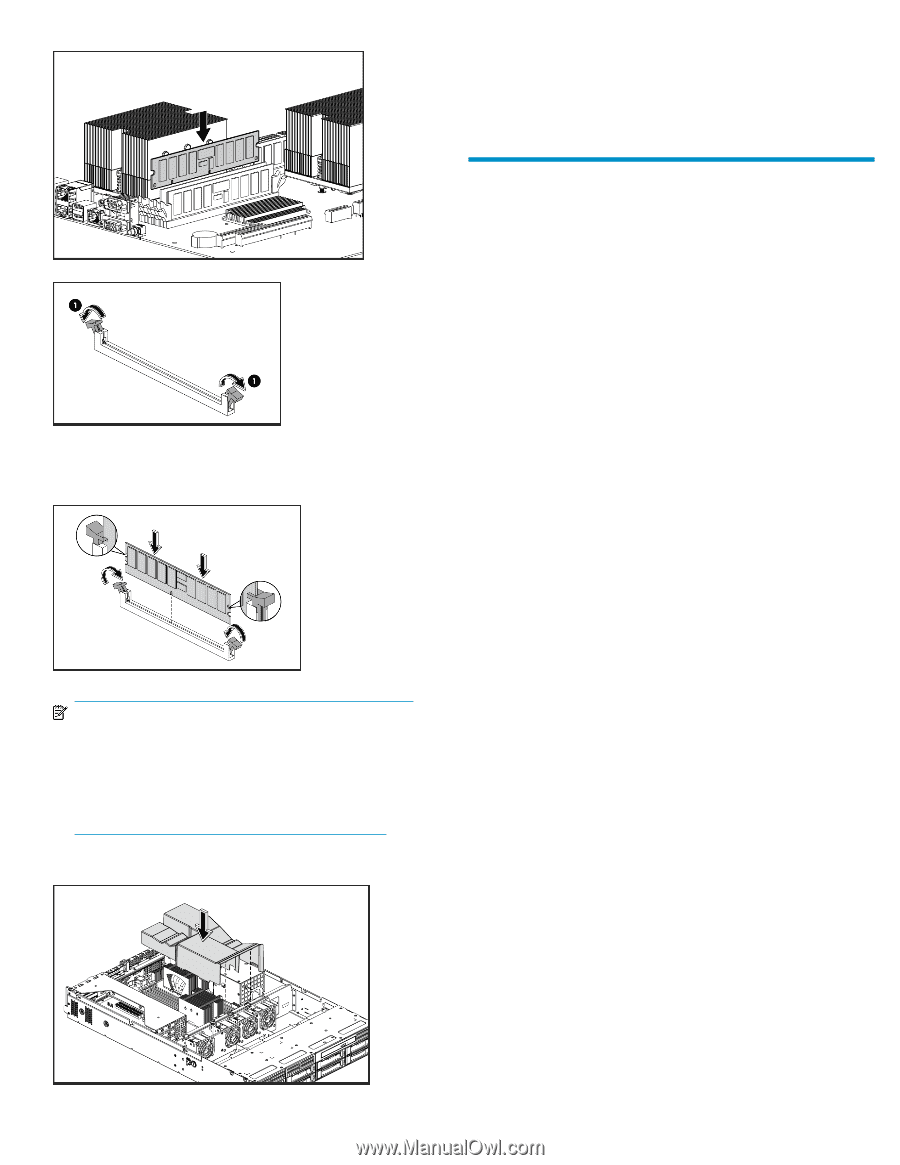
10. Locate the appropriate empty RAM slot and install the RAM. 14. Align the top cover to the chassis and then slide it towards the front panel to position it into place. 15. Once the cover is attached to the chassis, tighten the screw on the top cover with a T-10 wrench. 16. Place the storage node back in the rack, connect the Ethernet cable, and power on the storage node. Upgrading the software 11. Open the locking latches on this slot as shown. To upgrade software on P4000 G2s that are in a management group Continue with the software upgrade instructions in the 1GbE to 10GbE SFP+ Migration Guide. 12. Install the RAM by pushing straight down on the RAM. When the RAM is fully seated, the locking latches will lock in place on each side. NOTE: Note the locating key on the RAM, and in the mating RAM slots on the motherboard. Make sure the locating key in the RAM matches up with the locating key in the motherboard slot. Failure to do so and forcing the RAM in place will damage the system motherboard and/or RAM. 13. Install the air baffle back in place as shown. To upgrade software on P4000 G2s that are new and/or not in a management group 1. Open the CMC and find the P4000 G2. 2. Log in to the storage node you want to upgrade. 3. Click Storage Node Tasks on the Details tab and select Install Software. 4. From the list, select the storage node that you want to upgrade. Use the CTRL key to select multiple storage nodes to upgrade from the list. 5. Select the radio button: Install file on selected nodes one at a time (Recommended). 6. Click Browse to navigate to the folder where you copied the patch file. 7. Select the file and click Open Install File. Focus returns to the Install Software window. When the file name is present, the Install button becomes enabled. 8. Review the version and description to be sure that you are using the correct upgrade file. 9. Click Install. 10. Select the check box to have the install messages automatically scroll. These messages can be saved to a file. (Optional) After the installation completes, click Save To File and choose a name and location for the file. 11. Click Close when the installation on all the storage nodes is completed. Page 3
-
 1
1 -
 2
2 -
 3
3
 |
 |