HP P6000 HP Controller Enclosure LED Display Replacement Instructions (593093- - Page 3
Installing an LED display - computer
 |
View all HP P6000 manuals
Add to My Manuals
Save this manual to your list of manuals |
Page 3 highlights
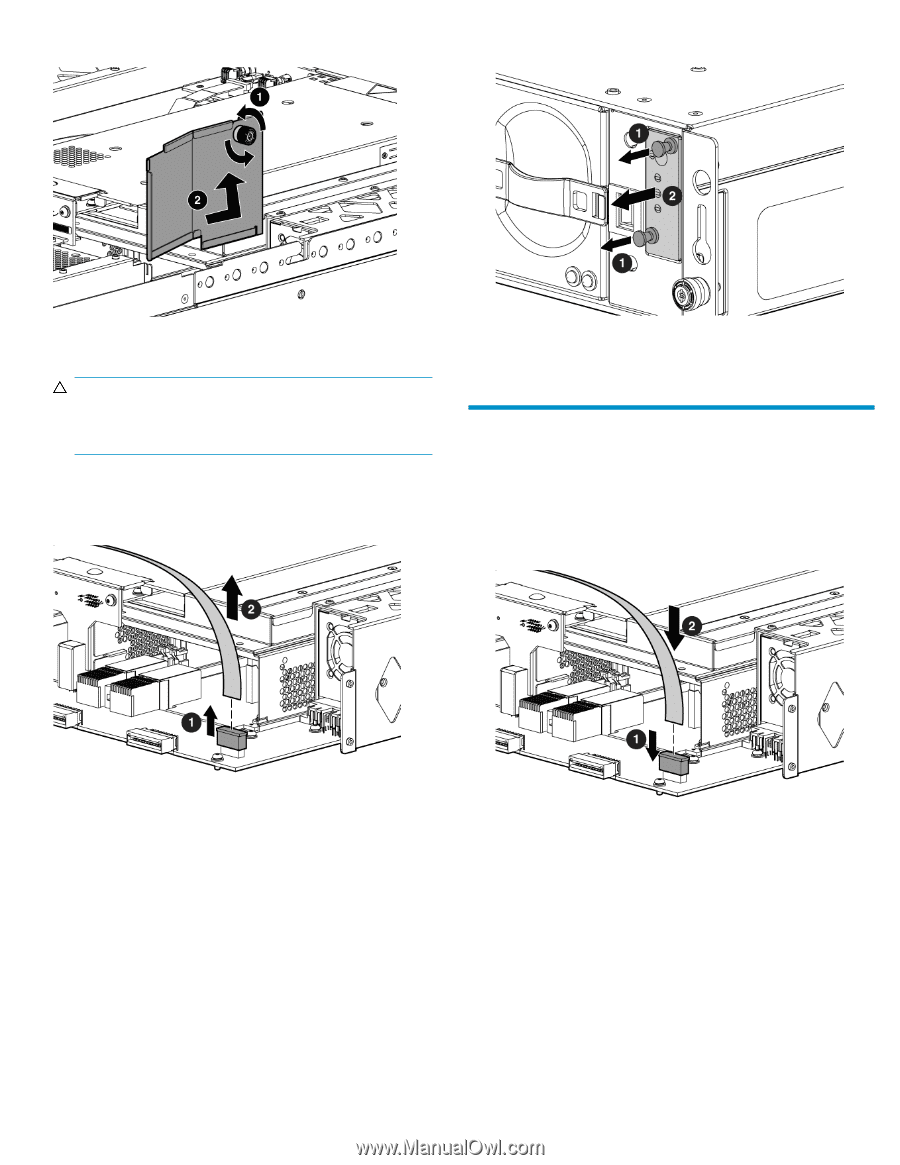
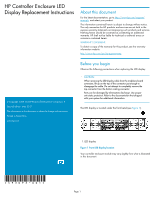
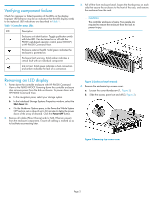
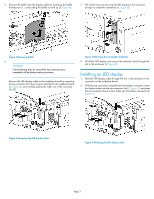
5. Remove the baffle near the display cable by loosening the baffle thumbscrew (1, ) and pulling the baffle out and up (2, Figure 4). 7. Pull out the two pins securing the LED display to the enclosure enough to unseat the membrane (1, Figure 6). Figure 4 Removing baffle . 6. CAUTION: In the following step, do not pull the top connector piece completely off the bottom mating connector. Remove the LED display cable to the midplane board by unseating the top connector from the connector attached to the midplane board (1, Figure 5), and carefully pulling the cable out of the connector slot (2). Figure 6 Removing the array LED membrane . 8. Lift off the LED display and remove the attached cable through the slot in the enclosure (2, Figure 6). Installing an LED display 1. Feed the LED display cable through the slot in the enclosure to the connector on the midplane board. 2. With the top connector unseated from the bottom connector, insert the display cable into the top connector slot (1, Figure 7), and press the top connector down to seat firmly into the bottom connector (2, Figure 7). Figure 5 Removing the LED display cable . Figure 7 Attaching the LED display cable . Page 3
-
 1
1 -
 2
2 -
 3
3 -
 4
4
 |
 |