HP P6000 HP Y-cable Replacement Instructions (593098-001, June 2011) - Page 2
Replacing a Y-cable, Verifying proper operation
 |
View all HP P6000 manuals
Add to My Manuals
Save this manual to your list of manuals |
Page 2 highlights
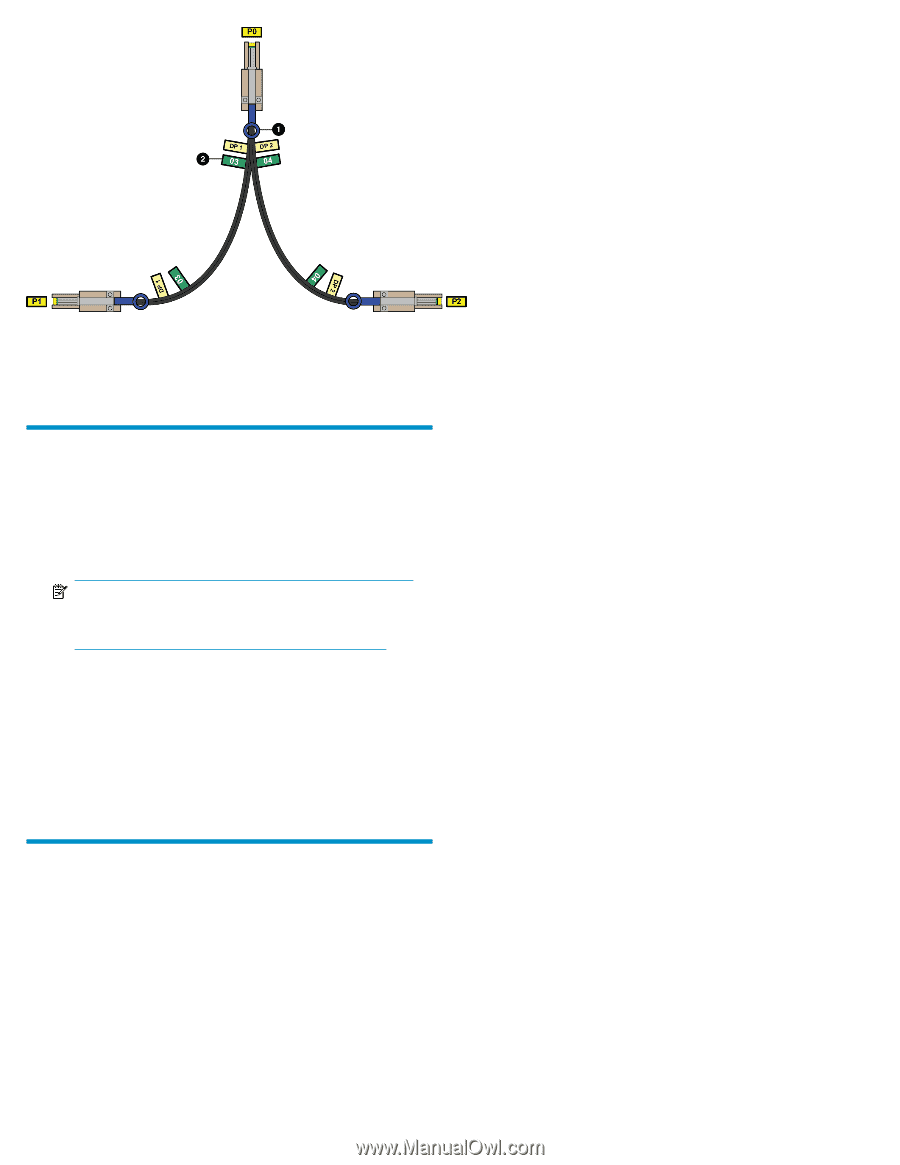
1. Pull tab (may also be a release bar) 2. Port number label Figure 1 Y-cable . Replacing a Y-cable To ensure the replacement cable is configured the same as the original cable, HP recommends that you replace one end at a time. 1. Remove the end of the cable that is connected to the controller port (DP-A or DP-B) (P0 in Figure 1). NOTE: The cable release may be either a pull tab or a release bar. 2. Insert the new cable head into the controller port (DP-A or DP-B). 3. Remove the end of the cable that is connected to the disk enclosure port (P1 or P2) (cable head P1 (DP 1) in Figure 1.) 4. Insert the new cable end into the disk enclosure port (P1 or P2). 5. Remove the end of the cable that is connected to the second port (cable head P2 (DP 2) in Figure 1.) 6. Insert the new cable end into the disk enclosure port (P1 or P2). Verifying proper operation Use HP P6000 Command View to verify that the device ports are enabled. Page 2
-
 1
1 -
 2
2
 |
 |