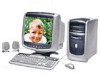
HP Pavilion 400 HP Pavilion Desktop PC - (English) QUICK START GUIDE PAV UK SP - Page 113
Recovery - boot disk
 |
View all HP Pavilion 400 manuals
Add to My Manuals
Save this manual to your list of manuals |
Page 113 highlights
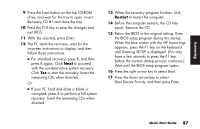
Recover y 9 Press the Eject button on the top CD-ROM drive, and wait for the tray to open. Insert Recovery CD #1 and close the tray. 10 Press the F10 key to save the changes and exit BIOS. 11 With Yes selected, press Enter. 12 The PC starts the recovery; wait for the onscreen instructions to display, and then follow those instructions: ■ For standard recovery, press R, and then press R again. Click Next to proceed with the non-destructive system recovery. Click Yes to start the recovery. Insert the remaining CDs when directed. Or ■ If your PC hard disk drive is blank or corrupted, press R to perform a full system recovery. Insert the remaining CDs when directed. 13 When the recovery program finishes, click Restart to restart the computer. 14 Before the computer restarts, the CD tray ejects. Remove the CD. 15 Return the BIOS to the original setting. Enter the BIOS setup program during the startup: When the blue screen with the HP Invent logo appears, press the F1 key on the keyboard until Entering SETUP is displayed. (You only have a few seconds to press the F1 key before the normal startup process continues.) Wait until the BIOS setup program opens. 16 Press the right arrow key to select Boot. 17 Press the down arrow key to select Boot Device Priority, and then press Enter. Quick Start Guide 87
-
 1
1 -
2
-
3
-
4
-
5
-
6
-
7
-
8
-
9
-
10
-
11
-
12
-
13
-
14
-
15
-
16
-
17
-
18
-
19
-
20
-
21
-
22
-
23
-
24
-
25
-
26
-
27
-
28
-
29
-
30
-
31
-
32
-
33
-
34
-
35
-
36
-
37
-
38
-
39
-
40
-
41
-
42
-
43
-
44
-
45
-
46
-
47
-
48
-
49
-
50
-
51
-
52
-
53
-
54
-
55
-
56
-
57
-
58
-
59
-
60
-
61
-
62
-
63
-
64
-
65
-
66
-
67
-
68
-
69
-
70
-
71
-
72
-
73
-
74
-
75
-
76
-
77
-
78
-
79
-
80
-
81
-
82
-
83
-
84
-
85
-
86
-
87
-
88
-
89
-
90
-
91
-
92
-
93
-
94
-
95
-
96
-
97
-
98
-
99
-
100
-
101
-
102
-
103
-
104
-
105
-
106
-
107
-
 108
108 -
 109
109 -
 110
110 -
 111
111 -
 112
112 -
 113
113 -
 114
114 -
 115
115 -
 116
116 -
 117
117 -
 118
118 -
119
-
120
-
121
-
122
-
123
-
124
-
125
-
126
 |
 |