HP Pavilion 7900 HP Pavilion Desktop PCs - DVDRW - (English) Technical Support - Page 76

Errors and Warnings Report

Page 76 highlights

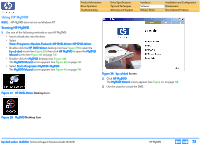
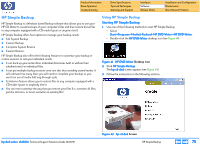
Product Information Drive Operation Troubleshooting Drive Specifications Tips and Techniques Warranty and Support Interfaces Software Release Notes Installation and Configuration Maintenance Discontinued Products Full System Backup Making a copy of your computer's entire hard drive is easy with HP Simple Backup. 1. Start HP Simple Backup. 2. Click on Full System Backup from the main screen. HP Simple Backup's Wizard walks you through the rest of the necessary steps. Custom Backup HP Simple Backup's Custom Backup feature allows you to pick and choose which files you want to backup. To create a Custom Backup, perform the following steps: 1. Start HP Simple Backup. 2. Click on Custom Backup from the main screen. HP Simple Backup's Wizard walks you through the rest of the necessary steps. Complete System Restore HP Simple Backup's Complete System Restore option allows you to take the backup files you created using the Full System Backup option and put those files back onto any computer equipped with a CD reader (yours or anyone else's). 1. Insert the first CD of your backup set into your CD reader. 2. Click Complete System Restore from the automatically displayed screen. HP Simple Backup's Wizard walks you through the rest of the necessary steps. NOTE: If HP Simple Backup does not start automatically, click on the Windows Start button and then select the Run... option. Browse to your CD reader's drive, double click the Setup.exe command and then click OK. Custom Restore The Custom Restore option is much like the Complete System Restore option in that it allows you to restore files to any computer equipped with a CD reader (yours or anybody else's). 1. Insert the disc you created using HP Simple Backup's Custom Backup option into your computer's CD reader. 2. Click Custom Restore from the automatically displayed screen. HP Simple Backup's Wizard walks you through the rest of the necessary steps. NOTE: If HP Simple Backup does not start automatically, click on the Windows Start button and then select the Run... option. Browse to your CD reader's drive, double click the Setup.exe command and then click OK. Automatically Excluded Files Because of the constantly changing characteristics of some types of files, HP Simple Backup automatically excludes them. Following is a list of some of these types of files: I Backup application files I Index files for caches (internet files, history files, etc.) I Windows swap files I Drivespace or Doublespace files I Temporary directories (i.e., .tmp files) Errors and Warnings Report The following is a list of errors and warnings that may appear in the Report file after a backup or restore operation. Look below for a description of the error that was reported. Error/Warning Description File/directory busy or in use by another application, it will be skipped An application was running at the time of backup, or a data file was in use. Close all applications, or those running from your system tray (i.e. Antivirus, Scheduler,...), prior to backing up. Error opening file/directory • File or directory may be corrupted. Recommend running ScanDisk on that drive prior to backup. • You may not have proper read access to that file or directory (i.e. Windows NT security permission). hp dvd-writer dvd100i Technical Support Solutions Guide 10/25/01 HP Simple Backup ⇐ ⇒ 76

  • 1
  • 2
  • 3
  • 4
  • 5
  • 6
  • 7
  • 8
  • 9
  • 10
  • 11
  • 12
  • 13
  • 14
  • 15
  • 16
  • 17
  • 18
  • 19
  • 20
  • 21
  • 22
  • 23
  • 24
  • 25
  • 26
  • 27
  • 28
  • 29
  • 30
  • 31
  • 32
  • 33
  • 34
  • 35
  • 36
  • 37
  • 38
  • 39
  • 40
  • 41
  • 42
  • 43
  • 44
  • 45
  • 46
  • 47
  • 48
  • 49
  • 50
  • 51
  • 52
  • 53
  • 54
  • 55
  • 56
  • 57
  • 58
  • 59
  • 60
  • 61
  • 62
  • 63
  • 64
  • 65
  • 66
  • 67
  • 68
  • 69
  • 70
  • 71
  • 72
  • 73
  • 74
  • 75
  • 76
  • 77
  • 78
  • 79
  • 80
  • 81
  • 82
  • 83
  • 84
  • 85
  • 86
  • 87
  • 88
  • 89
  • 90
  • 91
  • 92
  • 93
  • 94
  • 95
  • 96
  • 97
  • 98
  • 99
  • 100
  • 101
  • 102
  • 103
  • 104

hp dvd-writer
hp dvd-writer
hp dvd-writer
hp dvd-writer
dvd100i
dvd100i
dvd100i
dvd100i
Technical Support Solutions Guide 10/25/01
HP Simple Backup
76
76
76
76
Full System Backup
Full System Backup
Full System Backup
Full System Backup
Making a copy of your computer's entire hard drive is easy with HP Simple Backup.
1.
1.
1.
1.
Start HP Simple Backup.
2.
2.
2.
2.
Click on
Full System Backup
Full System Backup
Full System Backup
Full System Backup
from the main screen.
HP Simple Backup's Wizard walks you through the rest of the necessary steps.
Custom Backup
Custom Backup
Custom Backup
Custom Backup
HP Simple Backup's Custom Backup feature allows you to pick and choose which
files you want to backup. To create a Custom Backup, perform the following steps:
1.
1.
1.
1.
Start HP Simple Backup.
2.
2.
2.
2.
Click on
Custom Backup
Custom Backup
Custom Backup
Custom Backup
from the main screen.
HP Simple Backup's Wizard walks you through the rest of the necessary steps.
Complete System Restore
HP Simple Backup's Complete System Restore option allows you to take the backup
files you created using the Full System Backup option and put those files back onto
any computer equipped with a CD reader (yours or anyone else's).
1.
1.
1.
1.
Insert the first CD of your backup set into your CD reader.
2.
2.
2.
2.
Click
Complete System Restore
from the automatically displayed screen.
HP Simple Backup's Wizard walks you through the rest of the necessary steps.
NOTE:
NOTE:
NOTE:
NOTE:
If HP Simple Backup does not start automatically, click on the Windows
Start
Start
Start
Start
button and then select the
Run...
Run...
Run...
Run...
option. Browse to your CD reader's
drive, double click the
Setup.exe
Setup.exe
Setup.exe
Setup.exe
command and then click
OK
OK
OK
OK
.
Custom Restore
Custom Restore
Custom Restore
Custom Restore
The Custom Restore option is much like the Complete System Restore option in that
it allows you to restore files to any computer equipped with a CD reader (yours or
anybody else's).
1.
1.
1.
1.
Insert the disc you created using HP Simple Backup's Custom Backup option into
your computer's CD reader.
2.
2.
2.
2.
Click
Custom Restore
Custom Restore
Custom Restore
Custom Restore
from the automatically displayed screen.
HP Simple Backup's Wizard walks you through the rest of the necessary steps.
NOTE:
NOTE:
NOTE:
NOTE:
If HP Simple Backup does not start automatically, click on the Windows
Start
Start
Start
Start
button and then select the Run... option. Browse to your CD reader's
drive, double click the Setup.exe command and then click OK.
Automatically Excluded Files
Because of the constantly changing characteristics of some types of files, HP Simple
Backup automatically excludes them. Following is a list of some of these types of
files:
Backup application files
Index files for caches (internet files, history files, etc.)
Windows swap files
Drivespace or Doublespace files
Temporary directories (i.e., .tmp files)
Errors and Warnings Report
The following is a list of errors and warnings that may appear in the
Report
Report
Report
Report
file after
a backup or restore operation. Look below for a description of the error that was
reported.
Error/Warning
Description
File/directory busy or in
use by another application,
it will be skipped
An application was running at the time of backup,
or a data file was in use. Close all applications, or
those running from your system tray (i.e. Anti-
virus, Scheduler,...), prior to backing up.
Error opening file/directory
File or directory may be corrupted. Recommend
running ScanDisk on that drive prior to backup.
You may not have proper read access to that file
or directory (i.e. Windows NT security
permission).
Product Information
Drive Specifications
Interfaces
Installation and Configuration
Drive Operation
Tips and Techniques
Software
Maintenance
Troubleshooting
Warranty and Support
Release Notes
Discontinued Products