HP Pavilion xt5300 HP Pavilion ze4x00, ze5x00 and specific xt notebook series - Page 30
To connect an infrared device select models only
 |
View all HP Pavilion xt5300 manuals
Add to My Manuals
Save this manual to your list of manuals |
Page 30 highlights
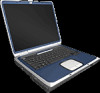
Note Basic Operation Using CDs or DVDs To connect an infrared device (select models only) Select models include an infrared port. By default, the infrared port is not enabled, so you must first enable it before you can use it. If your model has an infrared port (a small, rectangular lens located on the front of the notebook), then your notebook has wireless, serial communication capability. That is, your notebook and other infrared devices, such as printers or other notebooks, can communicate wirelessly using this port. Using the infrared port • Make sure the infrared port of your notebook and the infrared port of the device with which you want to communicate lie in a straight line facing each other. The two ports should be no more than one meter apart with no obstructions in between. Noise from nearby equipment can cause transmission errors. 1. Select Start > Control Panel > Performance and Maintenance > System. 2. Select the Hardware tab. 3. Select the Device Manager button. 4. Select the ALI fast infrared controller, then the Enable Device button. 5. Select Next > Finish > Close. Then close all open dialog boxes. • To check the status of communications, open Wireless Link by selecting Start > Control Panel > Printers & Other Hardware > Wireless Link. Printing to an infrared printer Install your printer and assign it to the notebook infrared port. You can then print from your applications as you would to any other printer. Transferring files through an infrared connection You can use your notebook infrared port to transfer files by using Wireless Link. See the Windows online Help for instructions on using Wireless Link. 22 Startup Guide
-
 1
1 -
2
-
3
-
4
-
5
-
6
-
7
-
8
-
9
-
10
-
11
-
12
-
13
-
14
-
15
-
16
-
17
-
18
-
19
-
20
-
21
-
22
-
23
-
24
-
 25
25 -
 26
26 -
 27
27 -
 28
28 -
 29
29 -
 30
30 -
 31
31 -
 32
32 -
 33
33 -
 34
34 -
 35
35 -
36
-
37
-
38
-
39
-
40
-
41
-
42
 |
 |
