HP Photosmart 315 HP Photosmart 315 digital camera - (English) Quick Success P - Page 2
Install the software, Connect the camera, Transfer photos - photosmart software
 |
View all HP Photosmart 315 manuals
Add to My Manuals
Save this manual to your list of manuals |
Page 2 highlights
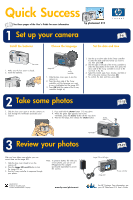
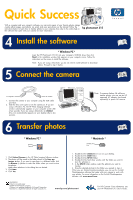
Quick Success. Picture of computer C315 With a computer and your camera’s software, you can print copies of your favorite photos, design creative album pages, send photos via email, and even post photos on the Internet! Follow the instructions below to learn how to transfer photos to your computer, then refer to the online help in the software that came with your camera for more information. hp photosmart 315 4 Install the software * Windows PC * Insert the HP PhotoSmart 315 CD into your computer’s CD-ROM drive, then click Next in the installation window that appears on your computer screen. Follow the instructions on the screen to install the software. Note: If you are using a Macintosh, you do not need to install software to download photos. Proceed to step 5 below. 5 Connect the camera 51 52,56 To computer To camera 1. Connect the camera to your computer using the USB cable provided. 2. Slide the lens cover open to turn the camera on. If you are using a Windows PC, the HP Photo Imaging Software window automatically appears on your computer screen after a few seconds. If you are using a Macintosh, an Untitled drive icon automatically appears on your desktop after a few seconds. Note: To preserve battery life while you transfer photos, you can use an HPapproved AC adapter (purchased separately) to power the camera. 6 Transfer photos 53,57 * Windows PC * Unload Camera * Macintosh * Untitled drive icon 1. Click Unload Camera in the HP Photo Imaging Software window. 2. The photos will be saved in the folder shown in the Save my images to box. If you want to save them in a different folder, click the browse (...) button to select the folder where you want to store the photos. Make other selections in the dialog box as desired. 3. Click Start. 4. Click Yes. 1. Double-click the Untitled drive icon on your desktop. 2. Double-click the DCIM folder. 3. Double-click the HP315 folder. 4. Double-click the hard drive window and the folder you want to store the photo(s) in. 5. In the HP315 folder window, select the photo(s) you want to transfer. 6. Drag the selected photo(s) to the folder you opened in step 4. When you are finished transferring photos, you can use the ArcSoft PhotoImpression software that came with your camera to work with your photos. For more information on the ArcSoft PhotoImpression software, visit www.arcsoft.com. C8452-90101 Printed on recycled paper ©2000 Hewlett-Packard Company Windows is a registered trademark of Microsoft Corporation Macintosh is a registered trademark of Apple Computer, Inc. www.hp.com/photosmart For HP Customer Care information, see your HP PhotoSmart 315 User’s Guide.
-
 1
1 -
 2
2
 |
 |