HP Photosmart C8100 Getting Started Guide - Page 2
into place. Make sure all buttons are - install
 |
View all HP Photosmart C8100 manuals
Add to My Manuals
Save this manual to your list of manuals |
Page 2 highlights
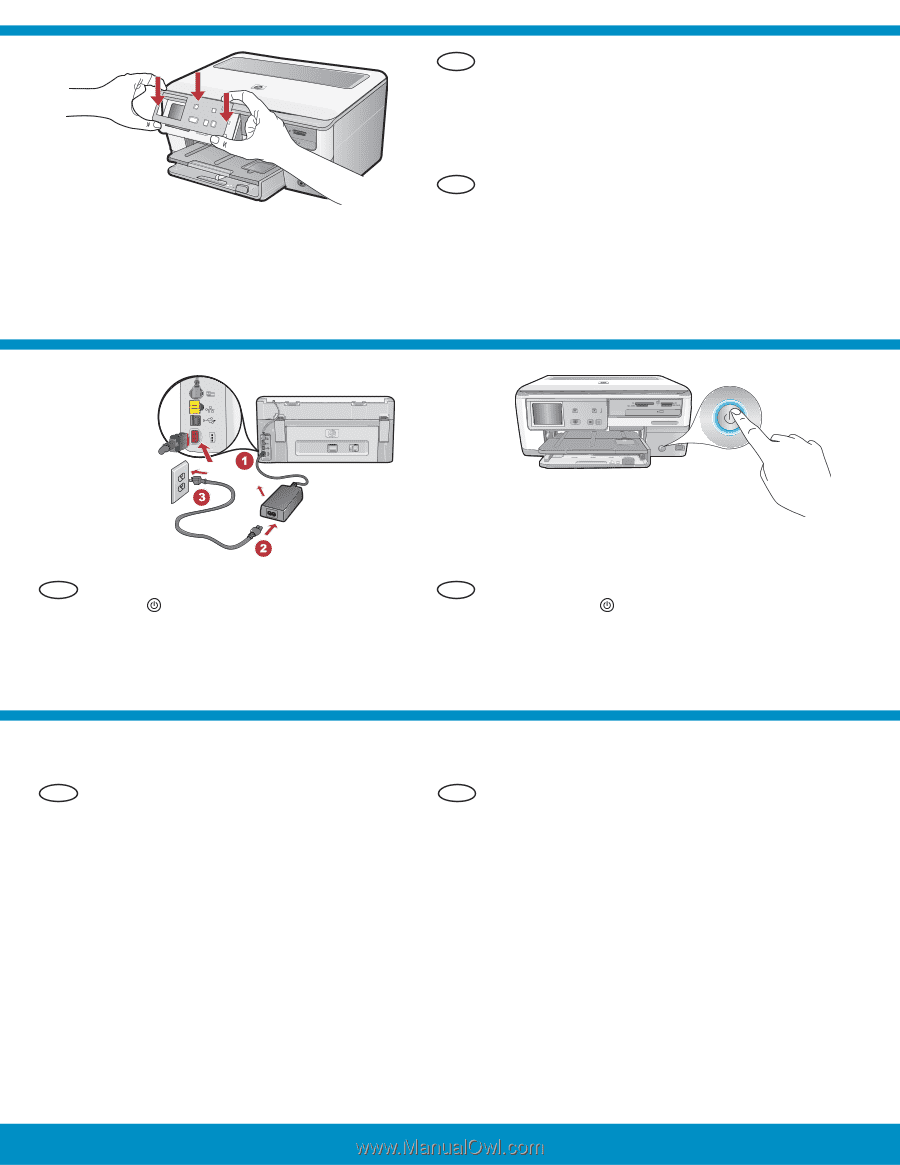
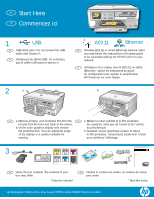
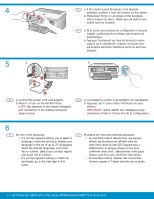
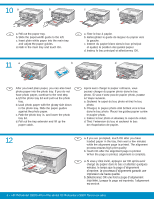
4 5 a EN a. If the control panel faceplate is not already attached, position it over the buttons on the device. b. Press down firmly on all edges of the faceplate until it snaps into place. Make sure all buttons are visible and not blocked. FR a. Si le cache du panneau de configuration n'est pas installé, positionnez-le au-dessus des boutons du périphérique. b. Appuyez fermement sur tous les bords du cache jusqu'à qu'il s'enclenche. Assurez-vous que tous les boutons sont bien visibles et qu'ils ne sont pas bloqués. b EN a. Connect the power cord and adapter. b. Press to turn on the HP All-in-One. NOTE: Pay attention to the helpful messages and animations in the display during the setup process. FR a. Connectez le cordon d'alimentation et l'adaptateur. b. Appuyez sur pour mettre HP Tout-en-un sous tension. REMARQUE : soyez attentif aux messages et aux animations d'aide à l'écran lors de la configuration. 6 EN Do one of the following: FR Procédez de l'une des manières suivantes : • If a prompt appears asking you to select a • Si vous êtes invité à sélectionner une langue, language, touch the arrows to display your utilisez les touches pour afficher celle de language in the list of up to 25 languages. votre choix dans la liste (25 langues max.). Touch the desired language, and touch Sélectionnez la langue voulue et Oui pour Yes to confirm. Select your country/region, confirmer votre choix. Sélectionnez votre pays/ and touch Yes to confirm. région, puis Oui pour confirmer votre choix. • If a prompt appears asking to install ink • Si vous êtes invité à installer des cartouches cartridges, go to the next step in this d'encre, passez à l'étape suivante de ce guide. guide. 2 • HP Photosmart C8100 All-in-One series/HP Photosmart C8100 Tout-en-un série
-
 1
1 -
 2
2 -
 3
3 -
 4
4 -
 5
5 -
 6
6 -
 7
7 -
 8
8 -
9
-
10
-
11
-
12
-
13
-
14
-
15
-
16
 |
 |