HP Photosmart D5300 Basics Guide
HP Photosmart D5300 Manual
 |
View all HP Photosmart D5300 manuals
Add to My Manuals
Save this manual to your list of manuals |
HP Photosmart D5300 manual content summary:
- HP Photosmart D5300 | Basics Guide - Page 1
HP Photosmart D5300 series Basics Guide - HP Photosmart D5300 | Basics Guide - Page 2
such products and services. Nothing herein should be construed as constituting an additional warranty. HP shall not be liable for technical or editorial errors or omissions contained herein. © 2007 Hewlett-Packard Development Company, L.P. Windows, Windows 2000, and Windows XP are U.S. registered - HP Photosmart D5300 | Basics Guide - Page 3
HP Photosmart at a glance 2 Control panel features...3 Find more information...4 Load paper...4 Avoid paper jams...6 Print directly onto a CD/DVD...7 Print up to 13 x 18 cm (5 x 7 inch) photos 8 Replace the print cartridges...10 2 Troubleshooting and support Uninstall and reinstall the software - HP Photosmart D5300 | Basics Guide - Page 4
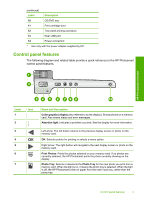
guide introduces basic operations and troubleshooting, as well as provides information for contacting HP support and ordering supplies. The onscreen Help details the full range of features and functions, including use of the HP Photosmart software that came with the HP Photosmart. The HP Photosmart - HP Photosmart D5300 | Basics Guide - Page 5
to the HP Photosmart control panel features. HP Photosmart overview Label 1 2 Icon 3 4 5 6 7 Name and Description Color graphics display (also referred to as the display): Shows photos on a memory card. Also shows status and error messages. Attention light: Indicates a problem occurred. See - HP Photosmart D5300 | Basics Guide - Page 6
The Setup Guide provides instructions for setting up the HP Photosmart and installing software. Make sure you follow the steps in the Setup Guide in order. If you have problems during setup, see Troubleshooting in the last section of the Setup Guide, or see "Troubleshooting and support" on page - HP Photosmart D5300 | Basics Guide - Page 7
HP Photosmart overview 2. Slide the paper-width guide to its outermost position. 3. Tap a stack of paper on a flat surface to align the edges that the HP Photosmart is idle and silent when you load paper into the main input tray. If the HP Photosmart is servicing the print cartridges or otherwise - HP Photosmart D5300 | Basics Guide - Page 8
against the stack of photo paper until the guide stops. Do not overload the photo tray; make sure the stack of photo paper fits within the photo tray and is no higher than the top of the paper-width guide. HP Photosmart overview 4. Lower the photo tray lid. Avoid paper jams To help avoid paper - HP Photosmart D5300 | Basics Guide - Page 9
not force paper too far forward in the input tray. • Use paper types that are recommended for the HP Photosmart. Print directly onto a CD/DVD 1. Use the software that came with the HP Photosmart to create a label and print it directly on an inkjet printable CD/DVD. 2. When prompted, carefully remove - HP Photosmart D5300 | Basics Guide - Page 10
from your memory card without first transferring the files to a computer. You can print borderless photos (one per sheet of paper) or you can print multiple photos on a single sheet of paper. By default, the HP Photosmart is set to detect the type of paper you are using automatically. For the best - HP Photosmart D5300 | Basics Guide - Page 11
Stick Duo or Duo Pro (adapter optional), or Memory Stick Micro (adapter required) To print up to 13 x 18 cm (5 x 7 inch) photos 1. Insert your memory card into the appropriate slot on the HP Photosmart. The most recent image on the card appears on the display. 2. Load up to 13 x 18 cm (5 x 7 inch - HP Photosmart D5300 | Basics Guide - Page 12
the print cartridges Follow these instructions when you need to replace print cartridges. NOTE: When the ink level for the print cartridge is low, a message appears on the display. You can also check the ink levels by using the Printer Toolbox available through the HP Photosmart Software on your - HP Photosmart D5300 | Basics Guide - Page 13
using the pink pull tab. HP Photosmart overview 1 Copper-colored contacts 2 Plastic tape with pink pull tab (must be removed before installing) 3 Ink nozzles under tape CAUTION: Do not touch the copper-colored contacts or ink nozzles. Also, do not re-tape the print cartridges. Doing so can result - HP Photosmart D5300 | Basics Guide - Page 14
left slot. If you are installing a black, photo, or gray photo print cartridge, slide it into the right slot. HP Photosmart overview 8. Close the print cartridge door. If you installed a new print cartridge, the HP Photosmart prints a print cartridge alignment page. 9. When prompted, ensure plain - HP Photosmart D5300 | Basics Guide - Page 15
message appears. NOTE: If you have colored paper loaded in the input tray when you align the printer, the alignment will fail. Load unused plain white paper into the input tray, and then try the alignment again. 11. Press OK to continue. HP Photosmart overview Replace the print cartridges 13 - HP Photosmart D5300 | Basics Guide - Page 16
program. 7. Follow the onscreen instructions and the instructions provided in the Setup Guide that came with the HP Photosmart. Hardware setup troubleshooting Use this section to solve any problems you might encounter while setting up the HP Photosmart hardware. The HP Photosmart will not turn on - HP Photosmart D5300 | Basics Guide - Page 17
your country/region, and then click Contact HP for information on calling for technical support. I connected the USB cable, but I am having problems using the HP Photosmart with my computer Cause: The USB cable was connected before the software was installed. Connecting the USB cable before prompted - HP Photosmart D5300 | Basics Guide - Page 18
Chapter 2 Troubleshooting and support For more information on installing the software and connecting the USB cable, see the Setup Guide that came with the HP Photosmart. The HP Photosmart does not print Solution: If the HP Photosmart and computer are not communicating with each other, try the - HP Photosmart D5300 | Basics Guide - Page 19
, remove and then install the software you installed with the HP Photosmart again. For more information on setting up the HP Photosmart and connecting it to your computer, see the Setup Guide that came with the HP Photosmart. Clear paper jams If the HP Photosmart has a paper jam, check the Two - HP Photosmart D5300 | Basics Guide - Page 20
from the HP Photosmart, more paper jams are likely to occur. 3. Lower the print cartridge door. Also, lower the output tray if it is raised. Troubleshooting and support 4. Press OK to continue the current job. CD/DVD print troubleshooting Use this section to solve any problems you might encounter - HP Photosmart D5300 | Basics Guide - Page 21
holder marked with arrows goes into the CD/DVD tray first. Troubleshooting and support Cause: You might have inserted the CD/DVD holder back into marked with arrows goes into the CD/ DVD tray first. Cause: The HP Photosmart prompts you to insert the next disc when printing multiple CD/ DVDs in - HP Photosmart D5300 | Basics Guide - Page 22
the CD/DVD holder to remove ink from the holder. This avoids ink contamination within the device, as tray and try your print again. Troubleshooting and support The HP Photosmart is printing on a non-printable documentation or the online help of the software you are using for additional information. - HP Photosmart D5300 | Basics Guide - Page 23
print cartridges to air, which reduces the life of the print cartridges. NOTE: If you leave the print cartridge door open for a long period of time, the HP Photosmart will recap the print cartridges to protect them from exposure to air. Troubleshooting and support Print cartridge troubleshooting - HP Photosmart D5300 | Basics Guide - Page 24
online support specialists • Software and driver updates for the HP Photosmart • Valuable HP Photosmart and troubleshooting information for common problems • Proactive device updates, support alerts, and HP newsgrams that are available when you register the HP Photosmart 3. Call HP support. Support - HP Photosmart D5300 | Basics Guide - Page 25
is possible the output from the HP Photosmart may be slightly distorted • HP recommends using a USB cable less than or equal to 3 metres (10 feet) in length to minimize injected noise due to potential high electromagnetic fields Print cartridge yield Ink from the cartridges is used in the printing - HP Photosmart D5300 | Basics Guide - Page 26
Chapter 3 Regulatory notices The HP Photosmart meets product requirements from regulatory agencies in your country/ regulatory number should not be confused with the marketing name (HP Photosmart D5300 series, etc.) or product numbers (Q8360A, etc.). Technical information 24 Technical - HP Photosmart D5300 | Basics Guide - Page 27
Warranty Warranty 25 Technical information - HP Photosmart D5300 | Basics Guide - Page 28
Chapter 3 Technical information 26 Technical information - HP Photosmart D5300 | Basics Guide - Page 29
-
 1
1 -
 2
2 -
 3
3 -
 4
4 -
 5
5 -
 6
6 -
 7
7 -
8
-
9
-
10
-
11
-
12
-
13
-
14
-
15
-
16
-
17
-
18
-
19
-
20
-
21
-
22
-
23
-
24
-
25
-
26
-
27
-
28
-
29
 |
 |
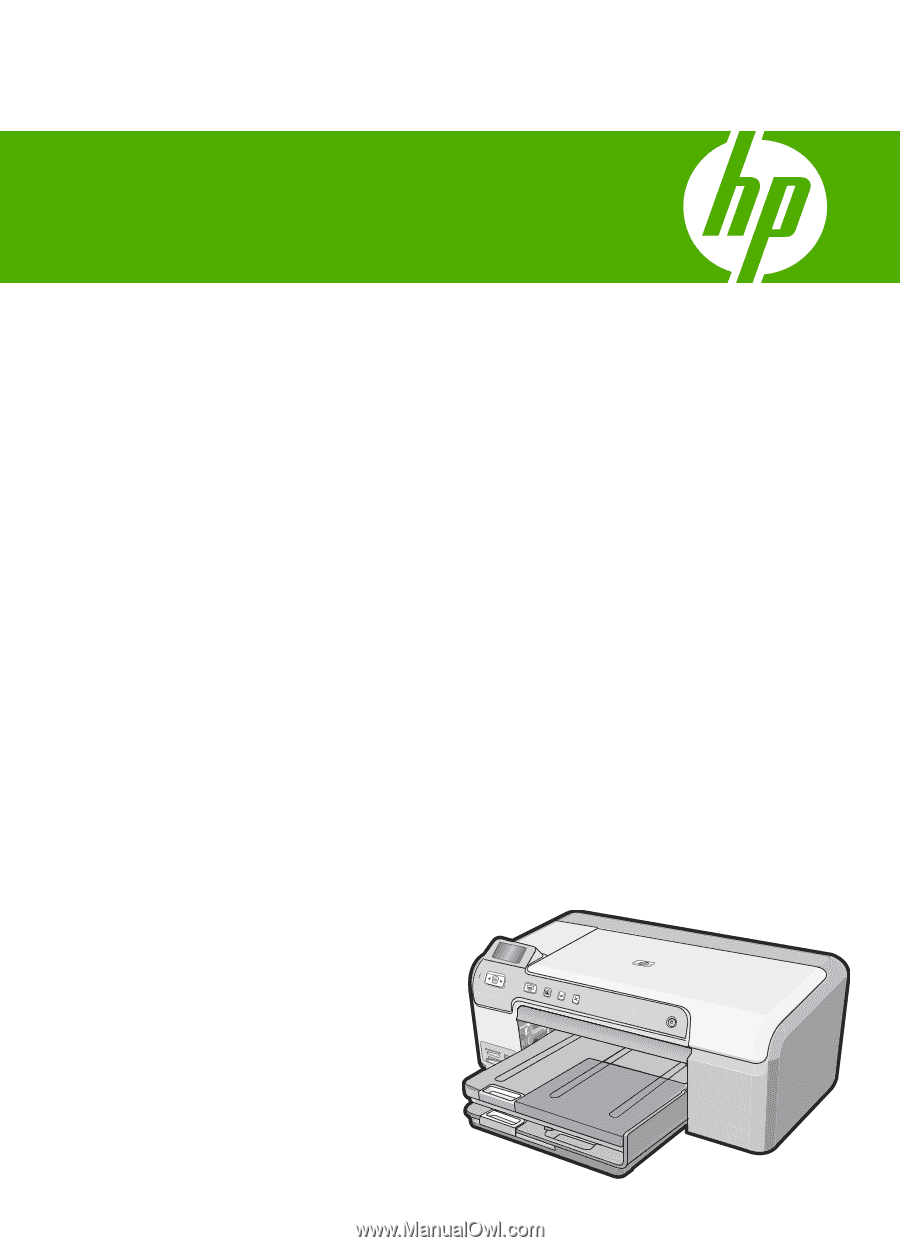
HP Photosmart D5300 series
Basics Guide