HP Photosmart R930 Quick Start Guide - Page 11

Install and format an optional, memory card
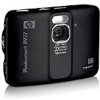
Page 11 highlights

English and will ensure that images are accurately marked if you use the date and time imprint feature. 1. Touch or to adjust the month, date, and year. 2. Touch Next to confirm your settings and display the Time screen. 3. Touch or to adjust the time. 4. When all settings are correct, touch Done. Install and format an optional memory card This camera supports standard, high speed, and high capacity Secure Digital (SD and SDHC) memory cards, 32MB to 8GB. 1. Turn off the camera and open the Battery/Memory Card door. 2. Insert the optional memory card in the smaller slot as shown. Make sure the memory card snaps into place. 3. Close the Battery/Memory Card door and turn on the camera. NOTE: When you turn on your camera with a memory card installed, the camera indicates the number of images you can store on the memory card at the current Image Quality setting. This camera supports storing a maximum of 1999 images on a memory card. Setting up your camera 11

  • 1
  • 2
  • 3
  • 4
  • 5
  • 6
  • 7
  • 8
  • 9
  • 10
  • 11
  • 12
  • 13
  • 14
  • 15
  • 16
  • 17
  • 18
  • 19
  • 20
  • 21
  • 22
  • 23
  • 24
  • 25
  • 26
  • 27
  • 28
  • 29
  • 30
  • 31
  • 32
  • 33
  • 34
  • 35
  • 36
  • 37
  • 38
  • 39
  • 40
  • 41
  • 42
  • 43
  • 44
  • 45
  • 46
  • 47
  • 48
  • 49
  • 50
  • 51
  • 52
  • 53
  • 54
  • 55
  • 56
  • 57
  • 58
  • 59
  • 60
  • 61
  • 62
  • 63
  • 64
  • 65
  • 66
  • 67
  • 68
  • 69
  • 70
  • 71
  • 72
  • 73
  • 74
  • 75
  • 76
  • 77
  • 78
  • 79
  • 80
  • 81
  • 82
  • 83
  • 84
  • 85
  • 86
  • 87
  • 88
  • 89
  • 90
  • 91
  • 92
  • 93
  • 94
  • 95
  • 96
  • 97
  • 98
  • 99
  • 100
  • 101
  • 102
  • 103
  • 104
  • 105
  • 106
  • 107
  • 108
  • 109
  • 110
  • 111
  • 112
  • 113
  • 114
  • 115
  • 116
  • 117
  • 118
  • 119
  • 120
  • 121
  • 122
  • 123
  • 124
  • 125
  • 126
  • 127
  • 128
  • 129
  • 130
  • 131
  • 132
  • 133
  • 134
  • 135
  • 136
  • 137
  • 138
  • 139
  • 140
  • 141
  • 142
  • 143
  • 144

and will ensure that images are accurately marked if you
use the date and time imprint feature.
1.
Touch
or
to adjust the
month, date, and year.
2.
Touch
Next
to confirm your
settings and display the
Time
screen.
3.
Touch
or
to adjust the
time.
4.
When all settings are correct, touch
Done
.
Install and format an optional
memory card
This camera supports standard, high speed, and high
capacity Secure Digital (SD and SDHC) memory cards,
32MB to 8GB.
1.
Turn off the camera and open
the Battery/Memory Card door.
2.
Insert the optional memory card
in the smaller slot as shown.
Make sure the memory card
snaps into place.
3.
Close the Battery/Memory Card
door and turn on the camera.
NOTE:
When you turn on your camera with a
memory card installed, the camera indicates the
number of images you can store on the memory card
at the current
Image Quality
setting. This camera
supports storing a maximum of 1999 images on a
memory card.
Setting up your camera
11
English