HP Photosmart R930 Quick Start Guide - Page 13
Using the Touch Screen interface
 |
View all HP Photosmart R930 manuals
Add to My Manuals
Save this manual to your list of manuals |
Page 13 highlights
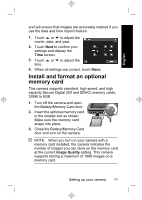
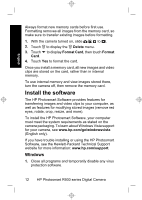
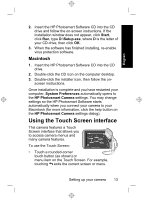
English 2. Insert the HP Photosmart Software CD into the CD drive and follow the on-screen instructions. If the installation window does not appear, click Start, click Run, type D:\Setup.exe, where D is the letter of your CD drive, then click OK. 3. When the software has finished installing, re-enable virus protection software. Macintosh 1. Insert the HP Photosmart Software CD into the CD drive. 2. Double-click the CD icon on the computer desktop. 3. Double-click the installer icon, then follow the on- screen instructions. Once installation is complete and you have restarted your computer, System Preferences automatically opens to the HP Photosmart Camera settings. You may change settings so the HP Photosmart Software starts automatically when you connect your camera to your Macintosh (for more information, click the help button on the HP Photosmart Camera settings dialog). Using the Touch Screen interface This camera features a Touch Screen interface that allows you to access camera menus and many camera features. To use the Touch Screen: • Touch a rounded-corner touch button (as shown) or menu item on the Touch Screen. For example, touching exits the current screen or menu. Setting up your camera 13
-
 1
1 -
2
-
3
-
4
-
5
-
6
-
7
-
 8
8 -
 9
9 -
 10
10 -
 11
11 -
 12
12 -
 13
13 -
 14
14 -
 15
15 -
 16
16 -
 17
17 -
 18
18 -
19
-
20
-
21
-
22
-
23
-
24
-
25
-
26
-
27
-
28
-
29
-
30
-
31
-
32
-
33
-
34
-
35
-
36
-
37
-
38
-
39
-
40
-
41
-
42
-
43
-
44
-
45
-
46
-
47
-
48
-
49
-
50
-
51
-
52
-
53
-
54
-
55
-
56
-
57
-
58
-
59
-
60
-
61
-
62
-
63
-
64
-
65
-
66
-
67
-
68
-
69
-
70
-
71
-
72
-
73
-
74
-
75
-
76
-
77
-
78
-
79
-
80
-
81
-
82
-
83
-
84
-
85
-
86
-
87
-
88
-
89
-
90
-
91
-
92
-
93
-
94
-
95
-
96
-
97
-
98
-
99
-
100
-
101
-
102
-
103
-
104
-
105
-
106
-
107
-
108
-
109
-
110
-
111
-
112
-
113
-
114
-
115
-
116
-
117
-
118
-
119
-
120
-
121
-
122
-
123
-
124
-
125
-
126
-
127
-
128
-
129
-
130
-
131
-
132
-
133
-
134
-
135
-
136
-
137
-
138
-
139
-
140
-
141
-
142
-
143
-
144
 |
 |