HP Photosmart c20/c30 HP PhotoSmart C20 and C30 Digital Camera - Quick Start P - Page 1
HP Photosmart c20/c30 Manual
 |
View all HP Photosmart c20/c30 manuals
Add to My Manuals
Save this manual to your list of manuals |
Page 1 highlights
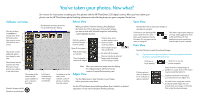
Taking your first picture with the HP PhotoSmart C30 Digital Camera This information will get you started with your new digital camera. If you need more detailed instructions, see the Basics guide. 1 Get ready • Load the batteries. • Set the date and time on your camera: 1. Make sure the lens cover is closed (the camera is off). 2. Press the photo LCD on/off button to turn the photo LCD on. The Set Date & Time menu option appears on the photo LCD. 3. Use the arrow buttons to select the day (date) of the month, then press OK. Select the month, year, hour, minutes, and AM or PM. 4. Use the arrow buttons to select Yes to confirm the date and time, then press OK. arrow buttons photo LCD on/off button photo LCD 2 Take some photos 1. Open the lens cover to turn the camera on. The lens cover is the on/off switch for the camera. 2. Look through the viewfinder and frame your subject. 3. Press the shutter release button 1/2 way. When you see the green light in the viewfinder, press the button all the way down. The camera will beep to let you know the picture has been taken. shutter release button 3 Review your photos Use the photo LCD to review your photos before you download them to your PC. 1. Close the lens cover to turn the camera off. 2. Press the photo LCD on/off button to turn the photo LCD on. Use the arrow buttons to sequence through your photos. Note: You can also use your television to review photos. See the Basics guide for details. 3. When you’re done reviewing your photos, remember to turn the photo LCD off. 4 Install the photo finishing software 1. Place the HP PhotoSmart Photo Finishing Software CD into your computer’s CD-ROM drive. 2. Follow the instructions on the screen to complete the software installation. 5 Connect the camera to the computer 1. Close the lens cover to turn the camera off. 2. Plug the large end of the PC connection cable into the PC serial port. 3. Plug the small end of the cable into the camera. 4. Open the lens cover to turn the camera on. When you connect the camera to the computer, the HP PhotoSmart photo finishing software starts and begins displaying your photos in the Select view. Note that the photos are not yet saved on your computer’s hard drive—you save them in the Save view. Now you’re ready to download your photos into your computer. See reverse for more information.
-
 1
1 -
 2
2
 |
 |
