HP Photosmart c20/c30 HP PhotoSmart C20 and C30 Digital Camera - Quick Start P - Page 2
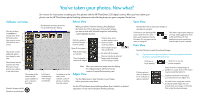
You²ve taken your photos. Now what? - digital camera
 |
View all HP Photosmart c20/c30 manuals
Add to My Manuals
Save this manual to your list of manuals |
Page 2 highlights
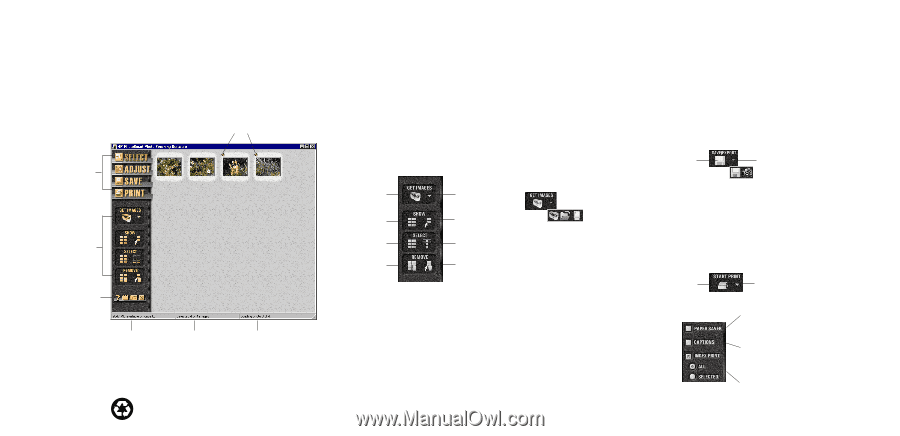
You’ve taken your photos. Now what? See reverse for instructions on taking your first photos with the HP PhotoSmart C30 digital camera. After you have taken your photos, use the HP PhotoSmart photo finishing software to work with the photos on your computer. Here’s how... Software overview Select View Save View Click any of these four buttons to change views. (If all the buttons don’t show on your screen click Select to see a menu.) This section contains additional options that change for each view. These buttons are the same for each view. Move your mouse pointer over a button to see what it does. This number is the amount of disk space available on your computer’s hard drive. Printed in Singapore 8/98 Printed on recycled paper Red diamond means the photo has not yet loaded into the display. When your photos load into memory, they display in the Select view. This is where you choose which images you want to work with. Selected images are indicated by a white highlight (shadow). Click the camera to download images from the camera. Show all the images. Mark all the images as “selected.” Clear the display (remove all images). Click the down arrow to select another source (such as a folder on the hard drive). Show only the images that are selected. De-select all the images. Remove only the de-selected images from the display (selected images remain). Look here to see how many of the images are selected. Look here to see the status of the software, such as if photos are loading from the camera. Note: When you remove an image from the display, the original image is still stored on the camera’s CompactFlash memory card. Adjust View Use the Adjust view to make changes to your images before you print or save them. See the HP PhotoSmart photo finishing software User’s Guide for a detailed explanation of each view in the photo finishing software. Use the Save view to save your images, or use them in a project. Click here to save the image files to your hard drive. The name below each image becomes the file name. (You can type over this name to change it.) Click here to export your images to an image editing application (such as Microsoft Picture It!). The application you are exporting to must be open on your computer. Print View Use the Print view to print the selected images. Tip: If you just want to print one photo, select only that photo (deselect all others), and turn OFF Index Print. Click here to begin printing. Click here to view the printer properties. Click an option to select or deselect it. An “X” indicates an option is selected. Paper Saver fits as many images as possible on a page. Some of the images may be rotated (turned) to fit. Captions print below each image, if you entered them in the Adjust view. An Index Print is a page that contains thumbnail (small) images. You can include all of your images on the Index Print, or just the selected images.
-
 1
1 -
 2
2
 |
 |