HP Photosmart c200 HP PhotoSmart C200 Digital Camera - User's Guide - Page 9
Using the Self-Timer - photosmart camera
 |
View all HP Photosmart c200 manuals
Add to My Manuals
Save this manual to your list of manuals |
Page 9 highlights
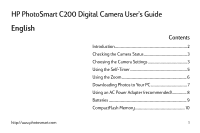
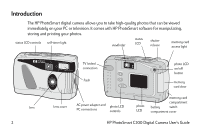
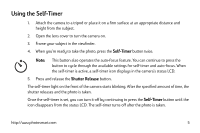
Using the Self-Timer 1. Attach the camera to a tripod or place it on a firm surface at an appropriate distance and height from the subject. 2. Open the lens cover to turn the camera on. 3. Frame your subject in the viewfinder. 4. When you're ready to take the photo, press the Self-Timer button twice. Note: This button also operates the auto-focus feature. You can continue to press the button to cycle through the available settings for self-timer and auto-focus. When the self-timer is active, a self-timer icon displays in the camera's status LCD. 5. Press and release the Shutter Release button. The self-timer light on the front of the camera starts blinking. After the specified amount of time, the shutter releases and the photo is taken. Once the self-timer is set, you can turn it off by continuing to press the Self-Timer button until the icon disappears from the status LCD. The self-timer turns off after the photo is taken. http://www.photosmart.com 5
-
 1
1 -
2
-
3
-
 4
4 -
 5
5 -
 6
6 -
 7
7 -
 8
8 -
 9
9 -
 10
10 -
 11
11 -
 12
12 -
 13
13 -
 14
14 -
15
-
16
-
17
-
18
-
19
-
20
-
21
-
22
-
23
-
24
-
25
-
26
-
27
-
28
-
29
-
30
-
31
-
32
-
33
-
34
-
35
-
36
-
37
-
38
-
39
-
40
-
41
-
42
-
43
-
44
-
45
-
46
-
47
-
48
-
49
-
50
-
51
-
52
-
53
-
54
-
55
-
56
-
57
-
58
-
59
-
60
-
61
-
62
-
63
-
64
-
65
-
66
 |
 |
