HP ProBook 4525s Getting Started - Windows 7 - Page 27
Replacing or upgrading the hard drive, Removing the hard drive - hard drive removal
 |
View all HP ProBook 4525s manuals
Add to My Manuals
Save this manual to your list of manuals |
Page 27 highlights
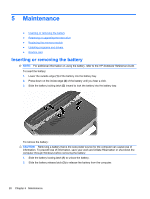
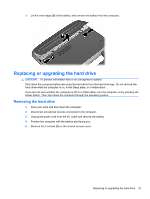
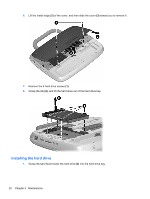
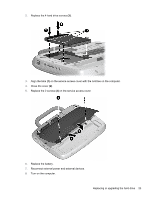
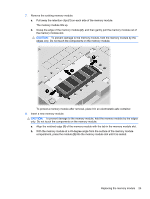
3. Lift the inner edge (3) of the battery, and remove the battery from the computer. Replacing or upgrading the hard drive CAUTION: To prevent information loss or an unresponsive system: Shut down the computer before removing the hard drive from the hard drive bay. Do not remove the hard drive while the computer is on, in the Sleep state, or in Hibernation. If you are not sure whether the computer is off or in Hibernation, turn the computer on by pressing the power button. Then shut down the computer through the operating system. Removing the hard drive 1. Save your work and shut down the computer. 2. Disconnect all external devices connected to the computer. 3. Unplug the power cord from the AC outlet and remove the battery. 4. Position the computer with the battery bay facing you. 5. Remove the 2 screws (1) on the service access cover. Replacing or upgrading the hard drive 21
-
 1
1 -
2
-
3
-
4
-
5
-
6
-
7
-
8
-
9
-
10
-
11
-
12
-
13
-
14
-
15
-
16
-
17
-
18
-
19
-
20
-
21
-
 22
22 -
 23
23 -
 24
24 -
 25
25 -
 26
26 -
 27
27 -
 28
28 -
 29
29 -
 30
30 -
 31
31 -
 32
32 -
33
-
34
-
35
-
36
-
37
-
38
-
39
-
40
-
41
-
42
 |
 |
