HP ProLiant SL250s HP ProLiant SL Servers Solution Overview Setup Poster - (Ja - Page 2
Powering up the chassis - gen8
 |
View all HP ProLiant SL250s manuals
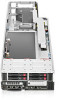
Add to My Manuals
Save this manual to your list of manuals |
Page 2 highlights
• Power emergency break support • Capability to set the chassis power level through PPIC utilities with BMC and iLO For more information about the Power Management Controller, see the HP website (http://h20000.www2.hp.com/bizsupport/TechSupport/ SoftwareDescription.jsp?lang=en&cc=us&prodTypeId=15351&prodSeriesId =4198401&prodNameId=4198402&swEnvOID=4024&swLang=8&mode=2 &taskId=135&swItem=MTX-4af0b8ffa5be4260a5d4d43ce2). SL-APM overview HP ProLiant SL Advanced Power Manager is a single point of contact for HP ProLiant Scalable System administration. To install, configure, and access HP ProLiant SL Advanced Power Manager, see the HP ProLiant SL Advanced Power Manager User Guide (http:// h20000.www2.hp.com/bc/docs/support/SupportManual/c02018322/ c02018322.pdf?jumpid=reg_R1002_USEN). 2 Installing the chassis The s6500 chassis can be installed either in a rack or rack-free environment. For rack installations, install the rack rails, and then install the chassis and other components. For more information, see the HP ProLiant s6500 Chassis Setup and Installation Guide, Quick Deploy Rail System Installation Instructions that ship with the rack hardware kit, and applicable installation instructions. 3 Installing options Install any hardware options before initializing the node. For options installation information, see the documentation that ships with the option. For node-specific information, see the node user guide on the HP website (http://www.hp.com). 4 Installing components WARNING: The node is very heavy. To reduce the risk of personal injury or damage to the equipment: • Reduce the weight of the node by removing the hard drives and power supplies before installing the node into the rack. • Get help to lift and stabilize the node during installation. When the node weighs more than 22.5 kg (50 lb), two people might be required to install the node into the rack. CAUTION: Always plan the rack installation so that the heaviest item is on the bottom of the rack. Install the heaviest item first, and continue to populate the rack from the bottom to the top. Before installing front or rear components into the s6500 chassis, review s6500 chassis bay numbering for each component. For slot numbering information, see the quick setup instructions. Based on the total number ordered and the planned configuration, install the following components: • Nodes • Power supplies • System fans For more information, see the appropriate chassis setup and installation guide and the node installation instructions. 5 Powering up the chassis Connect the AC or DC power cables, depending on the power configuration. When the circuit breakers are powered, the chassis and HP ProLiant SL Advanced Power Manager have power. By default, each installed component also powers up. Examine the HP ProLiant SL Advanced Power Manager for any errors which may prevent installed components from powering up. 6 Configuring the chassis For further information on setting up and configuring your system, see the HP ProLiant s6500 Chassis Quick Setup Instructions and the HP ProLiant s6500 Chassis Setup and Installation Guide. 7 Powering on and selecting boot options 1. Connect the Ethernet cable and press the Power On/Standby button. 2. During the initial boot: o To modify the server configuration ROM default settings, press F9 when prompted from the start up sequence to enter the RBSU. By default, RBSU runs in the English language. o If you do not need to modify the server configuration and are ready to install the system software, press F10 to access Intelligent Provisioning. NOTE: If an HP Smart Array controller has been added or is embedded in the system, the controller defaults to a RAID configuration based on the size and number of hard drives installed. For more information on modifying the controller default settings, see the documentation on the Documentation CD. For more information on automatic configuration, see the HP ROM-Based Setup Utility User Guide on the Documentation CD or the iLO Management Engine Information Library (http://www.hp.com/go/ilomgmtengine/docs). 8 Installing the system software To install an operating system on a single server using Intelligent Provisioning: 1. If needed, access Intelligent Provisioning by rebooting the server and pressing F10. 2. In the application, complete step 1, Set Intelligent Provisioning preferences. 3. From the Home screen, click Perform Maintenance, and then click Firmware Update. 4. Ensure the latest drivers are available for installation. Select Intelligent Provisioning Software from the list of firmware and click Update. If the check box is not selected, the latest drivers are already installed. 5. From the Home screen, click Configure and Install. 6. Follow the on-screen prompts to finish the installation. To update your drivers and system software: Intelligent Provisioning automatically integrates optimized ProLiant server support software from the HP SPP. SPP is the installation package for operating system-specific bundles of ProLiant optimized drivers, utilities, management agents, and system firmware. For more information on using SPP, see the HP Service Pack for ProLiant User Guide on the Documentation CD or the SPP Information Library (http://www.hp.com/go/spp/documentation). The Smart Update Firmware DVD ISO image is also available at the download tab on the HP website (http://www.hp.com/go/foundation). 9 Registering the server To register the server, refer to the HP Registration website (http://register.hp.com). Troubleshooting resources The HP ProLiant Gen8 Troubleshooting Guide, Volume I: Troubleshooting provides procedures for resolving common problems and comprehensive courses of action for fault isolation and identification, issue resolution, and software maintenance on ProLiant servers and server blades. The HP ProLiant Gen8 Troubleshooting Guide, Volume II: Error Messages provides a list of error messages and information to assist with interpreting and resolving error messages on ProLiant servers and server blades. The documents are on the Documentation CD and on the HP website (http://www.hp.com/go/proliantgen8/docs). For definitions of the acronyms used in this document, refer to "Acronyms and abbreviations" on the Documentation CD.
-
 1
1 -
 2
2
 |
 |