HP ProLiant XL220a HP ProLiant XL220a Gen8 v2 Server User Guide - Page 15
Remove the drive cage assembly
 |
View all HP ProLiant XL220a manuals
Add to My Manuals
Save this manual to your list of manuals |
Page 15 highlights
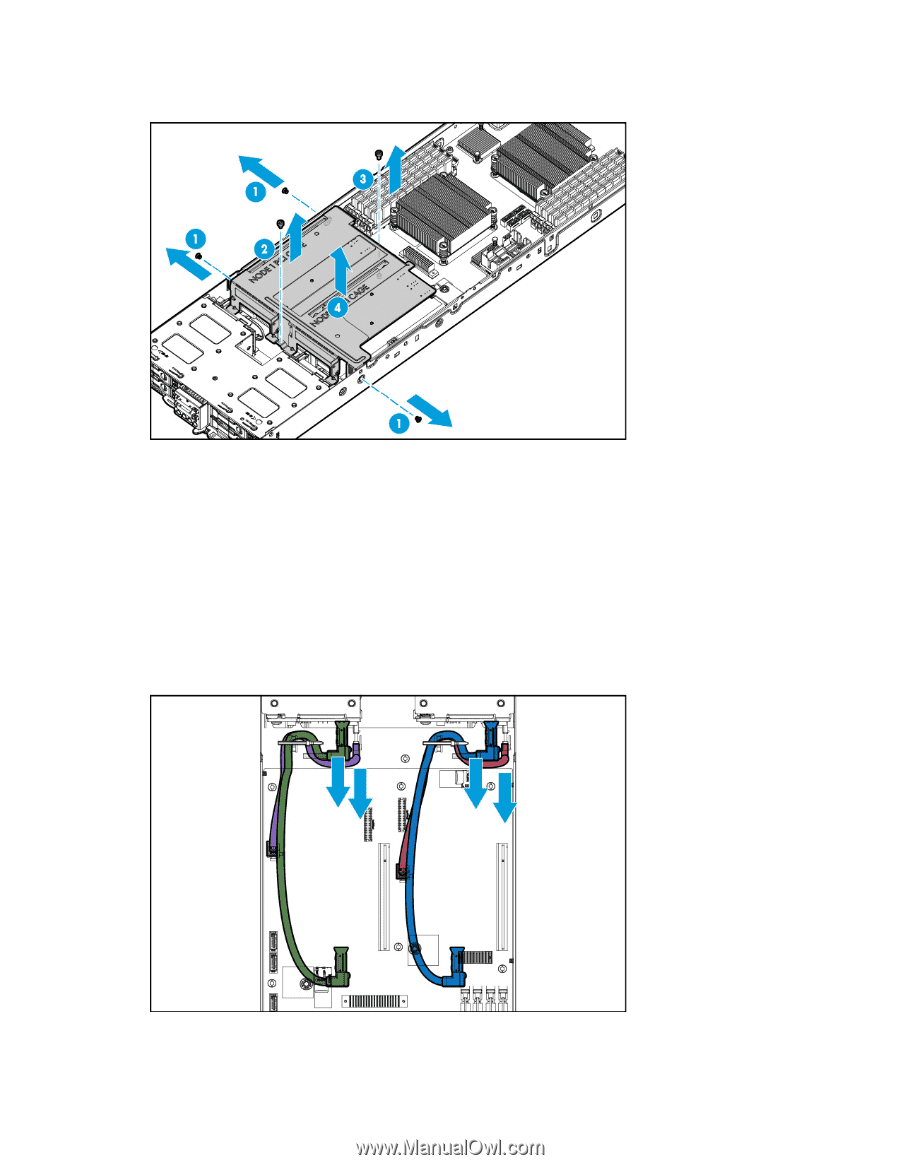
6. Remove the PCI riser board assembly. A T-10 screwdriver (for horizontal screws) and a T-15 screwdriver (for vertical screws) are required for this procedure. Remove the drive cage assembly 1. Back up all server data on the drive. 2. Power down the server (on page 12). 3. Disconnect all peripheral cables from the server. 4. Remove the server (on page 13). 5. Place the server on a flat, level work surface. 6. Remove the PCI riser board assembly (on page 14). 7. Disconnect all cables from the drive cage backplane. Operations 15
-
 1
1 -
2
-
3
-
4
-
5
-
6
-
7
-
8
-
9
-
 10
10 -
 11
11 -
 12
12 -
 13
13 -
 14
14 -
 15
15 -
 16
16 -
 17
17 -
 18
18 -
 19
19 -
 20
20 -
21
-
22
-
23
-
24
-
25
-
26
-
27
-
28
-
29
-
30
-
31
-
32
-
33
-
34
-
35
-
36
-
37
-
38
-
39
-
40
-
41
-
42
-
43
-
44
-
45
-
46
-
47
-
48
-
49
-
50
-
51
-
52
-
53
-
54
-
55
-
56
-
57
-
58
-
59
-
60
-
61
-
62
-
63
-
64
-
65
-
66
-
67
-
68
-
69
-
70
-
71
-
72
-
73
-
74
 |
 |
Operations 15
6.
Remove the PCI riser board assembly. A T-10 screwdriver (for horizontal screws) and a T-15
screwdriver (for vertical screws) are required for this procedure.
Remove the drive cage assembly
1.
Back up all server data on the drive.
2.
Power down the server (on page
12
).
3.
Disconnect all peripheral cables from the server.
4.
Remove the server (on page
13
).
5.
Place the server on a flat, level work surface.
6.
Remove the PCI riser board assembly (on page
14
).
7.
Disconnect all cables from the drive cage backplane.