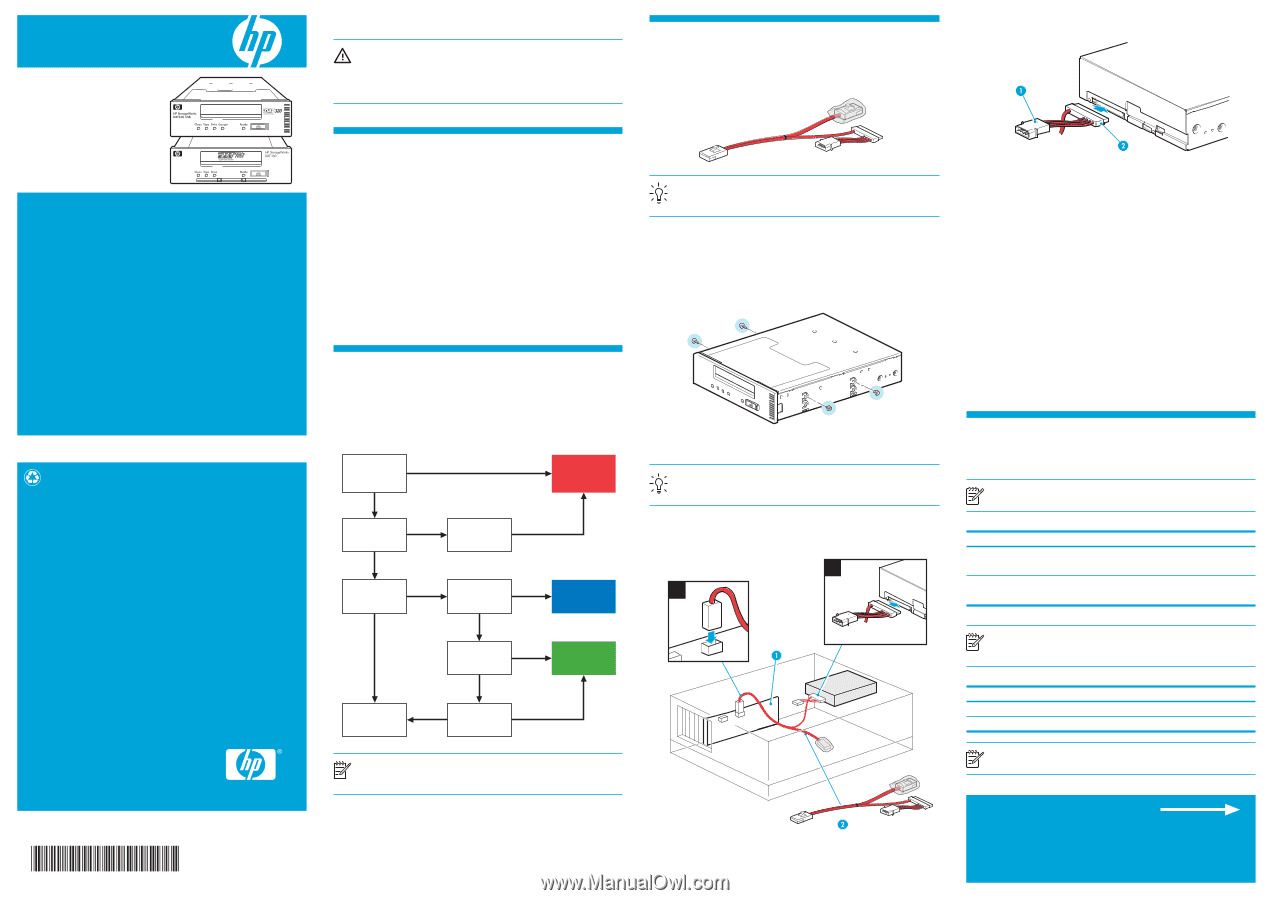
HP Q1581A HP StorageWorks DAT 320 and 160 SAS Internal tape drive Start Here ( - Page 1
HP Q1581A - StorageWorks DAT 160 USB External Tape Drive Manual
 |
UPC - 882780612716
View all HP Q1581A manuals
Add to My Manuals
Save this manual to your list of manuals |
Page 1 highlights
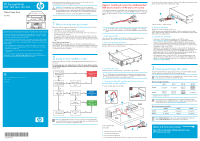
HP StorageWorks DAT 320 and 160 SAS Internal tape drive Start Here For detailed, step-by-step installation instructions, print the "User Guide" from the Documentation link on the HP StorageWorks CD-ROM. WARNING: To avoid personal injury or damage to the server or tape drive, disconnect your server from the mains power supply before installing the tape drive. To avoid damage to server or tape drive observe all recommended anti-static and power-grounding precautions, as specified in your server and tape drive manuals. For detailed safety information, see the Safety Booklet on the CD-ROM. Option 1: Install and connect to a dedicated host HBA (recommended for all HP and non-HP servers) A SAS cable for connection to a dedicated HBA is provided with the DAT tape drive. This is a split cable, but the second branch is not required. Do NOT remove the tie wrap and cover on the spare connector. See http:\\www.hp.com\go\connect for recommended HBAs. 2. Connect the SAS connector at the other end of the SAS cable to the tape drive and the power connector to the server's internal power supply. IMPORTANT INFORMATION ABOUT YOUR NEW TAPE DRIVE The recommended and simplest way of connecting a tape drive to your HP or non-HP SAS server is to purchase and install one of the supported HBAs. A cable is supplied with the tape drive to connect to a dedicated HBA. An alternative option for HP ProLiant servers is to connect to the server's SAS controller. If the host SAS controller has a mini-SAS connector, the supplied cable may be used to connect the tape drive. If it has an Infiniband-style SAS connector, you must purchase a different cable. • HP SAS cables contain four data paths, which normally support up to four hard disks. Both the HP SAS Infiniband and the HP Mini-SAS cables divert one of these data paths to the tape drive. • Use this option with care; it requires a clear understanding of your hard disk configuration. For the most up-to-date information about supported SAS HBAs and cabling configurations, refer to www.hp.com/go/connect and be sure to check the details of the specific tape drive and server combination that you require. © 2009 Hewlett-Packard Development Company, L.P. Printed in the EU www.hp.com DW092-90901 1 Refer to www.hp.com/go/connect Before you install your tape drive, always refer to www.hp.com/go/connect to find out: • Is connection to your SAS server supported? • Which HBAs are recommended for dedicated tape connect? • If you connect to the host SAS controller (not recommended), does it have a mini-SAS or an Infiniband-style SAS connector? • If you connect to the host SAS controller, does it have a spare SAS port to which you can attach the HP SAS cable or must you use the HP SAS cable to replace one of the existing cables? If so, will you lose the use of a hard disk drive bay and which one will it be? Not sure how to use go/connect? Select tape backup and navigate down to the Hardware Compatibility table for your make of server. The server/tape drive matrix shows top-level compatibility, but be sure to click on the box for your combination of server and tape drive to display a further page with detailed connectivity information. TIP: The CD-ROM contains a driver install package for Windows. We recommend that you use the installer package to install the drivers BEFORE you connect the tape drive. 1. Install the new HBA Follow the instructions supplied with the HBA to install the new SAS HBA and any required drivers. See www.hp.com/go/connect for supported HBAs. 2. Attach the mounting hardware If required, appropriate mounting hardware may be supplied with your server or with the tape drive. Refer to your server documentation. 2 Decide on your installation model This poster describes how to install an HP StorageWorks DAT 320 SAS tape drive on a SAS server. You may damage your server configuration, if you follow the wrong cabling instructions. Use the following diagram to determine which instructions on this poster are appropriate for your server. Server has spare separate HBA for dedicated tape support? No Server has spare Yes PCI slot for addition of dedicated HBA? No Host HBA Yes supports tape drive? No Yes Install new HBA and any required drivers OPTION 1: (Recommended) Connect to dedicated HBA Yes Host HBA has Yes spare SAS port? No Need to No disconnect bay? Yes OPTION 2: Connect to spare port OPTION 3: Replace existing SAS cable Cannot install No OK to lose disk Yes SAS tape drive bay? NOTE: The supplied cable connects to a mini-SAS connector on the dedicated HBA or host SAS controller. If you wish to connect the tape drive to an Infiniband-style SAS connector, be sure to purchase the appropriate cable. 3. Install the tape drive Install the tape drive, as described in the "User Guide" on the CD-ROM. TIP: If cable access for the tape drive bay is awkward, it may be easier to access power and other connections if the tape drive is installed in the top bay. You may need to move other devices to lower bays to achieve this. 4. Connect the SAS cable supplied with the tape drive to a separate HBA and the tape drive. 1. Connect the SAS cable to the new HBA. 2 1 C A B FRONT REAR D 1 SAS controller (HBA) A 2 SAS cable B C A = Mini-SAS connector on new HBA B = SAS connector for tape drive C = Power connector for tape drive D = Unused branch of cable (do NOT remove tie wrap or cover on the spare connector) 1 Power connector 2 SAS connector 5. Power up the server Replace server covers and power up the server. Watch the boot screen carefully after installation. Check to see that the new SAS tape drive is listed in the boot sequence. If there are any error or unexpected messages go back and check the SAS cabling carefully. 6 Complete the installation • Install drivers. The HP Tape driver (available on the CD-ROM or from http: www.hp.com/support) is recommended for use with Windows operating systems, but always check whether your software application requires you to use its own driver. For other operating systems patch to the latest version of the operating system and following the instructions in the patch documentation. See also the "UNIX Configuration Guide" on the CD-ROM. • Upgrade your software application to ensure it works correctly with the tape drive. When selecting the media to use with the backup application, you should select 8mm media with DAT 320 and DAT 160 tape drives. We do NOT recommend native backup applications, such as Windows Backup, because they do not support the full features of the tape drive and may cause performance problems. • HP StorageWorks Library & Tape Tools (L&TT) is the recommended diagnostic and support tool for your HP tape drive. Use it to verify installation and confirm that your tape drive is functioning correctly before you use it for backup. It is available free at www.hp.com/support/tapetools. 3 Choosing and looking after media For optimum performance and storage capacity, always use the recommended cartridges with your tape drive, and normally use only one cartridge per day. NOTE: The DAT 320 tape drive is not compatible with 4 mm DAT 72/DDS-4 media. It may only be used with DAT 320 and DAT 160 media. DDS data cartridge compatibility DDS-4 DAT 72 DAT 320 not supported not supported DAT 160 read/write (C5718A) read/write (C8010A) * Capacity assumes 2:1 compression. DAT 160 read/write (C8011A) 160 GB* read/write (C8011A) DAT 320 320 GB* read/write (Q2032A) not supported NOTE: Many tape drive and backup failures are caused by damaged or badly handled tape media. For detailed information on media care and best practice and to order online, refer to www.hp.com/go/storagemedia/dds. DDS cleaning cartridge compatibility Q2039A DAT 320 supported DAT 160 not supported C8015A not supported supported C5709A not supported not supported NOTE: DAT 320 tape drives: only use the cleaning cartridge if the Clean LED is flashing. DAT160 tape drives: HP recommends weekly cleaning. Options 2 & 3 are shown overleaf These offer an alternative cabling solution for some HP ProLiant servers only
-
 1
1 -
 2
2
 |
 |