HP R1500 Updating Firmware via USB to Serial Connection - Page 1
HP R1500 - UPS XR Manual
 |
View all HP R1500 manuals
Add to My Manuals
Save this manual to your list of manuals |
Page 1 highlights
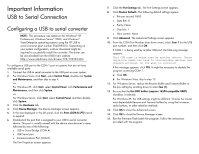
Important Information USB to Serial Connection Configuring a USB to serial converter NOTE: This procedure was tested on the Windows® XP Professional, Windows Server® 2003, and Windows® Vista Enterprise operating systems using the HP USB to serial converter (part number 304098-001). Depending on your system configuration, a driver download might be required to successfully install the converter. The driver can be downloaded from the USB-Drivers website (http://www.usb-drivers.com/drivers/123/123294.htm). To configure a USB port to the COM 1 port on systems that do not have available serial ports: 1. Connect the USB to serial converter to the USB port on your system. 2. For Windows Vista, click Start, select Control Panel, double-click System and Maintenance, and then skip to step 4. -orFor Windows XP, click Start, select Control Panel, click Performance and Maintenance, and then click System. -orFor Windows Server, click Start, select Control Panel, and then doubleclick System. 3. Click the Hardware tab. 4. Click Device Manager. The Device Manager screen appears. 5. In the tree displayed in the left panel, click the Ports (COM & LPT) branch to expand. 6. Double-click the port that is assigned to your USB to serial converter device. This port is usually named with the device manufacturer's name followed by one of the following: o USB to Serial Bridge (COM 4) o USB Serial port o Communications Port (COM1) The Port Properties screen appears. 7. Click the Port Settings tab. The Port Settings screen appears. 8. Click Restore Defaults. The following default settings appear: o Bits per second: 9600 o Data Bits: 8 o Parity: None o Stop bits: 1 o Flow control: None 9. Click Advanced. The Advanced Settings screen appears. 10. From the COM Port Number drop down menu, select Com 1 for the USB port number, and then click OK. If COM 1 is being used by another USB port, the following message appears: This COM name is being used by another device. Using duplicate names can lead to inaccessible devices and changed settings. Do you want to continue? If this message appears, click YES. It might be necessary to disable the program accessing COM 1. a. Click OK. b. For Windows Vista, skip to step 13. 11. For Windows Server, reduce the Receive Buffer and Transmit Buffer to the low setting by scrolling down to select low (1). 12. Be sure that the Use FIFO buffers (requires 16550 compatible UART) checkbox is selected. For Windows XP, the USB settings might be different. Choose the lowest, most dependable Receive and Transmit buffers by using the list menus, radio buttons, or other selection methods. 13. Click OK to close the Advanced screen. 14. Click OK to close the Device Manager screen. 15. Run the firmware Flash batch file program. Follow the instructions provided with the program.
-
 1
1 -
 2
2
 |
 |