List of Figures
1-1
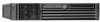
HP Integrity rx2620 Server (front view)
........................................................................................
19
1-2
HP Integrity rx2620 Server (front view with bezel removed)
.......................................................
19
1-3
HP Integrity rx2620 Server (rear view)
.........................................................................................
19
1-4
System Block Diagram
..................................................................................................................
22
1-5
Memory Block Diagram
................................................................................................................
24
2-1
Front View
.....................................................................................................................................
29
2-2
Control Panel
.................................................................................................................................
29
2-3
Hot-Plug Disk Drive LED Indicators
............................................................................................
30
2-4
Power Supply LEDs
.......................................................................................................................
31
2-5
DVD LEDs
.....................................................................................................................................
31
2-6
Rear View
......................................................................................................................................
32
2-7
10/100/1000 base-T Ethernet Gb LAN A Connector LEDs
............................................................
33
2-8
10/100/1000 base-T Ethernet Gb LAN B Connector LEDs
.............................................................
34
2-9
MP LAN LEDs
...............................................................................................................................
34
4-1
Internal Physical Layout
................................................................................................................
40
4-2
System Board Connectors and Slots
..............................................................................................
41
4-3
Release the Rack Latches
...............................................................................................................
43
4-4
Removing and Replacing the Top Metal Cover
............................................................................
44
4-5
Aligning the Top Metal Cover
.......................................................................................................
44
4-6
Closing the Top Metal Cover
.........................................................................................................
45
4-7
Front Bezel Retaining Clip
............................................................................................................
45
4-8
Replacing the Front Bezel
..............................................................................................................
46
4-9
Removing Fan 1A or Fan 1B
.........................................................................................................
47
4-10
Removing Fan 2
.............................................................................................................................
47
4-11
Removing Fan 3
............................................................................................................................
47
4-12
Releasing the Power Supply Retaining Clip
.................................................................................
49
4-13
Removing the Power Supply
.........................................................................................................
49
4-14
Replacing the Power Supply
.........................................................................................................
50
4-15
Unlocking and Releasing the Disk Drive
......................................................................................
51
4-16
Releasing the Disk Drive
...............................................................................................................
52
4-17
Removing the Disk Drive
..............................................................................................................
52
4-18
Airflow Guides Locations
.............................................................................................................
53
4-19
Removing the Memory Airflow Guide
.........................................................................................
54
4-20
Removing the Processor Airflow Guide
.......................................................................................
55
4-21
Opening the Release Clip
..............................................................................................................
55
4-22
Removing the Front Airflow Guide
.............................................................................................
56
4-23
DIMM Slot Identification
..............................................................................................................
58
4-24
Inserting DIMM into Slot
..............................................................................................................
60
4-25
Processor Locations on Server
.......................................................................................................
62
4-26
Processor Location on System Board
............................................................................................
62
4-27
Removing the Processor Airflow Guide
.......................................................................................
63
4-28
Unscrewing the Captive Screws
....................................................................................................
64
4-29
Slide Sequencing Retainer Plate
....................................................................................................
64
4-30
Unlocking the Processor Module Locking Mechanism
................................................................
65
4-31
Unlocked ZIF Socket Lock
.............................................................................................................
66
4-32
Processor Alignment Pins
.............................................................................................................
66
4-33
CPU Slot Alignment Holes
............................................................................................................
67
4-34
Installing the Processor Module
....................................................................................................
67
4-35
Locking the Processor Module in Place
........................................................................................
68
4-36
Sliding the Sequencing Retainer Plate
...........................................................................................
68
4-37
Securing the Captive Screws
.........................................................................................................
69
4-38
Removing the System Battery
.......................................................................................................
70
9
 1
1 4
4 5
5 6
6 7
7 8
8 9
9 10
10 11
11 12
12 13
13 14
14

