HP SB40c HP StorageWorks SB40c Storage Blade Maintenance and Service Guide (43 - Page 27
Replacing the chassis, Chassis
 |
View all HP SB40c manuals
Add to My Manuals
Save this manual to your list of manuals |
Page 27 highlights
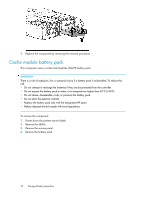
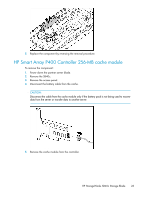
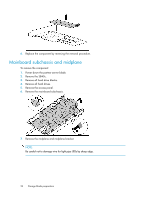
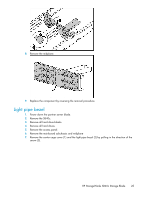
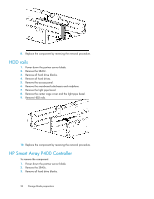
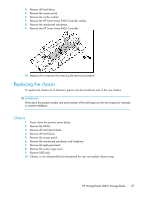
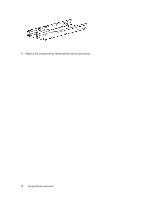
4. Remove all hard drives. 5. Remove the access panel. 6. Remove the cache module. 7. Remove the HP Smart Array P400 Controller cables. 8. Remove the mainboard subchassis. 9. Remove the HP Smart Array P400 Controller. 10. Replace the component by reversing the removal procedure. Replacing the chassis To replace the chassis all of electronic pieces must be transferred over to the new chassis. IMPORTANT: Write down the product number and serial number of the old chassis on the new chassis for warranty or contract validation. Chassis 1. Power down the partner server blade. 2. Remove the SB40c. 3. Remove all hard drive blanks. 4. Remove all hard drives. 5. Remove the access panel. 6. Remove the mainboard subchassis and midplane. 7. Remove the light pipe bezel. 8. Remove the center cage cover. 9. Remove HDD rails. 10. Chassis is now disassembled and prepared for user serviceable chassis swap. HP StorageWorks SB40c Storage Blade 27
-
 1
1 -
2
-
3
-
4
-
5
-
6
-
7
-
8
-
9
-
10
-
11
-
12
-
13
-
14
-
15
-
16
-
17
-
18
-
19
-
20
-
21
-
 22
22 -
 23
23 -
 24
24 -
 25
25 -
 26
26 -
 27
27 -
 28
28 -
 29
29 -
 30
30 -
 31
31 -
 32
32 -
33
-
34
-
35
-
36
 |
 |
