HP StorageWorks 7110 Upgrading a VA 7100/7400to a VA 7410/7110 - Upgrade Instr - Page 9
Configuring the Upgraded VA 7410/7110 Array, Step 6. Power-on the array controller enclosure
 |
View all HP StorageWorks 7110 manuals
Add to My Manuals
Save this manual to your list of manuals |
Page 9 highlights
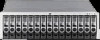
Configuring the Upgraded VA 7410/7110 Array The process of configuring the upgraded VA 7110/7410 is the same process used for installing a new array. Go to the HP StorageWorks Virtual Array Installation Guide and perform step 3 through step 19. Any differences in the steps when performing the upgrade are identified below. Note The step numbers in this section refer to the corresponding step numbers in the HP StorageWorks Virtual Array Installation Guide. Step 6. Power-on the array controller enclosure Because the array does not detect any valid image disks, the array status will be No Maps. Format the array to create the maps using the following command: vfpfmt Note Make sure that the disk enclosures are not connected to the array controller enclosure and operating when performing the format. This will ensure that the image disks selected for the array will be in the controller enclosure. Handling an abterm 70.3.2 If the array detects a valid image disk from the original array, a looping abterm 70.3.2 will occur due to the incompatible disk image. To clear the error, perform the following steps: 1 Power off the array enclosure. 2 Disconnect all disks from the backplane by sliding them out of the enclosure one inch. 3 Power on the array enclosure. The array status should be Not Enough Disks. 4 Install the disks back into the controller enclosure. 5 Format the array to create the image disks: vfpfmt The array status should now be Ready and you can proceed with step 7. Upgrading a VA 7100/7400 to a VA 7410/7110 9
-
 1
1 -
2
-
3
-
 4
4 -
 5
5 -
 6
6 -
 7
7 -
 8
8 -
 9
9 -
 10
10 -
 11
11 -
 12
12
 |
 |
