HP StorageWorks MSA 2/8 HP StorageWorks ISL Trunking V3.1.x/4.1.x User Guide ( - Page 34
Enabling and Disabling Trunking Using Web Tools, Admin, Port Setting, Trunking, Apply
 |
View all HP StorageWorks MSA 2/8 manuals
Add to My Manuals
Save this manual to your list of manuals |
Page 34 highlights
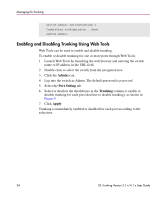
Managing ISL Trunking switch:admin> switchcfgtrunk 1 Committing configuration...done. switch:admin> Enabling and Disabling Trunking Using Web Tools Web Tools can be used to enable and disable trunking. To enable or disable trunking for one or more ports through Web Tools: 1. Launch Web Tools by launching the web browser and entering the switch name or IP address in the URL field. 2. Double-click to select the switch from the navigation tree. 3. Click the Admin icon. 4. Log into the switch as Admin. The default password is password. 5. Select the Port Setting tab. 6. Select or deselect the checkboxes in the Trunking column to enable or disable trunking for each port (deselect to disable trunking), as shown in Figure 6. 7. Click Apply. Trunking is immediately enabled or disabled for each port according to the selections. 34 ISL Trunking Version 3.1.x/4.1.x User Guide
-
 1
1 -
2
-
3
-
4
-
5
-
6
-
7
-
8
-
9
-
10
-
11
-
12
-
13
-
14
-
15
-
16
-
17
-
18
-
19
-
20
-
21
-
22
-
23
-
24
-
25
-
26
-
27
-
28
-
 29
29 -
 30
30 -
 31
31 -
 32
32 -
 33
33 -
 34
34 -
 35
35 -
 36
36 -
 37
37 -
 38
38 -
 39
39 -
40
-
41
-
42
-
43
-
44
-
45
-
46
-
47
-
48
-
49
-
50
-
51
-
52
-
53
-
54
-
55
-
56
-
57
-
58
-
59
-
60
-
61
-
62
-
63
-
64
-
65
-
66
-
67
-
68
-
69
-
70
-
71
-
72
-
73
-
74
-
75
-
76
-
77
-
78
-
79
-
80
-
81
-
82
-
83
-
84
-
85
-
86
-
87
-
88
-
89
-
90
-
91
-
92
 |
 |
