HP StorageWorks MSA20 StorageWorks Modular Smart Array 20 User Guide - Page 19
Installing the Enclosure in a Rack, Preparing the Rack, Removing the Enclosure Components
 |
View all HP StorageWorks MSA20 manuals
Add to My Manuals
Save this manual to your list of manuals |
Page 19 highlights
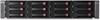
3 Installing the Enclosure in a Rack Installing the enclosure in a rack involves four steps: • Preparing the rack • Removing the enclosure components to make the enclosure more manageable • Mounting the enclosure in the rack • Completing the installation process (reinstalling the components and connecting the power) Preparing the Rack The racks that HP supports for use with the MSA20 enclosure are the HP System E racks and the HP 10000 Series racks. Other racks might also be suitable, but have not been tested with the MSA20. For information about setting up a rack, including appropriate warnings and cautions, refer to the relevant rack user guide. Before mounting the enclosure in a rack, confirm that the rack location meets the environmental requirements for the enclosure as described in Appendix C. Removing the Enclosure Components IMPORTANT: The following abbreviated instructions are appropriate for removing the components from an enclosure that is not being used. To remove individual components from a working enclosure, refer to the complete instructions in Chapter 5. HP StorageWorks Modular Smart Array 20 User Guide 3-1
-
 1
1 -
2
-
3
-
4
-
5
-
6
-
7
-
8
-
9
-
10
-
11
-
12
-
13
-
 14
14 -
 15
15 -
 16
16 -
 17
17 -
 18
18 -
 19
19 -
 20
20 -
 21
21 -
 22
22 -
 23
23 -
 24
24 -
25
-
26
-
27
-
28
-
29
-
30
-
31
-
32
-
33
-
34
-
35
-
36
-
37
-
38
-
39
-
40
-
41
-
42
-
43
-
44
-
45
 |
 |
