HP StorageWorks Modular Smart Array 1000 HP StorageWorks MSA1000 Configuration - Page 3

Installation Overview Master Checklist

Page 3 highlights

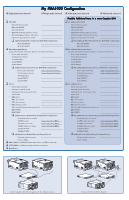
Installation Overview Master Checklist This section introduces the steps of installing an MSA1000 and may be used as a master checklist, but please use the MSA1000 Installation Guide to actually install your MSA1000. Note: The MSA1000 must be installed in the sequence listed here and in the HP StorageWorks MSA1000 Installation Guide. There are specific dependencies; if you deviate from this sequence, you may have to uninstall and reinstall your MSA1000, beginning at step 1. 1 Review your configuration plan Before you install your MSA1000, it is important that you first thoroughly research, study, and establish a configuration and installation plan for your specific environment. HP suggests that you go to the MSA1000 website for configuration specifications and late-breaking information and complete the Configuration Planning Worksheet on the reverse side of this poster. As part of the planning process, now is the time to determine how you need to configure the MSA1000 storage. Installation Guide section: Step 1: Reviewing your Plans 2 Prepare your site Before you install you MSA1000, select a location that meets the environmental standards described in the MSA1000 Installation Guide. Site requirements include adequate sources of power, airflow, and temperature control. 6 Install option kits in your MSA1000 If your plans include adding any of the available option kits for the MSA1000, install them now. It is easier to install these options before you install your MSA1000 in the rack. Some of the MSA1000 option kits include a redundant controller, additional controller cache, redundant Fibre Channel I/O Module, embedded MSA SAN Switch 2/8, and an embedded MSA Hub 2/3. Note: Do not install any hard drives into the MSA1000 until after the MSA1000 installed in the rack. Installation Guide section: Step 6: Installing Option Kits 7 Install the MSA1000 in the rack At this point in the process of installing your MSA1000, you have prepared your SAN for the MSA1000 and are ready to physically install your MSA1000. After you install the MSA1000 and any additional storage enclosures in the rack, you can install the hard drives into the units. Installation Guide section: Step 2: Preparing your Site 3 Prepare your servers Depending on your plans, you will connect your MSA1000 to either a new or an existing server. In both scenarios, it is important that your server is operating properly before adding any MSA1000-specific components to it. If more than one server will be accessing the MSA1000, HP recommends designating one of the servers as a management server. It is on this server that you will load management software (such as the ACU) and from this server that you will perform your SAN management tasks. Installation Guide section: Step 7: Installing your MSA1000 in the Rack 8 Connect the cables With the MSA1000 and any additional storage enclosures installed in the rack, you can now connect the SCSI, Fibre, and power cables. Note: Multi-path configurations have exacting cable requirements. Installation Guide section: Step 3: Preparing your Servers 4 Install the HBA in your servers Because the MSA1000 can be deployed into a variety of operating system environments and configurations (including single-path and multi-path), specific HBA are required for the different deployments. Obtain the correct HBA for your environment and install the HBA into each server that will access the MSA1000. Note: Be sure to follow the procedure as detailed in the HP StorageWorks MSA1000 Installation Guide. Installation Guide section: Step 8: Connecting the Cables 9 Power on your MSA1000 At this point in the installation process, you have prepared your servers and Fibre interconnect devices for the MSA1000 and have connected your MSA1000 to your SAN. With your SAN ready to go and the MSA1000 installed and ready to go, you can now power up your MSA1000. Note: Be sure to follow the procedure as detailed in the HP StorageWorks MSA1000 Installation Guide. Installation Guide section: Step 4: Installing the HBA in your Servers 5 Prepare your switches and hubs In an existing SAN, your switches and hubs are already set up and configured, but if you are deploying your MSA1000 into a new SAN, you need to install and configure your Fibre interconnect devices at this time. Installation Guide section: Step 9: Powering On your MSA1000: 10 Configure your MSA1000 After the servers and interconnect devices are set up and the MSA1000 is physically installed, connected and powered up, you can configure the MSA1000 for your operating system environment. These configuration steps vary for each operating system. Note: Be sure to follow the procedure as detailed in the HP StorageWorks MSA1000 Installation Guide. Installation Guide section: Step 5: Preparing your Switches and Hubs Installation Guide section: Step 10: Configuring your MSA1000

  • 1
  • 2
  • 3
  • 4

This section introduces the steps of installing an MSA1000 and may be used as a master checklist, but
please use the
please use the
please use the
please use the
please use the
MSA1000 Installation Guide
to actually install your MSA1000.
Note:
The MSA1000 must be installed in the sequence listed here and in the
HP StorageWorks MSA1000 Installation Guide
.
There are specific dependencies; if you deviate from this sequence, you may have to uninstall and reinstall your MSA1000,
beginning at step 1.
Installation Overview Master Checklist
Installation Guide section:
Step 5: Preparing your Switches and Hubs
5
Prepare your switches and hubs
5
Prepare your switches and hubs
5
Prepare your switches and hubs
5
Prepare your switches and hubs
5
Prepare your switches and hubs
In an existing SAN, your switches and hubs are already set up and configured,
but if you are deploying your MSA1000 into a new SAN, you need to install and
configure your Fibre interconnect devices at this time.
Installation Guide section:
Step 4: Installing the HBA in your Servers
4
Install the HBA in your servers
4
Install the HBA in your servers
4
Install the HBA in your servers
4
Install the HBA in your servers
4
Install the HBA in your servers
Because the MSA1000 can be deployed into a variety of operating system
environments and configurations (including single-path and multi-path),
specific HBA are required for the different deployments. Obtain the correct HBA
for your environment and install the HBA into each server that will access the
MSA1000.
Note:
Be sure to follow the procedure as detailed in the
HP StorageWorks MSA1000
Installation Guide
.
Installation Guide section:
Step 9: Powering On your MSA1000
:
9
P
9
P
9
P
9
P
9
Power on y
er on y
er on y
er on y
er on your MS
our MS
our MS
our MS
our MSA1000
A1000
A1000
A1000
A1000
At this point in the installation process, you have prepared your servers and
Fibre interconnect devices for the MSA1000 and have connected your
MSA1000 to your SAN. With your SAN ready to go and the MSA1000 installed
and ready to go, you can now power up your MSA1000.
Note:
Be sure to follow the procedure as detailed in the
HP StorageWorks MSA1000
Installation Guide
.
3
Prepare your servers
3
Prepare your servers
3
Prepare your servers
3
Prepare your servers
3
Prepare your servers
Depending on your plans, you will connect your MSA1000 to either a new or an
existing server. In both scenarios, it is important that your server is operating
properly before adding any MSA1000-specific components to it.
If more than one server will be accessing the MSA1000, HP recommends
designating one of the servers as a management server. It is on this server that
you will load management software (such as the ACU) and from this server that
you will perform your SAN management tasks.
Installation Guide section:
Step 3: Preparing your Servers
8
Connect the cables
8
Connect the cables
8
Connect the cables
8
Connect the cables
8
Connect the cables
With the MSA1000 and any additional storage enclosures installed in the rack,
you can now connect the SCSI, Fibre, and power cables.
Note:
Multi-path configurations have exacting cable requirements.
Installation Guide section:
Step 8: Connecting the Cables
7
Install the MSA1000 in the rack
7
Install the MSA1000 in the rack
7
Install the MSA1000 in the rack
7
Install the MSA1000 in the rack
7
Install the MSA1000 in the rack
At this point in the process of installing your MSA1000, you have prepared your
SAN for the MSA1000 and are ready to physically install your MSA1000.
After you install the MSA1000 and any additional storage enclosures in the
rack, you can install the hard drives into the units.
Installation Guide section:
Step 7: Installing your MSA1000 in the Rack
10
Configure your MSA1000
10
Configure your MSA1000
10
Configure your MSA1000
10
Configure your MSA1000
10
Configure your MSA1000
After the servers and interconnect devices are set up and the MSA1000 is
physically installed, connected and powered up, you can configure the
MSA1000 for your operating system environment.
These configuration steps vary for each operating system.
Note:
Be sure to follow the procedure as detailed in the
HP StorageWorks MSA1000
Installation Guide
.
Installation Guide section:
Step 10: Configuring your MSA1000
1
Review your configuration plan
1
Review your configuration plan
1
Review your configuration plan
1
Review your configuration plan
1
Review your configuration plan
Before you install your MSA1000, it is important that you first thoroughly
research, study, and establish a configuration and installation plan for your
specific environment.
HP suggests that you go to the MSA1000 website for configuration
specifications and late-breaking information and complete the Configuration
Planning Worksheet on the reverse side of this poster.
As part of the planning process, now is the time to determine how you need to
configure the MSA1000 storage.
Installation Guide section:
Step 1: Reviewing your Plans
6
Install option kits in your MSA1000
6
Install option kits in your MSA1000
6
Install option kits in your MSA1000
6
Install option kits in your MSA1000
6
Install option kits in your MSA1000
If your plans include adding any of the available option kits for the MSA1000,
install them now. It is easier to install these options
before you install your
MSA1000 in the rack.
Some of the MSA1000 option kits include a redundant controller, additional
controller cache, redundant Fibre Channel I/O Module, embedded MSA SAN
Switch 2/8, and an embedded MSA Hub 2/3.
Note:
Do not install any hard drives into the MSA1000 until after the MSA1000 installed
in the rack.
Installation Guide section:
Step 6: Installing Option Kits
2
Prepare your site
2
Prepare your site
2
Prepare your site
2
Prepare your site
2
Prepare your site
Before you install you MSA1000, select a location that meets the environmental
standards described in the MSA1000 Installation Guide.
Site requirements include adequate sources of power, airflow, and temperature
control.
Installation Guide section:
Step 2: Preparing your Site