HP T5135 HP ThinConnect, build S2ST0070 Administrator's Guide - Page 61
LPD Printer, Add LPD, Printer Name, Printer Description, Spooler Size, Printer Port, Windows Driver
 |
UPC - 882780814387
View all HP T5135 manuals
Add to My Manuals
Save this manual to your list of manuals |
Page 61 highlights
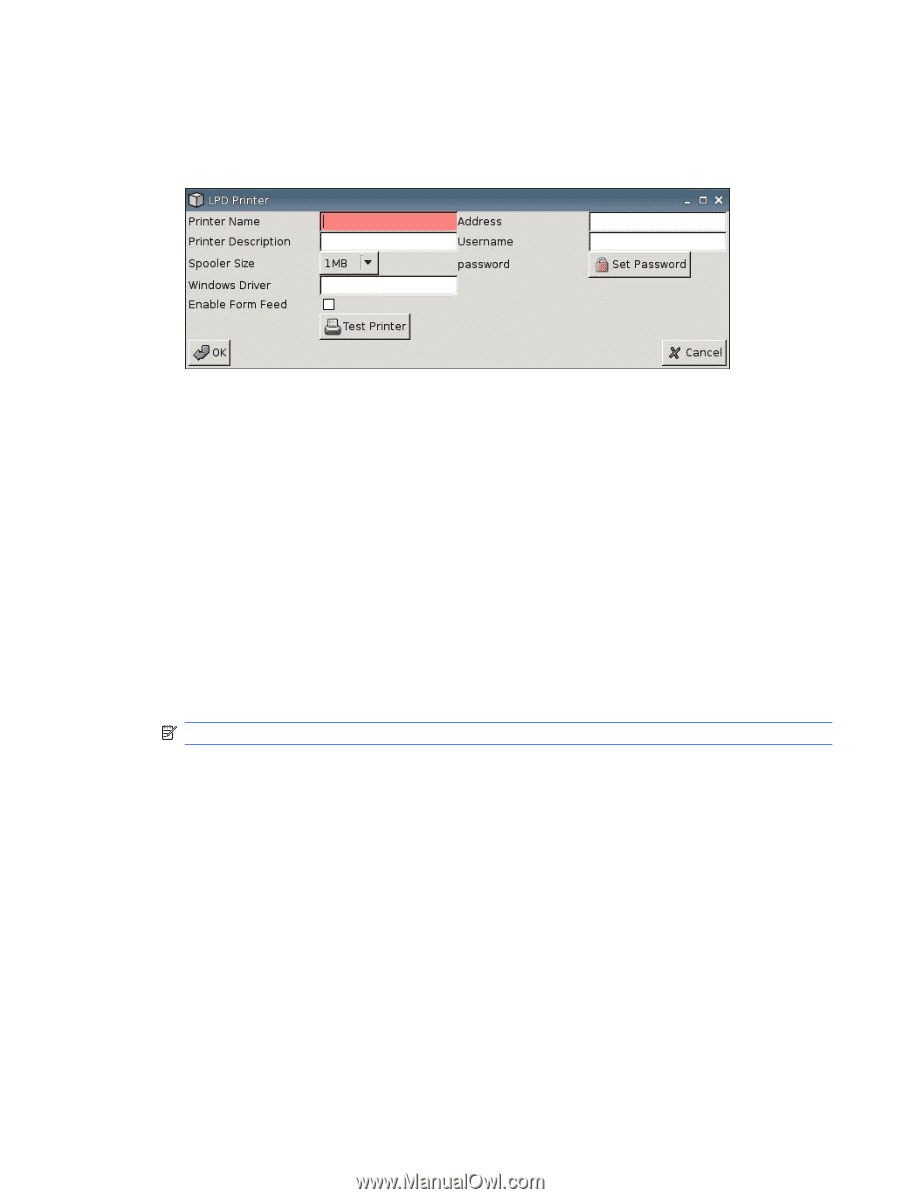
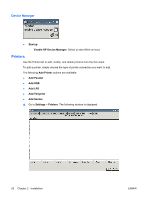
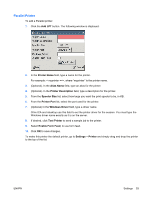
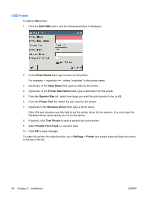
LPD Printer To add a LPD printer: 1. Click the Add LPD button, and the following window is displayed: 2. In the Printer Name field, type a name for the printer. For example: < myprinter ==>, where "myprinter" is the printer name. 3. (Optional). In the Printer Description field, type a description for the printer. 4. From the Spooler Size list, select how large you want the print spooler to be, in KB. 5. From the Printer Port list, select the port used for the printer. 6. (Optional) In the Windows Driver field, type a driver name. Citrix ICA and rdesktop use this field to set the printer driver for the session. You must type the Windows driver name exactly as it is on the server. 7. If desired, click Test Printer to send a sample job to the printer. 8. Select Enable Form Feed, to use form feed. 9. In the Address field, type the print server IP address. NOTE: For an LPD printer, you must populate the Address field. 10. In the Username field, type the user name for the account you want the printer to use to log into the remote computer. 11. Click OK to save changes. To make this printer the default printer, go to Settings > Printer and simply drag and drop the printer to the top of the list. ENWW Settings 55
-
 1
1 -
2
-
3
-
4
-
5
-
6
-
7
-
8
-
9
-
10
-
11
-
12
-
13
-
14
-
15
-
16
-
17
-
18
-
19
-
20
-
21
-
22
-
23
-
24
-
25
-
26
-
27
-
28
-
29
-
30
-
31
-
32
-
33
-
34
-
35
-
36
-
37
-
38
-
39
-
40
-
41
-
42
-
43
-
44
-
45
-
46
-
47
-
48
-
49
-
50
-
51
-
52
-
53
-
54
-
55
-
 56
56 -
 57
57 -
 58
58 -
 59
59 -
 60
60 -
 61
61 -
 62
62 -
 63
63 -
 64
64 -
 65
65 -
 66
66 -
67
-
68
-
69
-
70
-
71
-
72
-
73
-
74
-
75
-
76
-
77
-
78
 |
 |