HP T5545 TeemTalk 7.0 User Manual - Page 128
Function Keys & Buttons, Terminal Test - F5, Memory Lock - F6
 |
UPC - 884420407690
View all HP T5545 manuals
Add to My Manuals
Save this manual to your list of manuals |
Page 128 highlights
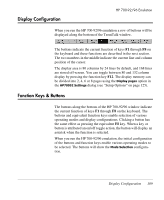
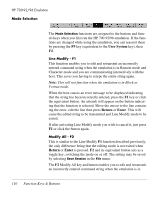
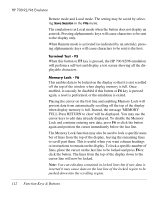
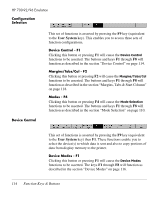
HP 700-92/96 Emulation Remote mode and Local mode. The setting may be saved by selecting Save Session in the File menu. The emulation is in Local mode when the button does not display an asterisk. Pressing alphanumeric keys will cause characters to be sent to the display only. When Remote mode is activated (as indicated by an asterisk), pressing alphanumeric keys will cause characters to be sent to the host. Terminal Test - F5 When this button or F5 key is pressed, the HP 700-92/96 emulation will perform a self-test and display a test screen showing all the displayable characters. Memory Lock - F6 This enables data to be locked on the display so that it is not scrolled off the top of the window when display memory is full. Once enabled, it can only be disabled if this button or F6 key is pressed again, a reset is performed, or the emulation is exited. Placing the cursor on the first line and enabling Memory Lock will prevent data from automatically scrolling off the top of the display when display memory is full. Instead, the message 'MEMORY FULL Press RETURN to clear' will be displayed. You may use the cursor keys to edit data already displayed. To disable the Memory Lock and continue entering new data, press F6 or click the button again and position the cursor immediately below the last line. The Memory Lock function may also be used to lock a specific number of lines from the top of the display, leaving the remaining lines to scroll past them. This is useful when you want column headings or instructions to remain on the display. To lock a specific number of lines, place the cursor on the last line to be locked and press F6 or click the button. The lines from the top of the display down to the cursor line will now be locked. Note: You can edit data contained in locked lines but if new data is inserted it may cause data on the last line of the locked region to be pushed down into the scrolling region. 112 Function Keys & Buttons
-
 1
1 -
2
-
3
-
4
-
5
-
6
-
7
-
8
-
9
-
10
-
11
-
12
-
13
-
14
-
15
-
16
-
17
-
18
-
19
-
20
-
21
-
22
-
23
-
24
-
25
-
26
-
27
-
28
-
29
-
30
-
31
-
32
-
33
-
34
-
35
-
36
-
37
-
38
-
39
-
40
-
41
-
42
-
43
-
44
-
45
-
46
-
47
-
48
-
49
-
50
-
51
-
52
-
53
-
54
-
55
-
56
-
57
-
58
-
59
-
60
-
61
-
62
-
63
-
64
-
65
-
66
-
67
-
68
-
69
-
70
-
71
-
72
-
73
-
74
-
75
-
76
-
77
-
78
-
79
-
80
-
81
-
82
-
83
-
84
-
85
-
86
-
87
-
88
-
89
-
90
-
91
-
92
-
93
-
94
-
95
-
96
-
97
-
98
-
99
-
100
-
101
-
102
-
103
-
104
-
105
-
106
-
107
-
108
-
109
-
110
-
111
-
112
-
113
-
114
-
115
-
116
-
117
-
118
-
119
-
120
-
121
-
122
-
 123
123 -
 124
124 -
 125
125 -
 126
126 -
 127
127 -
 128
128 -
 129
129 -
 130
130 -
 131
131 -
 132
132 -
 133
133 -
134
-
135
-
136
-
137
-
138
-
139
-
140
-
141
-
142
-
143
-
144
-
145
-
146
-
147
-
148
-
149
-
150
-
151
-
152
-
153
-
154
-
155
-
156
-
157
-
158
-
159
-
160
-
161
-
162
-
163
-
164
-
165
-
166
-
167
-
168
-
169
-
170
-
171
-
172
-
173
-
174
-
175
-
176
-
177
-
178
-
179
-
180
-
181
-
182
-
183
-
184
-
185
-
186
-
187
-
188
-
189
-
190
-
191
-
192
-
193
-
194
-
195
-
196
-
197
-
198
-
199
-
200
-
201
-
202
-
203
-
204
-
205
-
206
-
207
-
208
-
209
-
210
-
211
-
212
-
213
-
214
-
215
-
216
-
217
-
218
-
219
-
220
-
221
-
222
-
223
-
224
-
225
-
226
-
227
-
228
-
229
-
230
-
231
-
232
-
233
-
234
-
235
-
236
-
237
-
238
-
239
-
240
-
241
-
242
-
243
-
244
-
245
-
246
-
247
-
248
-
249
-
250
-
251
-
252
-
253
-
254
-
255
-
256
-
257
-
258
-
259
-
260
-
261
-
262
-
263
-
264
-
265
-
266
-
267
-
268
-
269
-
270
-
271
-
272
-
273
-
274
-
275
-
276
-
277
-
278
-
279
-
280
-
281
-
282
-
283
-
284
-
285
-
286
-
287
-
288
-
289
-
290
-
291
-
292
-
293
-
294
-
295
-
296
-
297
-
298
-
299
-
300
-
301
-
302
-
303
-
304
-
305
-
306
-
307
-
308
-
309
-
310
-
311
-
312
-
313
-
314
-
315
-
316
-
317
-
318
-
319
-
320
-
321
-
322
-
323
-
324
-
325
-
326
-
327
-
328
-
329
-
330
-
331
-
332
-
333
-
334
-
335
-
336
-
337
-
338
-
339
-
340
 |
 |
