HP Vectra XA 5/xxx HP Vectra VL 5/XXX Series 5 Pc Minitower User’s Gu - Page 50
Check Internal Items, Rebuild Your PC's, Components
 |
View all HP Vectra XA 5/xxx manuals
Add to My Manuals
Save this manual to your list of manuals |
Page 50 highlights
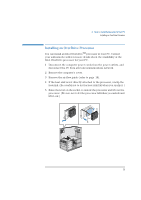
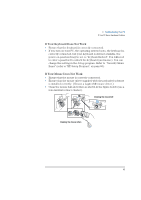
3 Troubleshooting Your PC If Your PC Does Not Start Properly Check Internal Items If the PC still does not start properly, follow this procedure to check the internal items: 1 Turn off the display, the computer, and all external devices. 2 Unplug all power cords and cables, noting their positions. Disconnect the PC from any telecommunications network. 3 Remove the cover. 4 Check the following items: Action Reference Check all internal cables. Check that the processor is correctly installed. Check that the processor speed switches have been set correctly. Check that the memory modules are correctly installed. Check that accessory boards are firmly seated in their slots. Verify that any switches and jumpers on the accessory boards are properly set. Check that the switches on the system board are properly set. Ensure they are correctly attached and firmly in place. Refer to "Installing an OverDrive Processor" on page 35. Refer to "System Board Switches" on page 57. Refer to "Installing Memory" on page 19. Refer to "Installing Accessory Boards" on page 32. Refer to the manuals that came with each board. Refer to "System Board Switches" on page 57. 5 Replace the cover. 6 Reconnect all cables and power cords. 7 Turn on the display and computer. Rebuild Your PC's Components If your PC still does not start properly, remove all boards and accessories, except the hard disk drive. Start the PC. If the PC now works, add the boards and accessories one at a time to determine which one is causing the problem. 40 English
-
 1
1 -
2
-
3
-
4
-
5
-
6
-
7
-
8
-
9
-
10
-
11
-
12
-
13
-
14
-
15
-
16
-
17
-
18
-
19
-
20
-
21
-
22
-
23
-
24
-
25
-
26
-
27
-
28
-
29
-
30
-
31
-
32
-
33
-
34
-
35
-
36
-
37
-
38
-
39
-
40
-
41
-
42
-
43
-
44
-
 45
45 -
 46
46 -
 47
47 -
 48
48 -
 49
49 -
 50
50 -
 51
51 -
 52
52 -
 53
53 -
 54
54 -
 55
55 -
56
-
57
-
58
-
59
-
60
-
61
-
62
-
63
-
64
-
65
-
66
-
67
-
68
-
69
-
70
-
71
-
72
-
73
-
74
-
75
-
76
-
77
-
78
-
79
-
80
-
81
-
82
-
83
-
84
-
85
-
86
-
87
-
88
-
89
-
90
-
91
-
92
-
93
-
94
-
95
-
96
-
97
-
98
-
99
-
100
-
101
-
102
 |
 |
