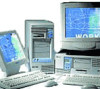
HP Vectra XA 5/xxx HP Vectra XA 5/xxx , User's Guide for Desktop models - Page 8

The HP Setup Program

Page 8 highlights

Removing the Cover 17 Replacing the Cover after Installing Accessories 17 Moving and Replacing the Power Supply 18 Installing Memory 19 Installing Main Memory 19 Upgrading the MGA Millennium Board Memory 21 Installing Mass Storage Devices 23 Connecting IDE Devices 23 Configuring an IDE Device After Installation 24 Installing an IDE Hard Disk Drive in the Rear Shelf 25 Installing an IDE Hard Disk Drive in the Bottom Shelf 26 Installing a CD-ROM Drive in the Middle Shelf 29 Installing a Tape Drive in the Bottom Shelf 31 Installing Accessory Boards 33 Configuring Accessory Boards with Plug and Play 33 Configuring non-Plug and Play ISA Accessory Boards 33 Installing the Accessory Board 34 Installing an OverDrive Processor 36 Installing the Security Bracket 38 3 The HP Setup Program The HP Summary Screen 40 Using the Setup Program 42 viii English

  • 1
  • 2
  • 3
  • 4
  • 5
  • 6
  • 7
  • 8
  • 9
  • 10
  • 11
  • 12
  • 13
  • 14
  • 15
  • 16
  • 17
  • 18
  • 19
  • 20
  • 21
  • 22
  • 23
  • 24
  • 25
  • 26
  • 27
  • 28
  • 29
  • 30
  • 31
  • 32
  • 33
  • 34
  • 35
  • 36
  • 37
  • 38
  • 39
  • 40
  • 41
  • 42
  • 43
  • 44
  • 45
  • 46
  • 47
  • 48
  • 49
  • 50
  • 51
  • 52
  • 53
  • 54
  • 55
  • 56
  • 57
  • 58
  • 59
  • 60
  • 61
  • 62
  • 63
  • 64
  • 65
  • 66
  • 67
  • 68
  • 69
  • 70
  • 71
  • 72
  • 73
  • 74
  • 75
  • 76
  • 77
  • 78
  • 79
  • 80
  • 81
  • 82
  • 83
  • 84
  • 85
  • 86
  • 87
  • 88
  • 89
  • 90
  • 91
  • 92
  • 93
  • 94
  • 95
  • 96
  • 97
  • 98
  • 99
  • 100
  • 101
  • 102
  • 103
  • 104
  • 105
  • 106
  • 107
  • 108
  • 109
  • 110
  • 111
  • 112
  • 113
  • 114
  • 115
  • 116
  • 117
  • 118
  • 119
  • 120
  • 121
  • 122
  • 123
  • 124
  • 125
  • 126
  • 127
  • 128
  • 129
  • 130

viii
English
Removing the Cover . . . . . . . . . . . . . . . . . . . . . . . . . . . . . . . . . . . . . . . . .
17
Replacing the Cover after Installing Accessories . . . . . . . . . . . . . . . . . .
17
Moving and Replacing the Power Supply . . . . . . . . . . . . . . . . . . . . .
18
Installing Memory. . . . . . . . . . . . . . . . . . . . . . . . . . . . . . . . . . . . . . . . .
19
Installing Main Memory. . . . . . . . . . . . . . . . . . . . . . . . . . . . . . . . . . . . . . .
19
Upgrading the MGA Millennium Board Memory . . . . . . . . . . . . . . . . . . .
21
Installing Mass Storage Devices . . . . . . . . . . . . . . . . . . . . . . . . . . . . .
23
Connecting IDE Devices . . . . . . . . . . . . . . . . . . . . . . . . . . . . . . . . . . . . . .
23
Configuring an IDE Device After Installation . . . . . . . . . . . . . . . . . . . . .
24
Installing an IDE Hard Disk Drive in the Rear Shelf . . . . . . . . . . . . . . . .
25
Installing an IDE Hard Disk Drive in the Bottom Shelf. . . . . . . . . . . . . .
26
Installing a CD-ROM Drive in the Middle Shelf . . . . . . . . . . . . . . . . . . . .
29
Installing a Tape Drive in the Bottom Shelf . . . . . . . . . . . . . . . . . . . . . . .
31
Installing Accessory Boards . . . . . . . . . . . . . . . . . . . . . . . . . . . . . . . .
33
Configuring Accessory Boards with Plug and Play . . . . . . . . . . . . . . . . .
33
Configuring non-Plug and Play ISA Accessory Boards . . . . . . . . . . . . . .
33
Installing the Accessory Board . . . . . . . . . . . . . . . . . . . . . . . . . . . . . . . . .
34
Installing an OverDrive Processor . . . . . . . . . . . . . . . . . . . . . . . . . . .
36
Installing the Security Bracket . . . . . . . . . . . . . . . . . . . . . . . . . . . . . .
38
3
The HP Setup Program
The HP Summary Screen. . . . . . . . . . . . . . . . . . . . . . . . . . . . . . . . . . .
40
Using the Setup Program. . . . . . . . . . . . . . . . . . . . . . . . . . . . . . . . . . .
42