HP XM600 hp kayak xm600 series 2, service handbook for minitower models - Page 26
Force BIOS flash, Switch 9 XA models or, XW and XA-s models Down Position
 |
View all HP XM600 manuals
Add to My Manuals
Save this manual to your list of manuals |
Page 26 highlights
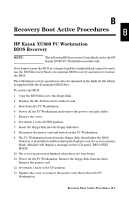
Force BIOS flash, Switch 9 (XA models) or 10 (XW and XA-s models) Down Position WARNING: WARNING: For Kayak XU Series 03xx, XA-s Series B 02xx and XA Series 05xx, a specific 'Mini-Dos' bootable disk has to be used. An image of this 'Mini-Dos' bootable floppy can be obtained from the Alps/Info server (not available from the external web site). If you do not have access to the Alps/Info server, contact your escalation team. If, for example, during a BIOS flash, the procedure is interrupted by a power failure, and the system does not restart, then you can force a BIOS flash. However, it should be noted that during the procedure, there is no image on the screen, nor access to the keyboard or mouse (only "vital" devices that are required to boot on the floppy device are initialized). To force a BIOS flash, do the following steps: 1 Ensure that you have created a DOS-bootable diskette. This floppy diskette contains all the recovery and system BIOS programming software (phlash.exe, platform.bin and hb1xxxyy.Ful). Include the flash command in the autoexec.bat, for example: phlash /mode=3 hb1xxxyy.Ful 2 Turn off the computer. 3 Set Switch 9 (XA models) or, Set Switch 10 (XW, XU and XA-s models) to the DOWN position (=on). 4 Insert the DOS-bootable diskette (refer to the above warning). 5 Power on the computer. 6 During the recovery process, short beeps are emitted. The recovery process is finished when there is a much longer beep (approximately around 1 to 2 minutes). 7 Power off the computer. Press the power ON/OFF button (for about 5 seconds), until the ON/OFF light switches off. Set the switch 10 to the UP position (=off). Recovery Boot Active Procedures B-3
-
 1
1 -
2
-
3
-
4
-
5
-
6
-
7
-
8
-
9
-
10
-
11
-
12
-
13
-
14
-
15
-
16
-
17
-
18
-
19
-
20
-
 21
21 -
 22
22 -
 23
23 -
 24
24 -
 25
25 -
 26
26 -
 27
27
 |
 |