HP Xw8400 Front fan kit installation - Page 4
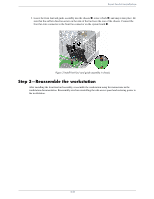
Step 3-Reassemble the workstation, After installing the front fan/card assembly
 |
UPC - 883585271085
View all HP Xw8400 manuals
Add to My Manuals
Save this manual to your list of manuals |
Page 4 highlights
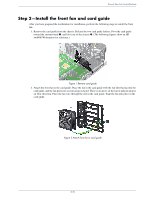
Front fan kit installation 3. Lower the front fan/card guide assembly into the chassis 1, rotate it back 2, and snap it into place. Be sure that the airflow direction arrow on the side of the fan faces the rear of the chassis. Connect the front fan wire connector to the front fan connector on the system board 3. Figure 3 Install front fan/card guide assembly in chassis Step 3-Reassemble the workstation After installing the front fan/card assembly, reassemble the workstation using the instructions in the workstation documentation. Reassembly involves reinstalling the side access panel and restoring power to the workstation. 4/8
-
 1
1 -
 2
2 -
 3
3 -
 4
4 -
 5
5 -
 6
6 -
 7
7 -
 8
8
 |
 |

4
/8
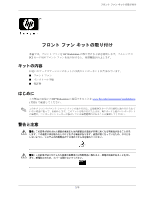
Front fan kit installation
3.
Lower the front fan/card guide assembly into the chassis
1
, rotate it back
2
, and snap it into place. Be
sure that the airflow direction arrow on the side of the fan faces the rear of the chassis. Connect the
front fan wire connector to the front fan connector on the system board
3
.
Figure 3 Install front fan/card guide assembly in chassis
Step 3—Reassemble the workstation
After installing the front fan/card assembly, reassemble the workstation using the instructions in the
workstation documentation. Reassembly involves reinstalling the side access panel and restoring power to
the workstation.