HP Z420 PCI Express graphics or compute card with auxiliary power adapter inst - Page 2
Step 2-Installing the graphics card, Step 3-Connecting the power, Step 4-Reassembling the computer, - drivers
 |
View all HP Z420 manuals
Add to My Manuals
Save this manual to your list of manuals |
Page 2 highlights
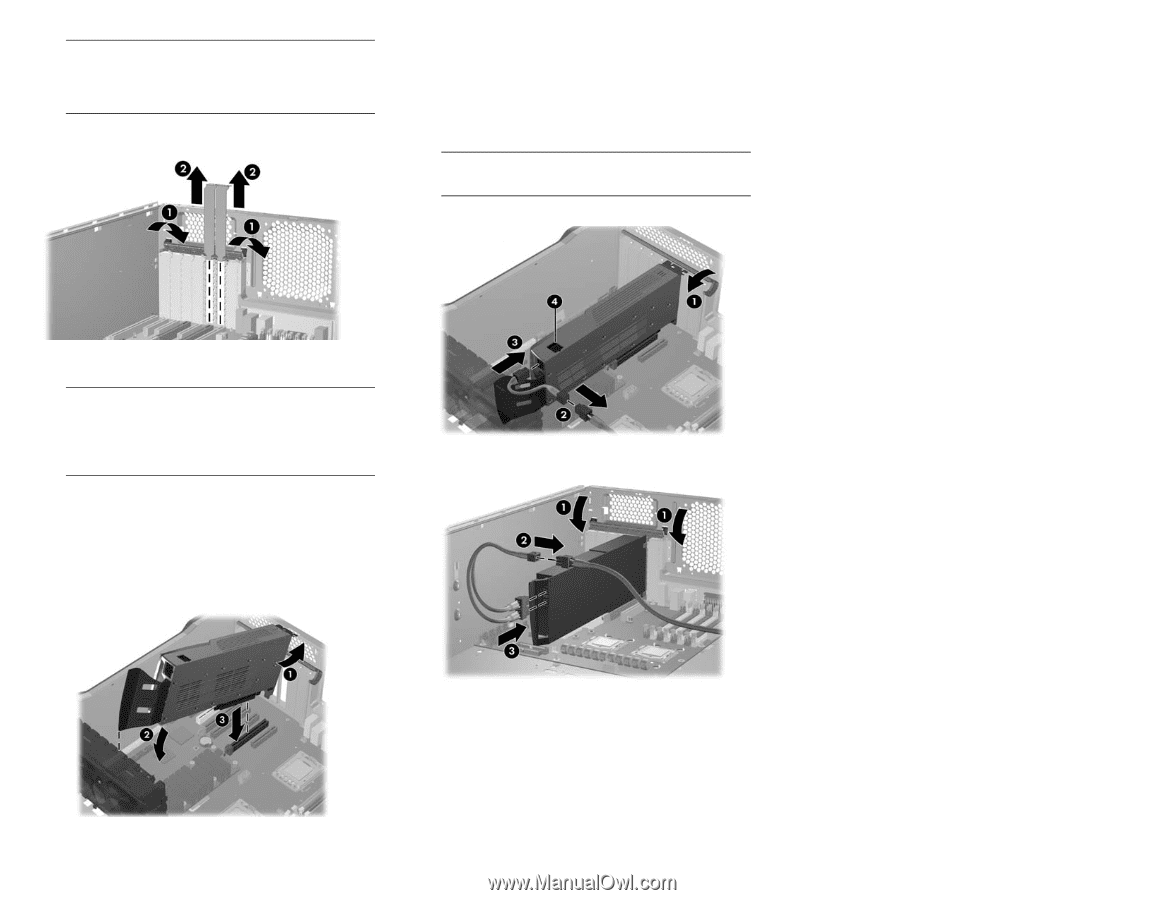
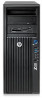
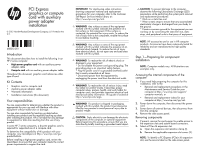
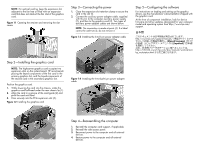
NOTE: For optimal cooling, keep the expansion slot adjacent to the fan free or filled with an expansion card that does not obstruct the fan inlet of the graphics card. Figure 1-1 Opening the retainer and removing the slot covers Step 2-Installing the graphics card NOTE: The high-power graphics card occupies two expansion slots on the system board. HP recommends placing the keyed components of the first card in the primary graphics slot, and the keyed-components of the second card in the secondary graphics slot. Position the graphics card. 1. While lowering the card into the chassis, rotate the graphics card bulkhead under the rear chassis lip (1). 2. Align the card in a groove of the card guide (2) and pivot the card until level. 3. Press securely into the PCIe expansion slot (3). Figure 1-2 Installing the graphics card Step 3-Connecting the power 1. Close the expansion slot retention clamp to secure the card in the slot (1). 2. Connect the auxiliary power adapter cable, supplied with this kit, to the computer auxiliary power supply (2), and then to the graphics card (3). Two types of auxiliary power adapter cables are shown below. NOTE: No connection is made at point (4). If a label covers the outlet at (4), do not remove it. Figure 1-3 Installing the 6-to-8 pin power adapter cable Figure 1-4 Installing the 6-to-dual-6 pin power adapter cable Step 5-Configuring the software For instructions on loading and setting up the graphics drivers, see the manufacturer's documentation shipped with the graphics card. At the time of component installation, look for device firmware and driver updates, designated for your computer model and operating system from http://www.hp.com/ support. ⽇本語 のこ hセttの スp wwュ おドwメ 使ロ.hン いッp.cト のプom su本 をンpp語 選oメr版 択t/ニが しmュa⽤ 、nー[u意Maかaさlsnら/れ(ua[Jて英lalapい語naまgサnueすイsaeg。]トe httおp:、//⽇h5本0向14け6.ワwwーwク5ス.hテp.ーcoシm/ョdンoc⽤/mドaキnuュaメl/wンoトrkはsta、tion/ hp_workstation.html Step 4-Reassembling the computer 1. Reinstall the computer card support, if applicable. 2. Reinstall the side access panel. 3. Reconnect power to the computer and all external devices. 4. Restore power to the computer and all external devices.
-
 1
1 -
 2
2
 |
 |