HP Z600 HP Workstations - HP eSATA PCI cable kit installation - Page 4
Step 2-Installing and connecting the eSATA adapter, Step 3-Reassembling the workstation, Step 4-
 |
UPC - 884962074053
View all HP Z600 manuals
Add to My Manuals
Save this manual to your list of manuals |
Page 4 highlights
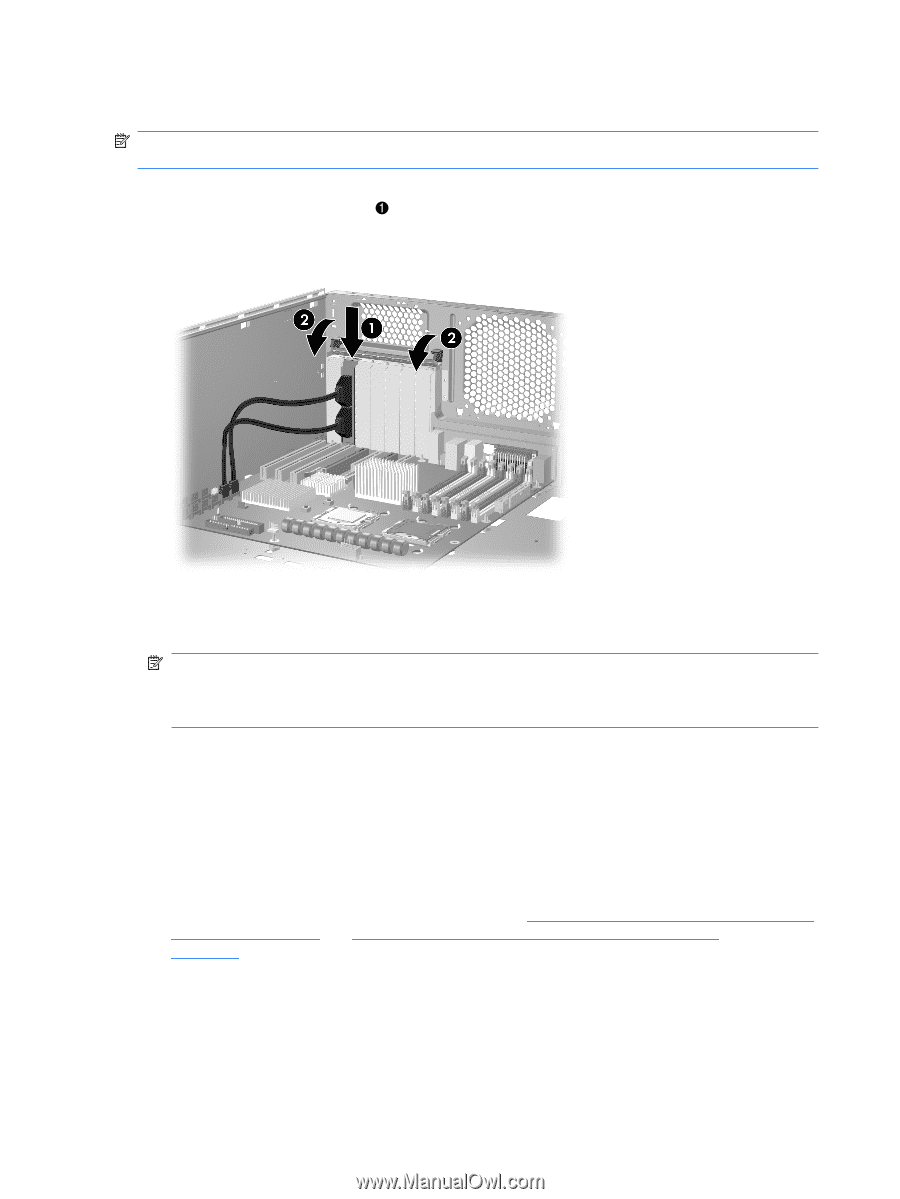
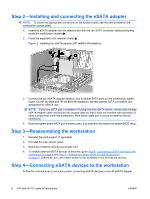
Step 2-Installing and connecting the eSATA adapter NOTE: To locate the appropriate connectors on the system board, see the service label on the workstation access panel. 1. Insert the eSATA adapter into the selected slot with the two SATA connector cables protruding inside the workstation chassis . 2. Close the expansion slot retention clamp 2. Figure 2 Installing the eSATA adapter (HP xw8600 Workstation) 3. Connect the two eSATA adapter cables to two available SATA ports on the workstation system board. On HP xw 6600 and HP xw 8600 Workstations, the red-colored SATA connectors are designated for eSATA use. NOTE: If only one SATA port is available or if using only one eSATA device, connect only a single eSATA adapter cable and secure the unused cable so that it does not interfere with operation of other components within the workstation. Note which cable port is active for external device connection. 4. Note the system board SATA port numbers used. You need this information for system BIOS setup. Step 3-Reassembling the workstation 1. Reinstall the card support, if applicable. 2. Reinstall the side access panel. 3. Reconnect external devices and power cord. 4. To enable external eSATA devices at this time, go to Step 4-Connecting eSATA devices to the workstation on page 4 and Step 5-Setting the system BIOS for eSATA operation on page 5. Otherwise, you can restore power to the workstation and all external devices. Step 4-Connecting eSATA devices to the workstation Follow the manufacturer's instructions when connecting eSATA devices to the HP eSATA adapter. 4 HP eSATA PCI cable kit installation ENWW
-
 1
1 -
 2
2 -
 3
3 -
 4
4 -
 5
5 -
 6
6
 |
 |